(Editor’s note: This is the second in a series on the Media Development Center’s new green screen, which is available for K-State students, faculty, and staff to use on still images and video.)
This segment will address how to edit still images to change the background for the green-screen effects.
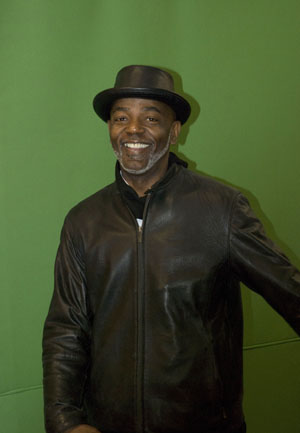
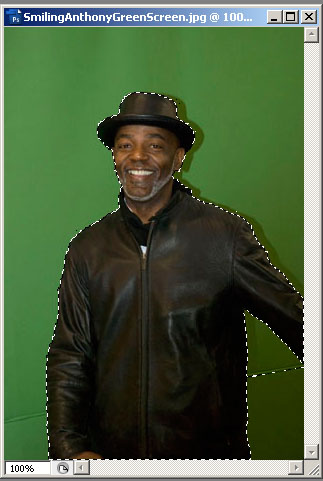
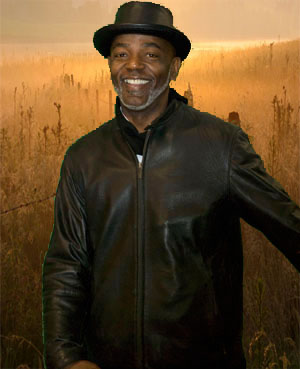
First, open Adobe Photoshop. Open the particular image that you would like to change. (Anthony Cobb is modeling in the image below.)
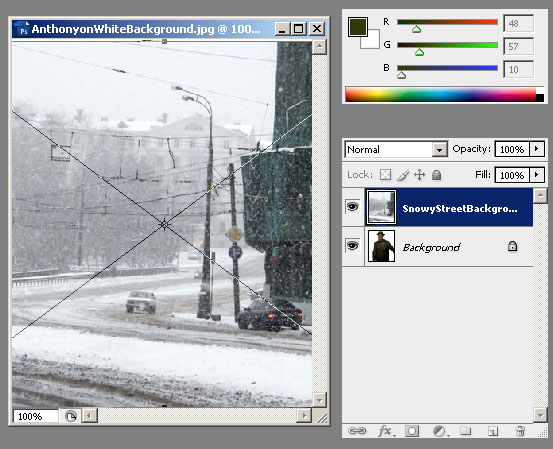
Go to the Menu Bar. Choose Select, then Color Range.

The following window will open.
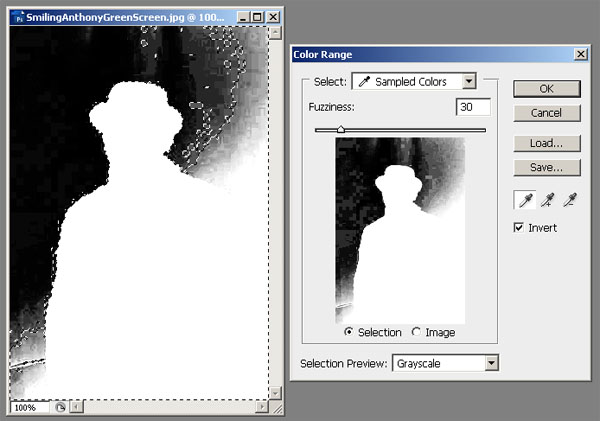
Change the Fuzziness slider to 30. Checkmark the Invert radio button. Make sure the Selection radio button under the image is chosen. Click Grayscale in the Selection Preview drop-down menu. If not all of the green was selected due to variance in the lighting hitting the green, click the middle eye-dropper to add more sampling to the image.
Once that button has been pushed, click your eyedropper on any other regions that should be erased. These will be identified in large swatches.
You will be using this tool to “sample” the selected green or blue screen in the background to let the software know what aspects you want to delete.
In the image above, just under the left arm, there is a region that needs to be cleaned up. To do so, use the lasso tool to highlight the area.
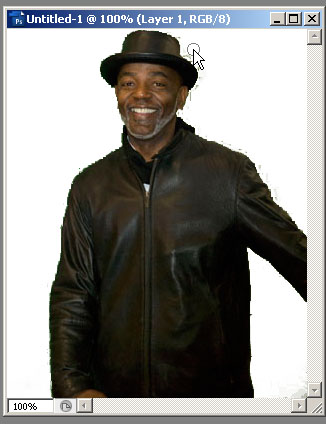
Touch-ups may be done around the edges of the shape by using the eraser tool.
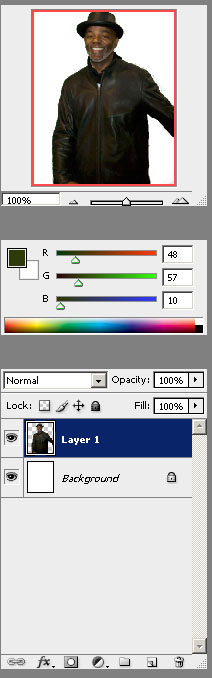
Editing in a normal (unlocked) layer
Check to make sure you are in a normal layer, not the background one. (Double-click the Background layer to make it a normal layer. Background layers are locked.)
To insert the background, go to File, then Place, and select the image for the background.
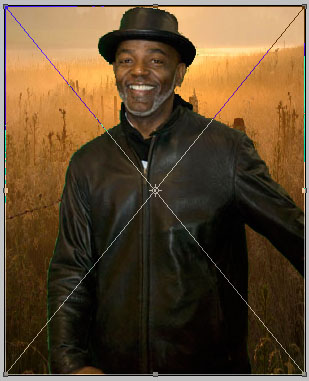
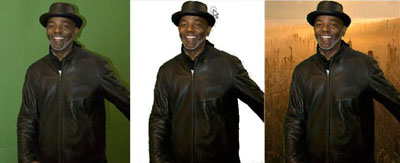
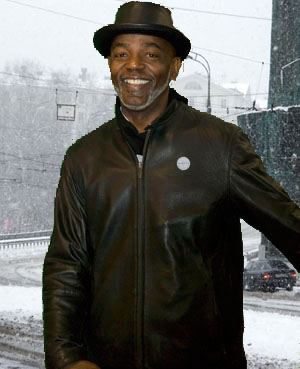
Foreground images will usually be placed at the top-most layer. To move a background behind an individual in the foreground, drag the background below the individual. The finalized image is shown below.
To place Anthony in a snowy scene, open his image. Place the snowy street scene image, and stretch the image to cover the background space.
To maintain the “aspect ratio,” hold down the Shift key while stretching the image from the tabs.
Move the background image into the foreground, and you will have a fused image.
Below are some other fun effects, such as transparency and layering.
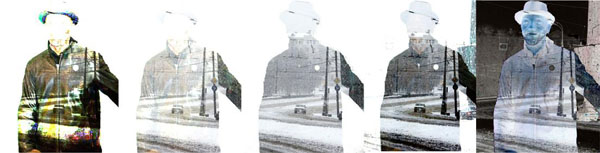
Note that, to the practiced eye, the lighting on the subject in the foreground may not match the background in “photo-realistic” images. However, many will not notice the difference.
Green (blue) screen is used because it is the furthest color from skin tone, apparently. The basic concept is that a certain color that is not highly common in skin tone may be used to similar effect.
Thanks to Anthony Cobb, who modeled the still images for the green screen.
Next time: Editing video for the green screen