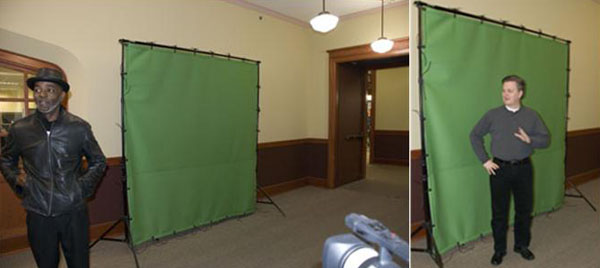
(Editor’s note: This is the third in a series on the Media Development Center’s new green screen, which is available for K-State students, faculty, and staff to use on still images and video.)
The third and last segment provides a brief overview of how to “key” video using a green screen. The “chroma-key” feature is available on virtually all commercial video-editing software programs. This segment will highlight how to use Sony Vegas 8 to create the “green screen” effects.
The following is a short video that was created on the fly to show how to do a green-screen capture.
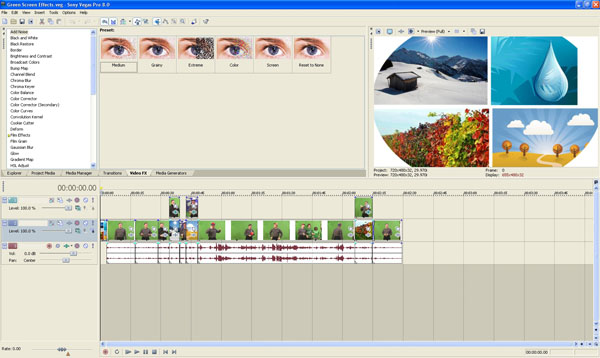
Begin by opening Sony Vegas 8 (on a PC video-editing station). Make sure that all the project media show up in the proper windows.
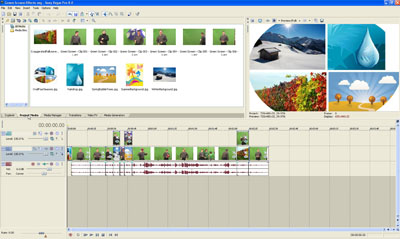
Ensure that the video and audio tracks have been dropped into their proper locations. Add another video track.
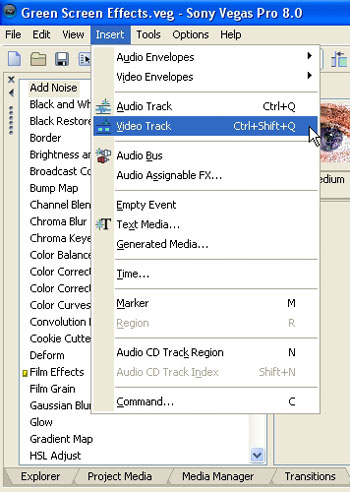
Now, you will be setting up the chroma-key to pull out all the green (or blue) from the selected parts of the video. Click the Video FX tab at the bottom of the window.
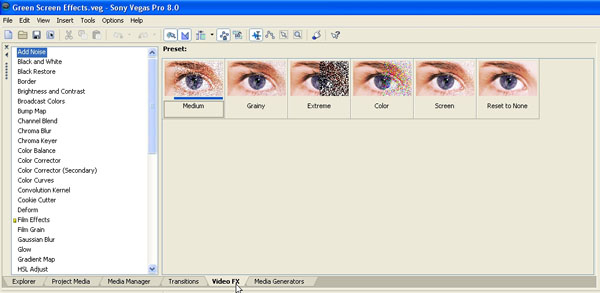
Your workspace should look like the following.
In the Video FX window, select the Chroma Keyer choice.
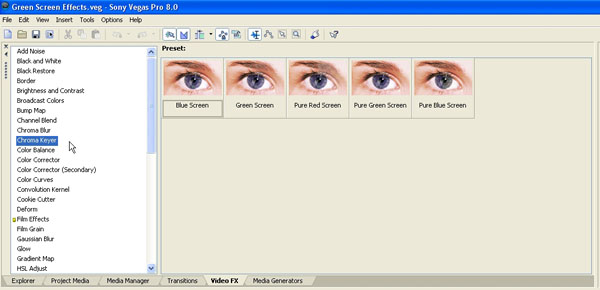
You will be given the choice of selecting a Blue Screen, Green Screen, Pure Red Screen, Pure Green Screen, or Pure Blue Screen setting.
In all likelihood, you will need to make manual adjustments for the correct background changes. Pull the “Green Screen” effect onto the segment of the video that you would like to have the chroma-key extraction applied to.
Chroma-key video event window
The Chroma Keyer video event window will open.
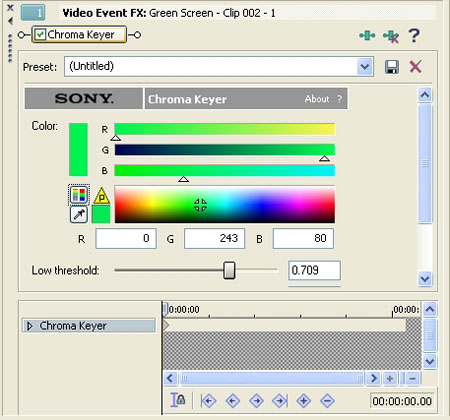
This video will allow you to make changes to the red, green, and blue color fields in order to adjust the background in relation to your selected background image. You may also use the eyedropper tool to select the background color that most closely represents the color of your background.
If you scroll lower in the window, you may adjust the thresholds for the color range that will be keyed out. First, checkmark the “Show mask only” feature, which allows you to view the scene in black-and-white without the distraction of colors. The foreground image will be in white, and the background will show up in black. This setup will help you identify the trouble areas in the image. (You will be able to toggle back and forth between the black-and-white and the full-color views for the best adjustments.) Many suggest beginning with adjusting the high threshold by moving the slider to the left until the subject is solid white. Then, the low-threshold adjustment may be moved to the right until the background is black.
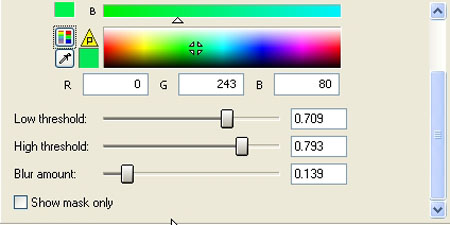
The “Blur amount” may be adjusted by focusing on the edge of the subject’s contour in order to eliminate ragged edges. This chroma-key effect may be saved as an effect and re-used, but it’s likely that customized adjustments will be needed for each of the backgrounds depending on the differences in imagery.
Image previewing
A preview screen (at the far right) shows how the changes are affecting the background and overall visual effects.

Drop the still image or moving video in the main video channel. The secondary channel can be the former chroma-keyed video or image.
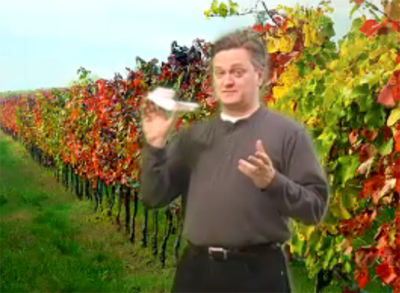
This video “keying” feature has been introduced here in a very broad way only. Explore this link (URL needed to the movie?) to see a short video about how chroma-keying might work to illustrate the four seasons of Kansas. This is just a quick example. This tool should be experimented with to find the best fit for your projects.
Light availability
Special lights may be borrowed from the Media Development Center (213 Hale Library) to enhance the video capture. This filtered (diffuse) light will enable a more even lighting applied to the background for easier chroma-keying later on in the video-editing program.
Thanks to IT staff: Chad Palmer served as the videographer. Fred Darkow acted in the videos, and Anthony Cobb modeled the still images for the green screen. The students who dropped by for an impromptu session were Zach Burns, Denasha McNeely, and Meagan Boyett (from left to right). Brent Anders uploaded the video to the media server.