Kansas State University

search

K-State Turf and Landscape Blog

Category: Environment

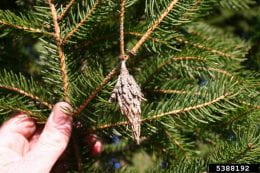
1, 2, 3…..look for bagworms!

By Brooke Garcia

The June 11, 2021 issue of the Extension Entomology Newsletter featured a recent post on Bagworms. The cool weather may have slowed the development of these landscape insect pests, but they are still going to be present this summer in the Kansas landscape on broadleaf and evergreen trees and shrubs.

Learn more in the Entomology Newsletter here: https://entomology.k-state.edu/doc/extension-newsletters/2021/KSInsectNewsletter%2010.pdf

Photo by: William Fountain at the University of Kentucky

How Did Warm-Season Grasses Fare This Winter?

Green up of Latitude 36 bermuda in mid-April in the Wichita area.

After severe cold, warm-season grasses have responded well and are generally experiencing good green up this spring.  I have had no information regarding winter injury on bermudagrass or zoysiagrass.  If you noticed any significant injury this spring, please reach out to me – I’d like to know.  Air temperatures were very cold throughout the state between February 6 and 19th, reaching a low of -18 F in the eastern part of the state and in the Wichita area.  There were differences in snow cover, however, and that can impact the level of insulation provided to the grasses.  The lowest soil temperature at a 2-inch depth at the Olathe Horticulture Center was 29 F on February 15th.  Winter injury becomes a greater concern if turfgrass crowns are elevated above the soil in thatch, or if there is no snow cover at all during extreme cold.  The Wichita area had several inches of snow on the ground when the extreme cold occurred.  I recently visited a new sports complex on which Latitude 36 bermudagrass was sodded late last summer, and no play occurred on the fields last year.  Green up of those fields is looking very good (see picture above).  Likewise, Northbridge and Latitude 36 bermudagrass in the Kansas City area have greened up well this spring.  I have noticed some slow green up on an area of Riviera bermuda (seeded type) at our research center.  Good green up of warm-season grasses may be due the fact that grasses were at the peak of acclimation (defined as the plant being physiologically prepared to tolerate extreme cold) when the cold temperatures arrived.  There is greater risk of injury if grasses are not fully acclimated.  This could occur with a late fall freeze, or when a short period of warmth in winter or early spring leads to some deacclimation (loss of tolerance), and then severe cold temperatures return when a front passes through.


Extension Publication Update

By Brooke Garcia

There is a new publications of interest recently updated through K-State Research and Extension by Dr. Raymond Cloyd:

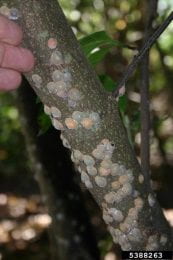
Magnolia scale, Neolecanium cornuparvum, is an insect pest of magnolia trees including star magnolia, Magnolia stellata, and saucer magnolia, Magnolia x soulangiana. Magnolia scale is native to the U.S. and is the largest soft scale in North America. This publication discusses the biology, damage, and management strategies that can be used to avoid plant damage caused by magnolia scale.”

Read more here: Magnolia Scale: Insect Pest of Magnolia Trees. MF3560. Raymond Cloyd.

Photo Credit: William Fountain, University of Kentucky, Bugwood.org

Localized dry spot in sand-based putting greens

(Megan Kennelly, KSU Plant Pathology)

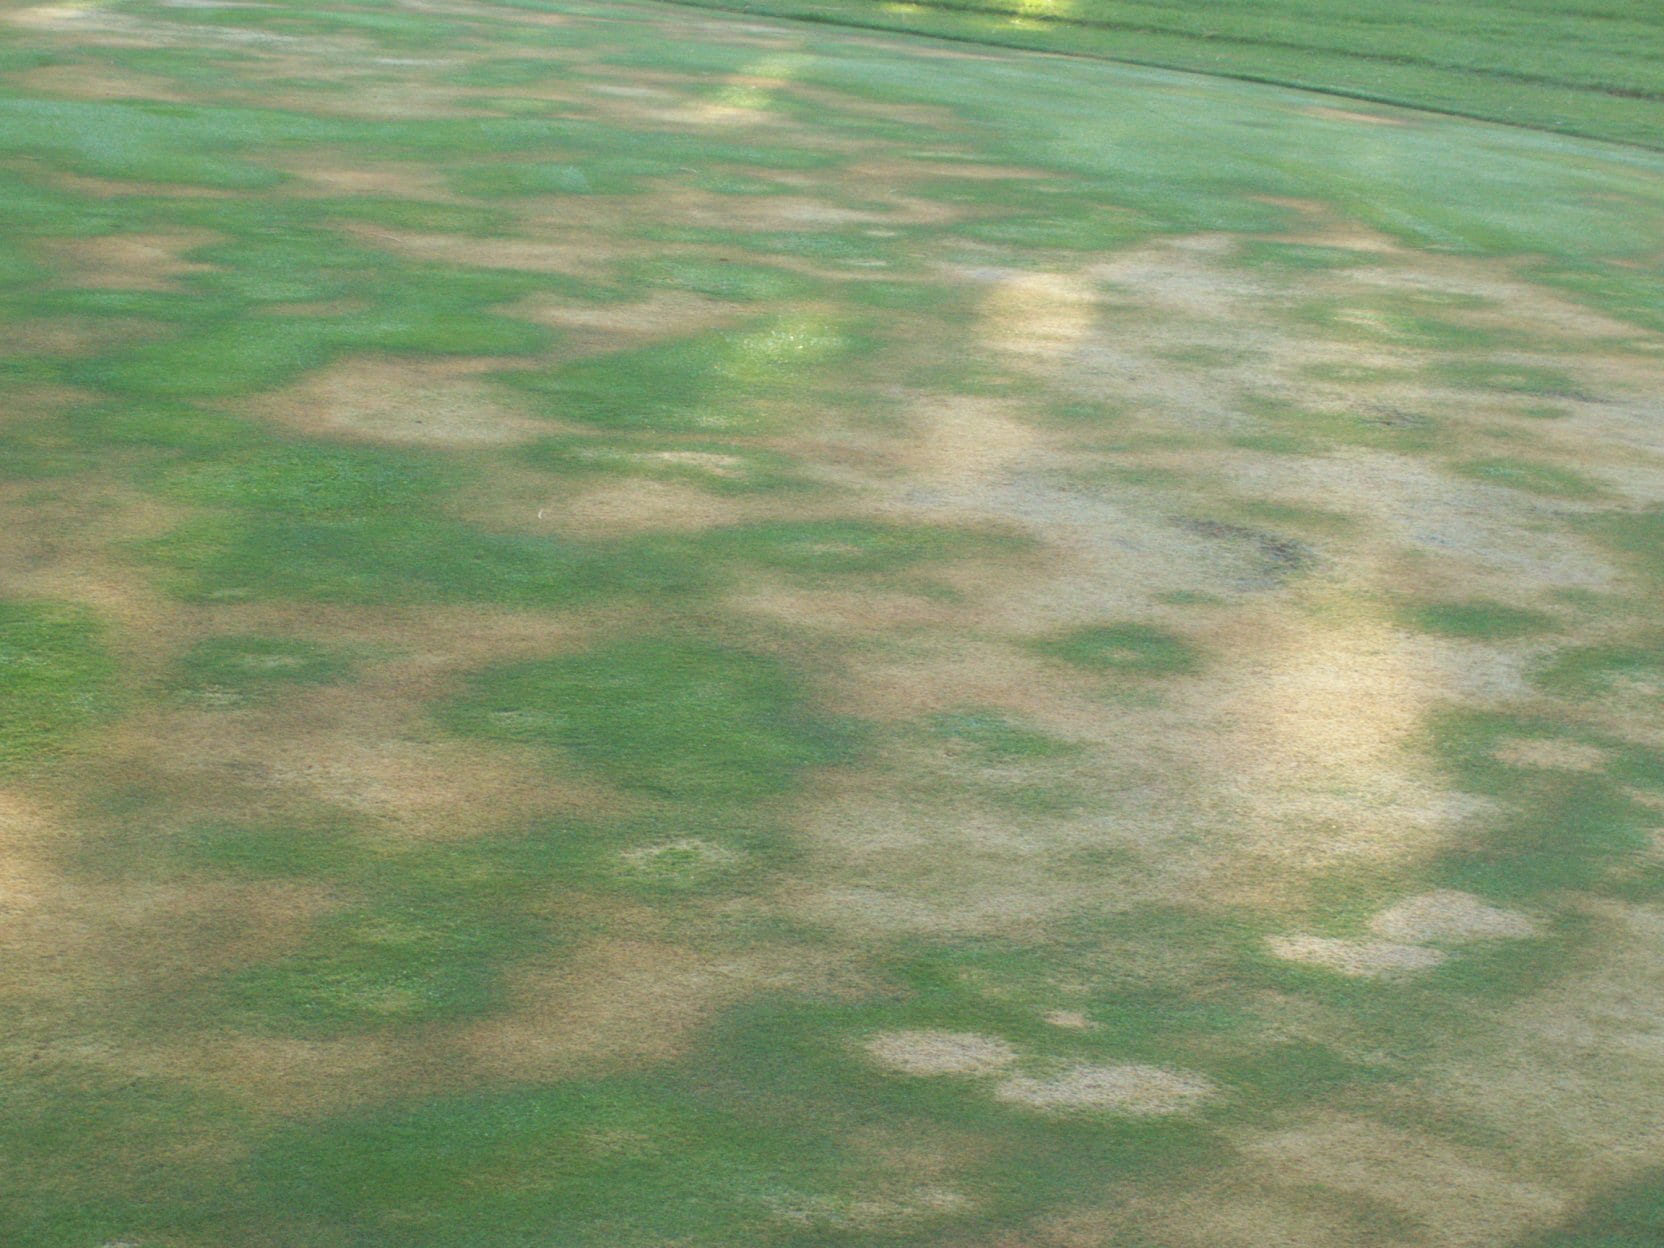
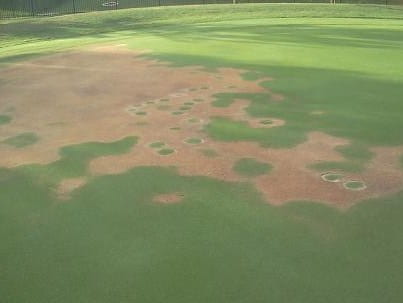
When hot dry winds meet hydrophobic (water-repellent) soil we can get “localized dry spot” in turf. The damage can develop quickly.

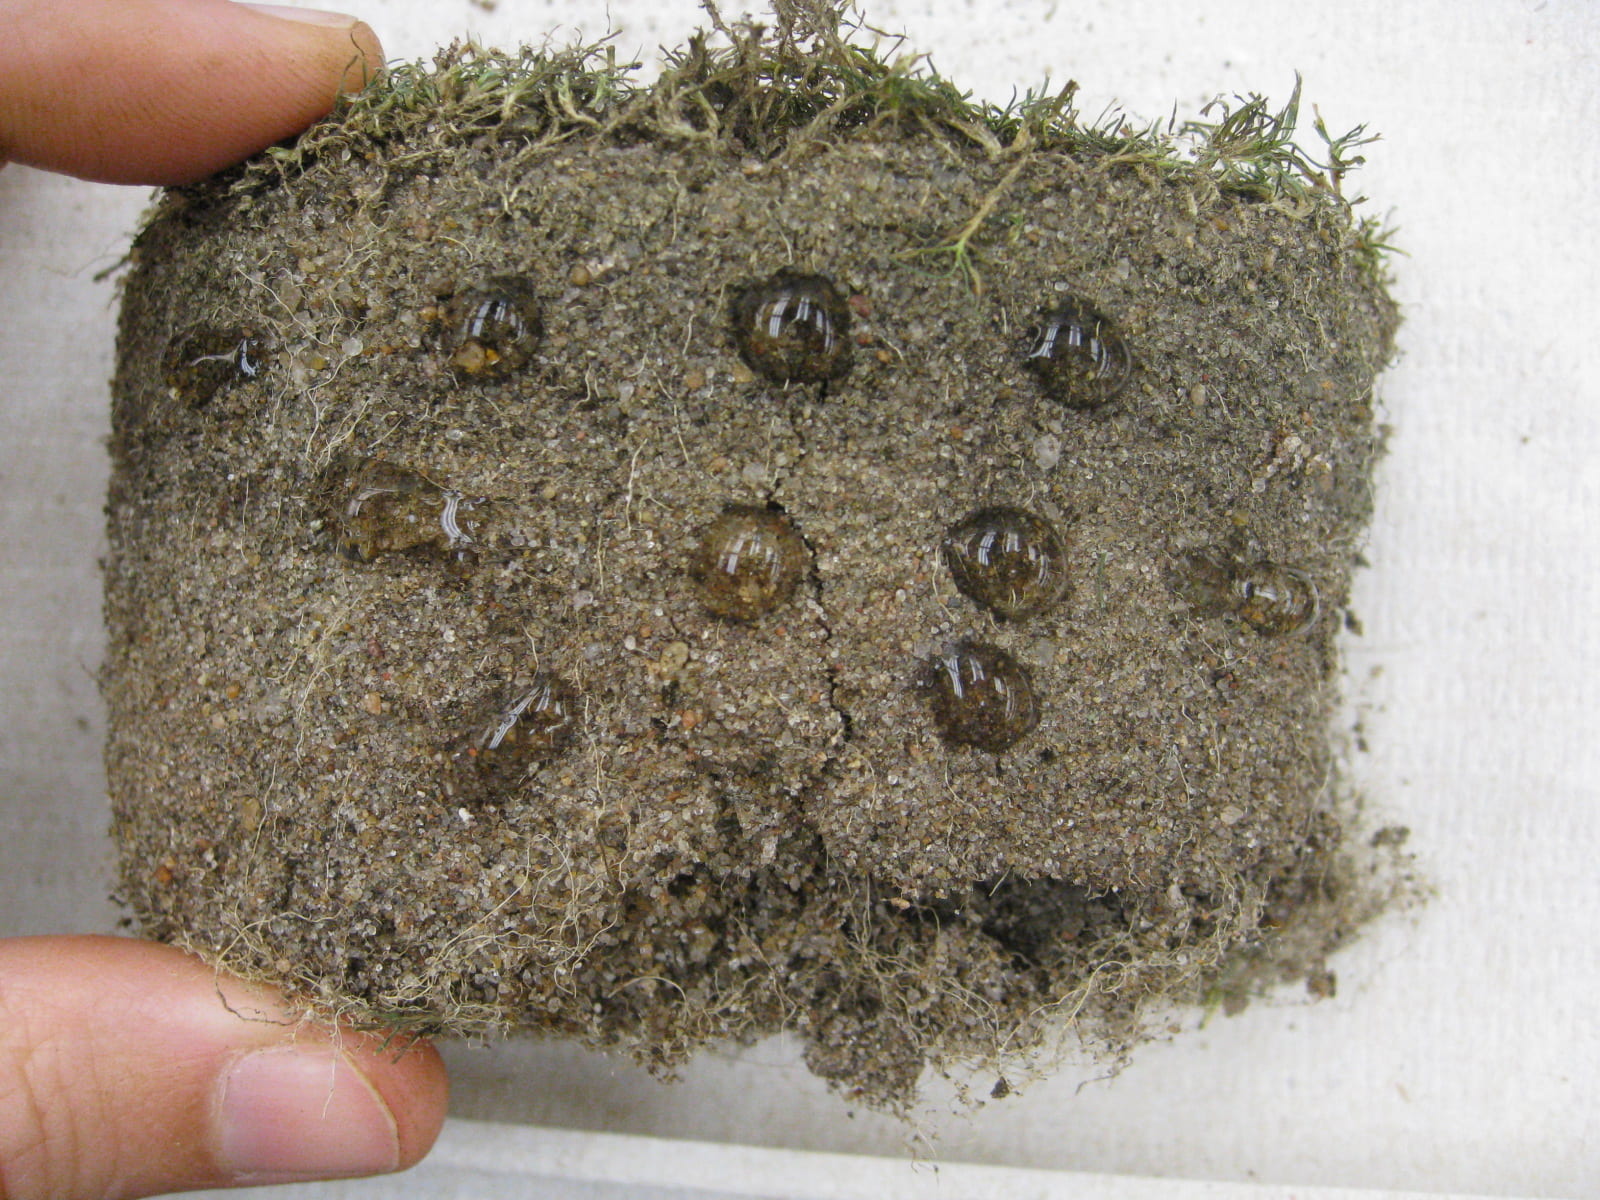
Water should wick in quickly. However, when the soil is hydrophobic the droplets sit there on the surface, and they don’t soak in:

The soil becomes hydrophobic due to a build-up of water-repellent waxy substances around the soil particles.

Here are some examples of what it can look like. It often takes odd shapes with unusual wispy/hazy edges:

Below are a couple of photos from a recent sample to the KSU diagnostic lab. You can see hydrophobic area a couple of inches down in the profile. You can also see the damaged turf in the background. The submitter said it was quite patchy around the green. It’s important to check your moisture levels regularly. When you do, check it in multiple places. You can even go high-tech with a moisture meter. For more information you can check this article from a few years back, Water Management on Greens With Soil Moisture Sensors.


Thatchy soils are one predisposing condition, and you can see the thatchy layers from this particular site here (though this particular plug was NOT hydrophobic):

Thatch management and wetting agents can help prevent and alleviate localized dry spot. There is some USGA info about localized dry spot here:

https://www.usga.org/content/usga/home-page/course-care/forethegolfer/2018/what-is-localized-dry-spot.html


New Podcast by Kansas Forest Service

By Brooke Garcia

Tim McDonnell, Community Forestry Coordinator for Kansas Forest Service, and Gary Farris, Arborist for the City of Wichita, recently recorded a podcast that highlights the importance of community forests. They discuss how Kansas also faces challenges in regards to protecting urban forests.
Listen to the podcast here: https://kansasforestservice.libsyn.com/more-than-beautification

Abundance of Caterpillars in the Garden

By Frannie Miller

This post has been provided by the Extension Entomology e-Newsletter.

This week as I have been out in my own yard and garden I have noticed an abundance of different types of caterpillars. Identification of caterpillars can be difficult because so many of them look really similar, but often if you know what plant they feed upon it will give you a clue.

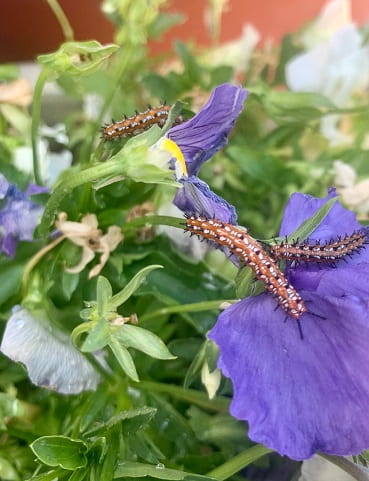
The first image is of a caterpillar sent to me by a friend asking what it was. She found it feeding on her pansies, which were a hold over plants from spring. These caterpillars are known as pansyworms. They usually grow to be 1 ¼ inches long with a characteristic deep-orange color with black striped sides which feature spines. These caterpillars will take bites out of the leaves, but the resulting variegated fritillary butterfly will add color to the garden.

Panysworm image: Courtesy of Cheryl Boyer

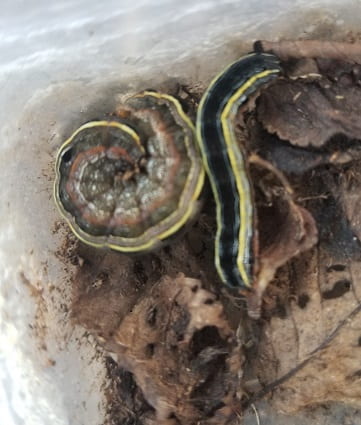
Then I found a few yellowstriped armyworm caterpillars feeding on some of my flowers. I picked them off as I did not want them to feed on those particular plants, but allowed them to feed elsewhere. These caterpillars turn into a somewhat drab grayish-brown moth.

Yellow Striped Armyworm

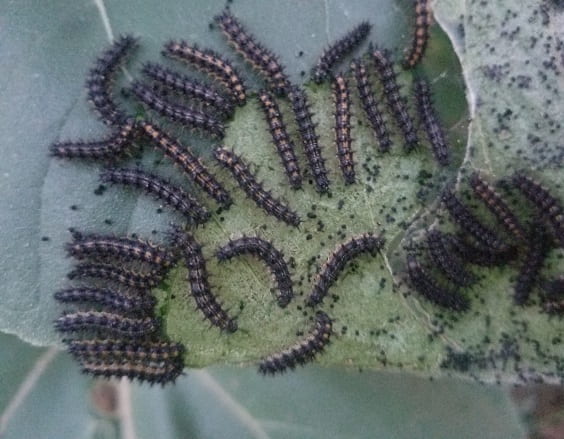
Finally I spotted a mass of small caterpillars feeding on sunflowers in the garden. The sunflowers were not ones I plants and had come up as volunteer so I have decided to let the caterpillars eat on these plants. It is difficult to for me to identify the exact species from a picture, but they will turn into some sort of checkerspot butterfly.

I have chosen to not use any insecticides to control these particular caterpillars, but options such as Bacillus thuringiensis subsp. kurstaki (Btk) and spinosad can be used when caterpillars are small. If you are going to use these products, remember to read and follow the label.

Checkerspot Caterpillar

Sometimes we don’t notice the caterpillars until they are larger and hand picking may become the best control option.

Euonymus Scale

By Brooke Garcia

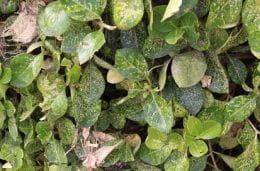
This is the time during the summer season when Euonymus Scale may be extra noticeable on evergreen euonymus. The scale insect will appear as small, white dots covering the planting. If you are wearing darker clothing and come into contact with the shrub, you may notice the white “debris” coming off of the plant. The plant can quickly become infested and covered with this insect. Euonymus Scale is capable of killing the plant if left untreated. Keep a watchful eye on plantings during this time. There are cultural strategies that can be incorporated into the garden to reduce the likelihood of this insect becoming a problem, but it is extremely prevalent and may require chemical treatment.

Euonymus Scale Infestation On Euonymus Plants Located Near Building (Auth-Raymond Cloyd, KSU)

For more information about the biological characteristics of this insects, as well as cultural and chemical practices that can aid in prevention and/or treatment, visit the K-State Extension Entomology post here: https://blogs.k-state.edu/kansasbugs/2020/07/02/euonymus-scale-4/

Yellow Nutsedge Control

Revised by Brooke M. Garcia, original post by Dr. Jared Hoyle

We have been receiving some precipitation recently across the state of Kansas. Even if you have received little rain in your area, you may be seeing yellow nutsedge popping up everywhere. Yellow nutsedge does favor moist soils but it can also grow in well-drained sites.


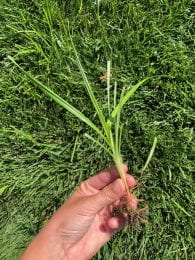
One of the easiest ways to identify yellow nutsedge is by a couple special features;

  • erect
  • persistant
  • yellow inflorescence
  • gradually tapering leaves to a sharp point
  • tubers not in chains
  • triangular stem

To control yellow nutsedge, if you can get applications out before tuber production then you will see increased control. But beware, yellow nutsedge will continue to grow as long as the environment is favorable for growth, so more than one application may be necessary.If using a herbicide application timing is critical. During mid-summer, yellow nutsedge starts making tubers and if you apply herbicides before tuber production you will get better control. If you wait until the yellow nutsedge is big and starting to make tubers then you will be playing catch-up all year. So sooner is better.  Don’t wait for it to get too big.

Here are some options for yellow nutsedge control for turfgrass professionals;

  • pyrimisulfan (new herbicide that provides yellow nutsedge control)
  • sulfentrazone
  • halosulfuron
  • iodosulfuron
  • mesotrione
  • bentazon
  • triflozysulfuron
  • flazasulfuron
  • sulfosulfuron

There are many different products out there that contain these active ingredients so just make sure you have an active ingredient that has yellow nutsedge control! Also make sure you check for turfgrass tolerances.

Always remember to READ THE LABEL for the correct rate, turfgrass tolerance, and specific instructions before application.

***Mention of trade names or commercial products in this article is solely for identification purposes and does not imply recommendation or endorsement, nor is criticism implied of similar products not mentioned by Kansas State University.***

Be sure to follow our KSU Turf Facebook page: www.facebook.com/KSUTurf

Today is the start of…. National Pollinator Week!

By Brooke M. Garcia

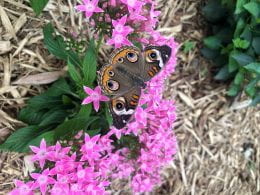
Happy National Pollinator Week! National Pollinator Week occurs every year around mid-June. This year, June 22-28th, 2020 is dedicated to celebrating pollinators and promoting how we can protect them in the landscape and/or environment. What can you do this week to protect or promote a pollinator?

Here are some ideas to show your support:

  • Plant native plants in the landscape
  • Educate employees on pesticide safety
  • Display pollinator artwork and outreach materials in your office lobby
  • Highlight Pollinator Week in a newsletter, blog, or magazine
  • Host a nature walk or pollinator expert lecture

Use the hashtag #pollinatorweek to promote pollinator week, events and resources shared.

For more information about National Pollinator Week, you can visit the official website.

Visit our K-State Pesticide Safety and Integrated Pest Management Facebook page to stay tuned with educational topics related to pollinators, pesticide safety, and IPM.

Three Steps to Choosing Potting Media for Outdoor Use

By Dr. Cheryl Boyer

There are a lot of choices in the potting media aisle of your local garden center. If you don’t know what you’re looking for, it can be a confusing experience to read the label. Fortunately, there are three easy steps/considerations for screening the available choices down to one that works for your needs.

Step 1: What are you using it for?

It does make a difference whether you are planning to use media in a container or as a soil amendment in a raised vegetable bed or landscaping bed. Some materials are designed to hold water well while others are designed to drain well. What do you need for each of those situations?

  • Growing plants in containers: Generally, you want to use a peat-based soil-less substrate for this application. Do not use field soil. These products are engineered for success in season-long growth of annual plants in containers of reasonable size for consumer use (very large containers are a different discussion). Peat-based mixes almost always have a “starter charge” of fertilizer mixed in to get your plants growing, but you’ll need to supplement with fertilizer as the season progresses. Old potting media has likely lost its starter charge and may, in fact, become hydrophobic (repels water) over time. You’ll need to spend some time rewetting and mixing old potting media for a new season if you intend to re-use it.
  • Amending a landscape bed or raised bed: Products containing peat should not be the primary component but are acceptable in small quantities. Field soil mixed with compost and perhaps a coarse pine bark-size material is best in this situation. The objective is to enrich your existing soil with natural material that will break down over time and in the meantime provide nutrients and aeration for roots to grow well. Make sure to apply the material and mix/till it into a broad area and not just a single planting hole or your new plants may experience the “soup bowl effect” and succumb to rapid decline. Check with your local landscape contractor to get a large volume of soil delivered, perhaps even mixed with compost from a local municipal composting facility.

Step 2: Understanding Major, Minor, and Specialty Components

These materials are regionally sourced and often composted to reduce particle size. Some materials are manufactured for the purpose of being used in potting media and many more are by-products of other industries. They are all fine as components but look at the label to understand how much of each “ingredient” is mixed, by volume, into the product you’re purchasing. If that information isn’t on the bag, be wary of purchasing.

  • Major components: Bark (or “composted forest products”), peat (this might be defined by type of peat which often refers to the source material or the coarseness), soil (don’t pay for this unless it’s local/regional and advertised as a single-component soil amendment—not as a potting media), manure, sand. Other waste-product alternative materials such as coconut coir and wood fiber are also great to use, but they’re not seen as often in consumer-level products.
  • Minor components: Perlite (little white pellets–it’s for aeration, not fertilization), vermiculite (shiny heat-expanded rock pieces), rice hulls (also for aeration with an added bonus of weed control when applied to the tops of containers). These are the most common.
  • Specialty components: mycorrhizae (symbiotic fungal organism that, mixed in, can be very beneficial in a container system by expanding the root capacity to take up nutrients and water, it’s less effective in field soil where these organisms are already abundant), fungicide (some products are designed to address specific fungal growth issues).

A note about manure and compost: These are good organic materials; however, you must be careful that the source can guarantee the material that produced the manure (hay, pasture grass, etc.) was not treated with herbicide. Many herbicides used in pasture management have a very long half-life and can persist in your landscape beds, killing desired plants.

A note about organic products: While most media components are considered “natural” and are likely produced using organic practices, few will be labeled as organic simply due to the nature of the organic certification process. An organically labeled product is not inherently better than another, though if you’re looking for a bagged manure product, organic will ensure the absence of herbicide residue.

Step 3: Mixing and Managing

Knowing what you’re working with and what you’re trying to do with it will help you understand how to manage it in practical use. These materials may also listed on the ingredient list and it’s helpful to know what to expect.

  • Lime: One special challenge we have in Kansas is that we have a lot of limestone around, which raises the pH of our soil and our water. You may notice that many bagged products include lime or limestone as a fertilization amendment. This is because most soil-less media components are very low in pH, or acidic, and they’re trying to get the mix to be pH neutral (so that most nutrients are available for plant uptake). In Kansas, most of our soils are on the high pH, or alkaline, side. It is to our advantage to apply soil-less products that are low in pH because that will help to neutralize our native soil. We don’t need the added limestone, but it’s unlikely you’ll find a product that doesn’t have it mixed in. For sure, don’t add more!
  • Fertilizer: As mentioned earlier, most bagged products have a “starter charge” of fertilizer. You won’t need to add anything immediately, but within a few weeks you’ll need to apply a water-based fertilizer (immediately available to plants) and/or a long-term slow-release fertilizer product. These usually come rated for months of use. A short-term product (3-4 months) may sound like it will last all summer, but if it gets really hot outside the pellets may release early (if temperature is the mode of operation). Combining a shorter-term product with a longer term one (8-9 months) may cover your needs for a longer time.
  • Wetting agent: Some products, like peat, are harvested and packaged in a very dry state and may need help retaining water when ready for use. This will likely be pre-mixed, though if you can tell it’s very dry you may want to spread it in a wheelbarrow and mix in some water (and maybe your own re-wetting agent) until it’s consistent.
  • Watering: Containers will need to be monitored for water more frequently than landscape beds, but they all need to be checked. This will vary in every situation, so you’ll need to keep an eye on it until you understand how all of the components are functioning together.

Potting media products are remarkably similar once you get past the packaging. Read the ingredient label (just like in the grocery store), find what you need for your application, and then choose the product that best meets your needs and your budget. Choose on price only after you’ve leveled the playing field of similar products.

Got questions about an unusual component? Let me know—I love a good alternative material discussion. Here is my email: crboyer@ksu.edu