This short article will address how to upload images to a photo album and to order the images.
Uploading the images
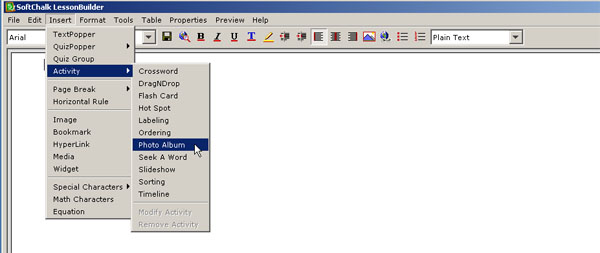
Launch the SoftChalk LessonBuilder 5 software. In the menu bar, go to Insert, select Activity, then select Photo Album.
A new window will open. In the Photos tab, you will be able to upload a folder of rendered (processed) images.
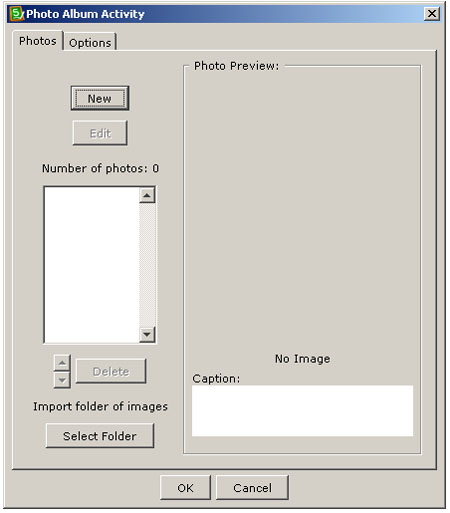
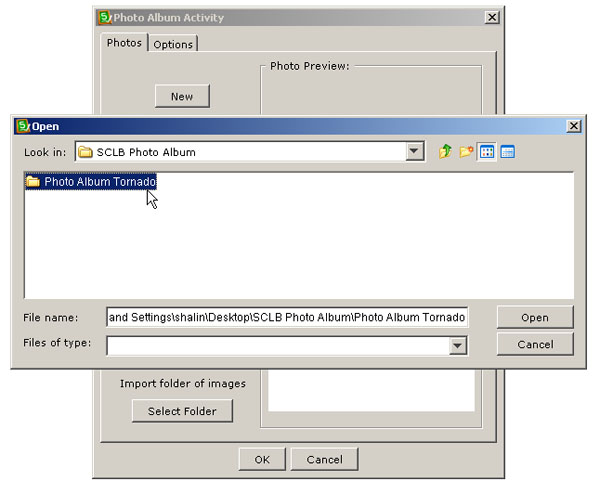
To upload a folder of images, click the Select Folder tab. Go to the location of your folder and click the folder, and then click Open.
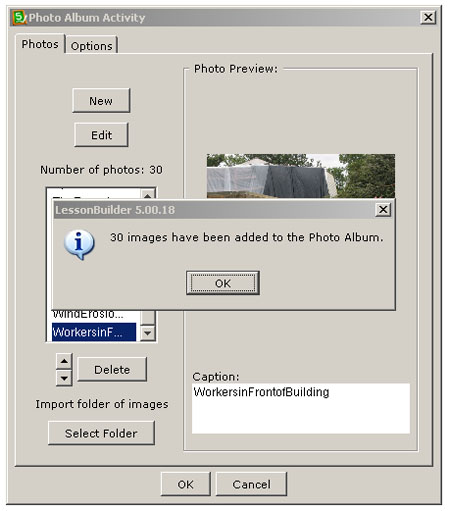
 The software will upload all the images, and they will be listed in alphabetical order. (If you have a particular order that you want the images in, you can use numbers at the beginning of each image so that the file comes in according to numerical order.)
Ordering the images into a sequence
The next step will be ordering the images in the desired sequence. To move an image, highlight it in the window (where the cursor is pointing). To the right, there will be a Photo Preview of the image. Below the Photo Preview is the de facto file name.
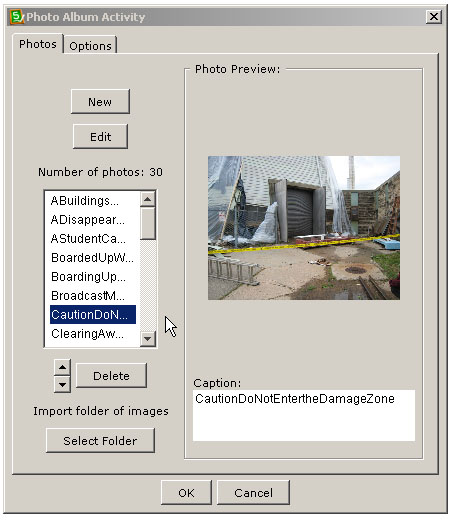
Click the up or down arrows to move the selected image into the proper location. These arrows are listed right below the photo listing.
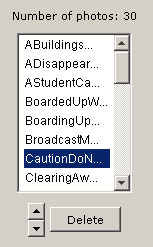
Notice that the Delete key also allows a user to delete images from the collection (by highlighting the name in the window and clicking Delete). In the following image, a repeated image is deleted.
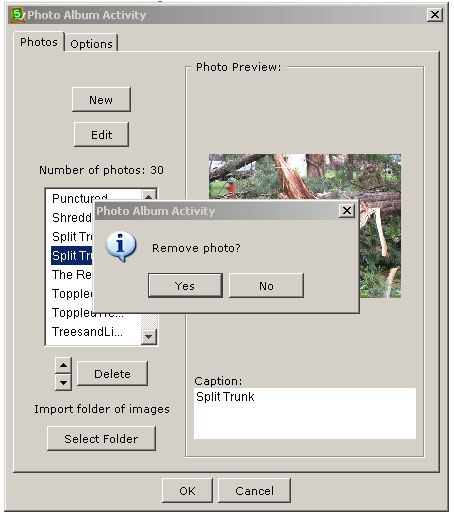
Click Yes to permanently remove the photo. Then click OK at the bottom.
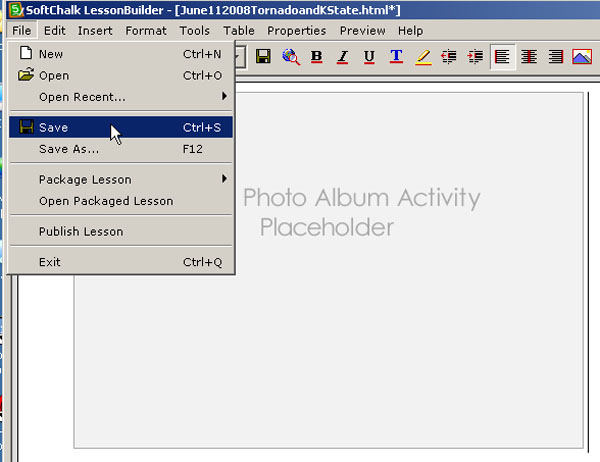
Save the photo album by going to the menu bar. Under File, click Save.
Next time: “Captioning Images and Adding Annotations”