Kansas State University

search

IT News

Category: Office 365

Collaborate with your team using a Microsoft shared account

Do you need a streamlined way for your team to manage email from the same inbox? A shared account provides a single email address that multiple team members can use to send and receive messages. A shared account gives team members access to email, calendar, contacts and more.

To get a shared account submit the Shared account request form (eID sign-in required).

The person who requests the account becomes the owner of the account and can manage who has access to the account. To learn how to manage a shared account, see the Managing a shared account knowledge base article.

If you have any questions about shared accounts, submit a ticket to the IT Service Desk.

Exploring the OneDrive homepage

The OneDrive homepage isn’t just for accessing files—it’s a powerful tool for managing all your files across Microsoft 365, no matter where they’re stored. Think of it as your one-stop shop for staying organized. Plus, you can quickly open OneDrive from the left navigation pane in Outlook and Teams.

Navigating the OneDrive homepage

The left navigation pane helps you find files quickly:

  • My Files: Your personal files and folders in OneDrive.
  • Shared: Files and folders you’ve shared or that others have shared with you.
  • Favorites: Mark important files as favorites for easy access.
  • Recycle Bin: Restore deleted files or permanently remove them.
  • Browse Files By: Filter by people, meetings, or media.
  • Quick Access: Jump to frequently used storage locations.

Main content area

The center of the homepage displays your recently used files. You can filter by name, person or file type to find what you need faster.

Do you want to learn more?

To learn more about OneDrive, view the OneDrive Quickstart Guide.

Save time by using Outlook templates

Microsoft Outlook logoDo you find yourself writing the same email over and over? Save time and streamline your workflow by using templates in Outlook on the web.

Creating a template

  1. Compose a new email message as you normally would and then copy the message.
  2. On the toolbar, click the Message tab.
  3. On the toolbar, click the My Templates button.
  4. Click the + Template link.
  5. Give your template a name and paste your message into the text box.
  6. Click Save to store your template for future use.

Using a saved template

  1. Open a new email.
  2. On the toolbar, click the Message tab.
  3. On the toolbar, click the My Templates button.
  4. Click on the three-dot menu in the email toolbar.
  5. Customize as needed and hit Send.

By integrating email templates into your workflow, you’ll reduce repetitive typing, improve response times and maintain consistent messaging.


Send an encrypted email in Outlook

Email encryption is used to encode the content of email messages to protect potentially sensitive information from being read by anyone other than the intended recipients. Encryption makes the content of your emails unreadable as they travel to the recipient.

You can encrypt messages by using the encrypt button on the toolbar or by typing one of the following keywords at the beginning of the subject line followed by a colon:

  • PCI:
  • PHI:
  • confidential:
  • secure:
  • encrypt:

Encrypt an email using the Encrypt button in Outlook on the web

  1. Sign in to Outlook on the web.
  2. Create your email message as usual.
  3. Click the Options tab and then click the Encrypt button.
  4. Choose Encrypt or any of the other permission options.
  5. Send the message.

You can also encrypt email in the desktop apps. See the Sending encrypted email in Outlook knowledge base article for instructions on how to encrypt emails in the desktop apps.

Organize your workflow with Microsoft Lists

Microsoft Lists is a simple yet powerful app that helps you organize, track, and collaborate on tasks and information. It integrates seamlessly with Microsoft 365, making managing work across your existing tools easy.

Why use Microsoft Lists?

  • Boost productivity: Reduce manual tracking and let Lists do the heavy lifting.
  • Improve collaboration : Keep everyone aligned with a central source of information.
  • Stay flexible: Customize lists to match your unique workflow.
  • Enhance visibility : See project progress at a glance with different viewing options.

How to Use Microsoft Lists for workflow organization Continue reading “Organize your workflow with Microsoft Lists”

Microsoft 365: Free for students, faculty and staff

Microsoft 365, an office collaboration suite, is available for free for K-State students, faculty, and staff. It includes tools such as email, calendar, office applications, file storage space, and more. You can access the suite from your desktop, web browser, or phone.

What’s Included?

Microsoft 365 gives you access to a range of apps and services designed to simplify your workflow and spark your creativity. The following are a few of the basic apps:

  • Microsoft Word for creating polished documents.
  • Excel for crunching numbers and analyzing data.
  • PowerPoint to design standout presentations.
  • Outlook for managing your email and calendar.
  • Teams for seamless communication and collaboration.
  • OneDrive for secure file storage and easy sharing.
  • OneNote for organizing information and collaborating with others.

Continue reading “Microsoft 365: Free for students, faculty and staff”

Schedule email in Microsoft Outlook on the web

Microsoft Outlook logoAre you going to be out of the office but need to send an email on a specific day? If so, use the Schedule Send feature in Outlook on the web.

How to Use Schedule Send

  1. Compose your email: Create a new email as you normally would.
  2. Set the time: Click the dropdown arrow next to the “Send” button and select Schedule send.
  3. Pick a date and time: A calendar will pop up. Choose the best day and time for your email to go out.
  4. Confirm: Click Send when you’ve finalized the schedule.

Outlook will send the message at the scheduled date and time.

Rehearse your presentation in PowerPoint

Speaker Coach recording screen
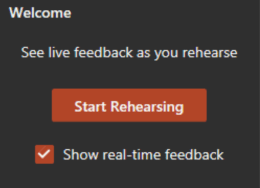
Did you know you can practice rehearsing your PowerPoint presentations by using the Speaker Coach feature?

Speaker Coach evaluates your pacing, pitch, your use of filler words, informal speech, euphemisms, and culturally sensitive terms, and it detects when you’re being overly wordy or are simply reading the text on a slide.

After each rehearsal, you get a report that includes statistics and suggestions for improvements.

Get started

  1. Open your presentation in PowerPoint for the web.
  2. On the Slide Show tab, select Rehearse with Coach.
    Note: If you don’t have a
    Slide Show tab, use the View tab to start Speaker Coach. The presentation opens in a full-screen view, similar to Slide Show.
  3. Select Start Rehearsing in the lower-right corner of your screen when you are ready to begin rehearsing.
  4. As you speak, Coach gives on-screen guidance (in the lower-right corner of the window) about pacing, inclusive language, use of profanity, filler words, and whether you’re reading the slide text.
  5. When you’re through, exit the full-screen view. Coach opens a Rehearsal Report that summarizes what it observed and offers recommendations.

Streamline your workflow with Quick Steps in Microsoft Outlook on the web

Quick Steps are shortcuts that allow you to perform multiple actions on an email with one click. Instead of doing each task separately, Quick Steps helps you streamline your work.

How to set up Quick Steps

  1. Open Outlook and go to the Home tab.
  2. On the toolbar, click Quick Steps.
  3. Click Add quick step
  4. In the Name box, type a name for the new Quick Step.
  5. Under Choose an action, select the action that you want the Quick Step to do. Select Add another action for any additional actions.
  6. Click Save.

Quick Step examples

Continue reading “Streamline your workflow with Quick Steps in Microsoft Outlook on the web”