Kansas State University

search

K-State Turf and Landscape Blog

Breaking disease life cycles with good sanitation

(Megan Kennelly, KSU Plant Pathology)

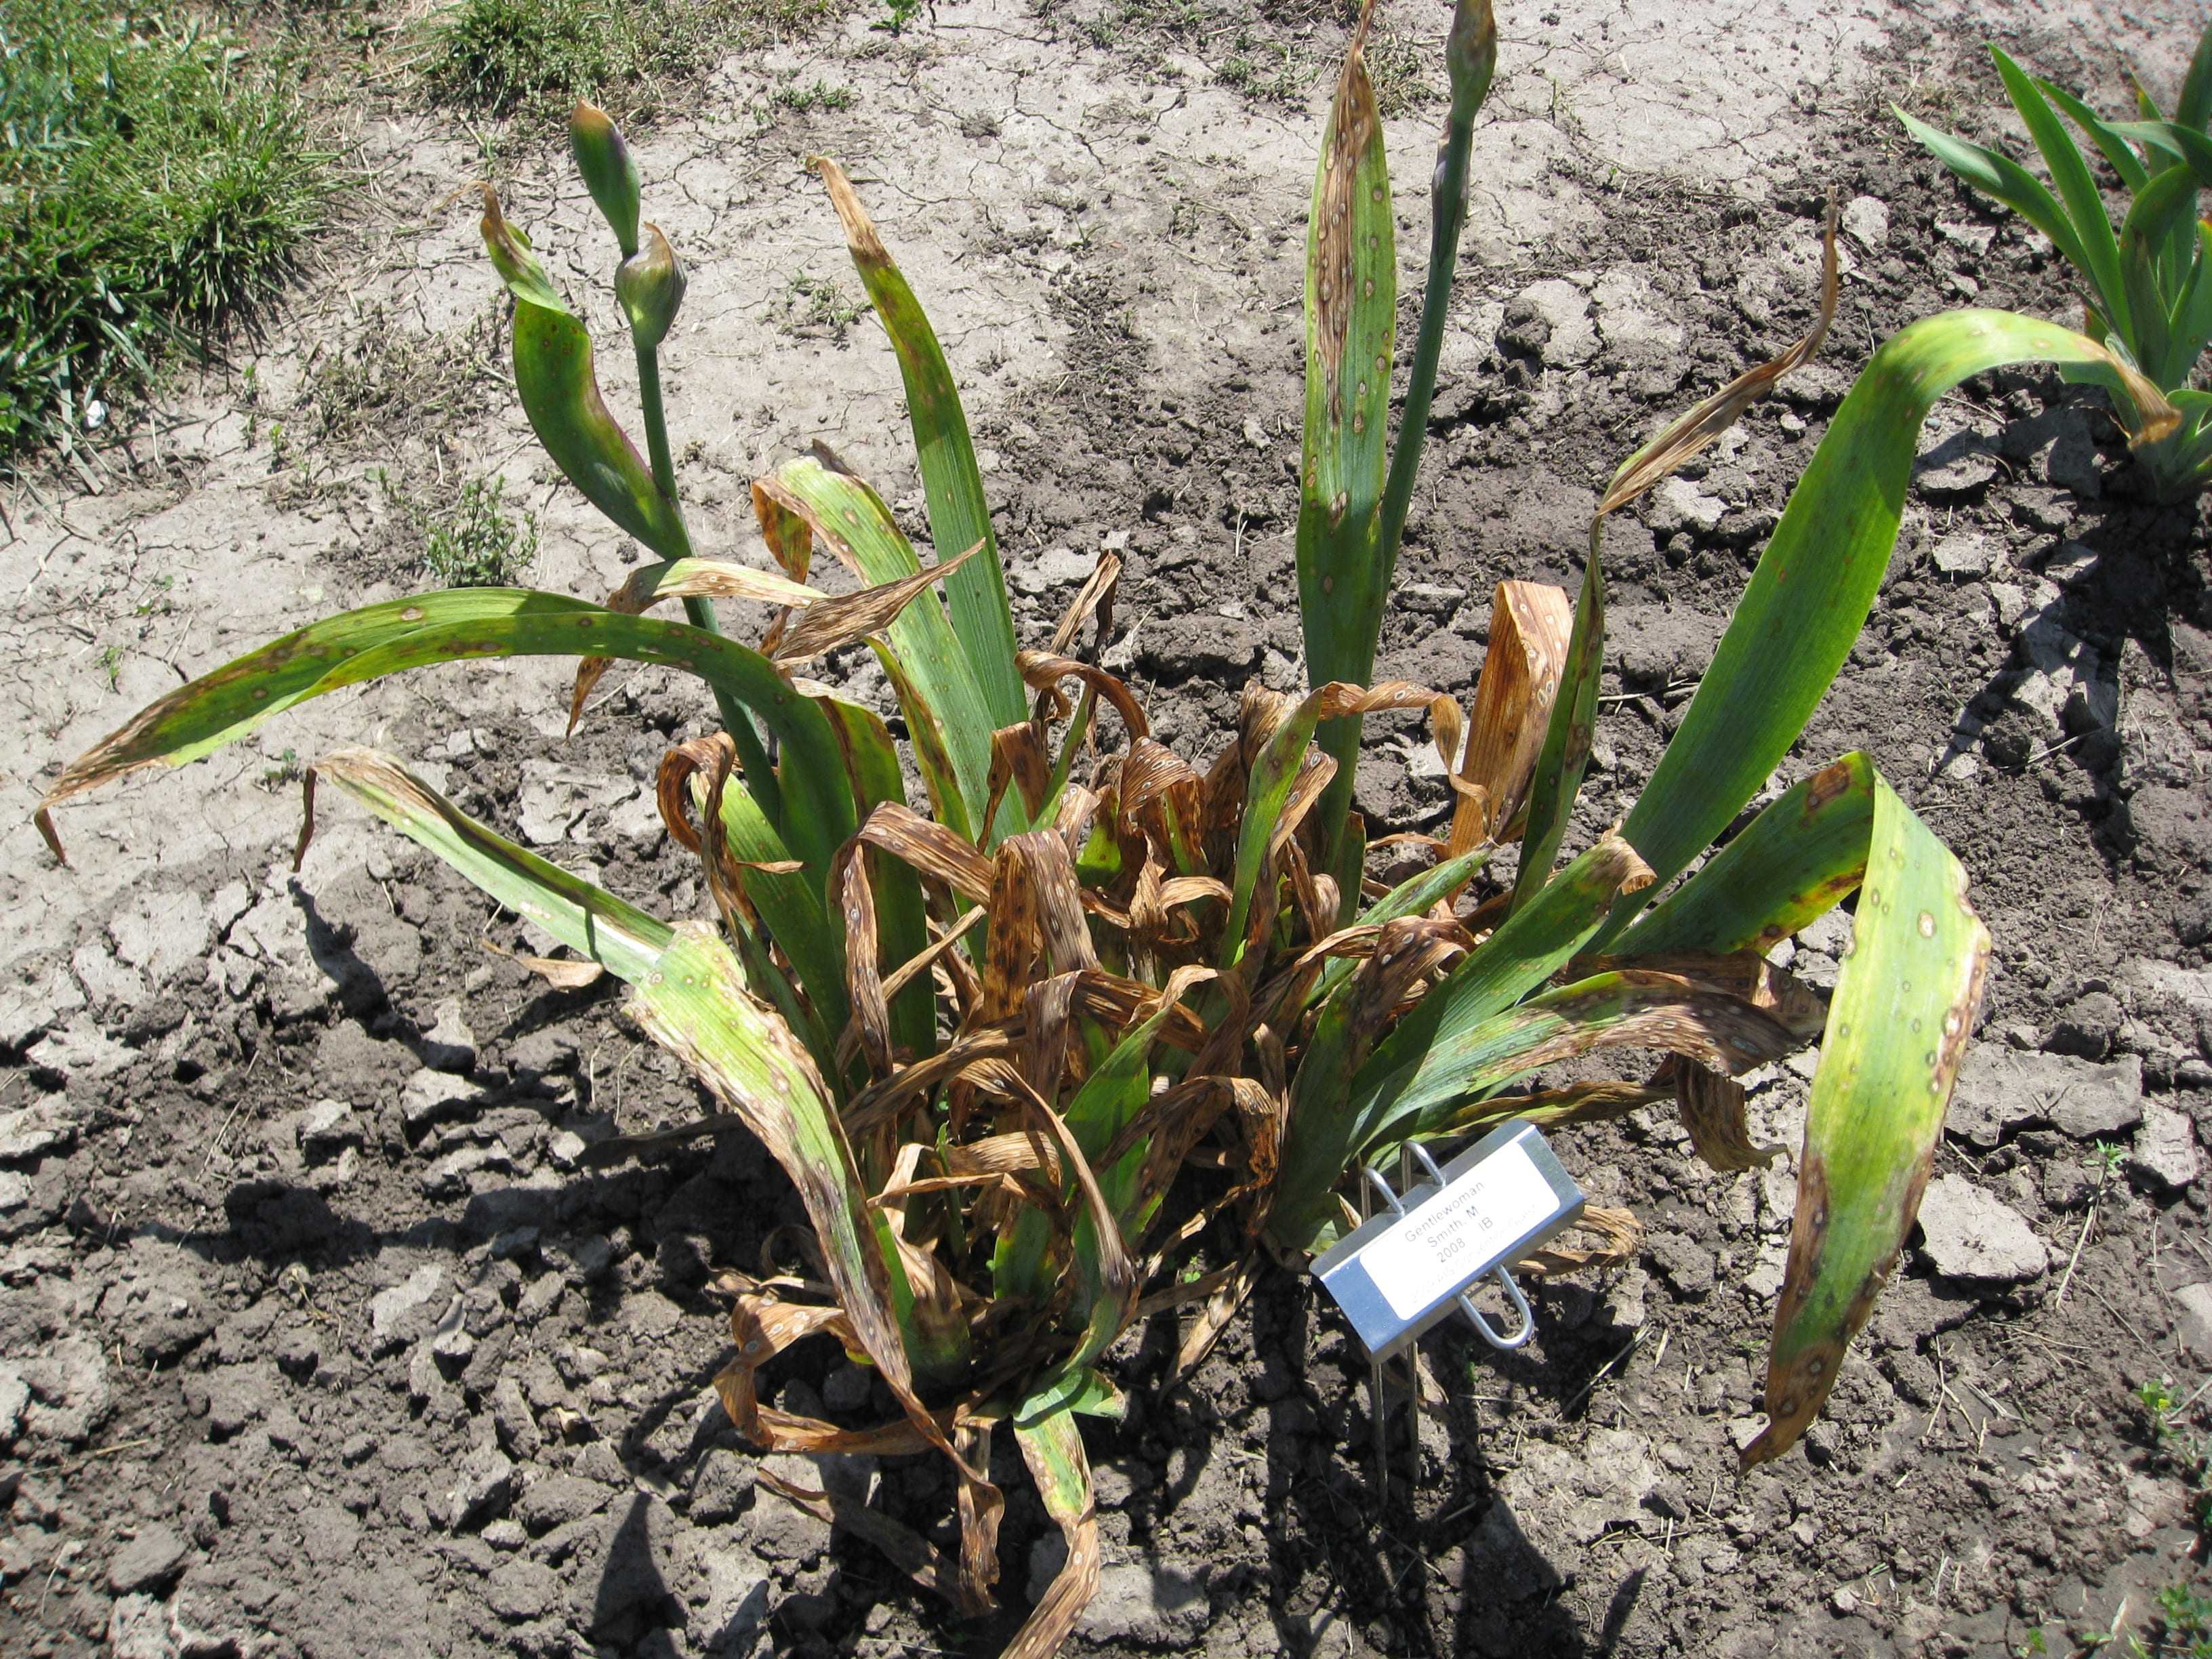
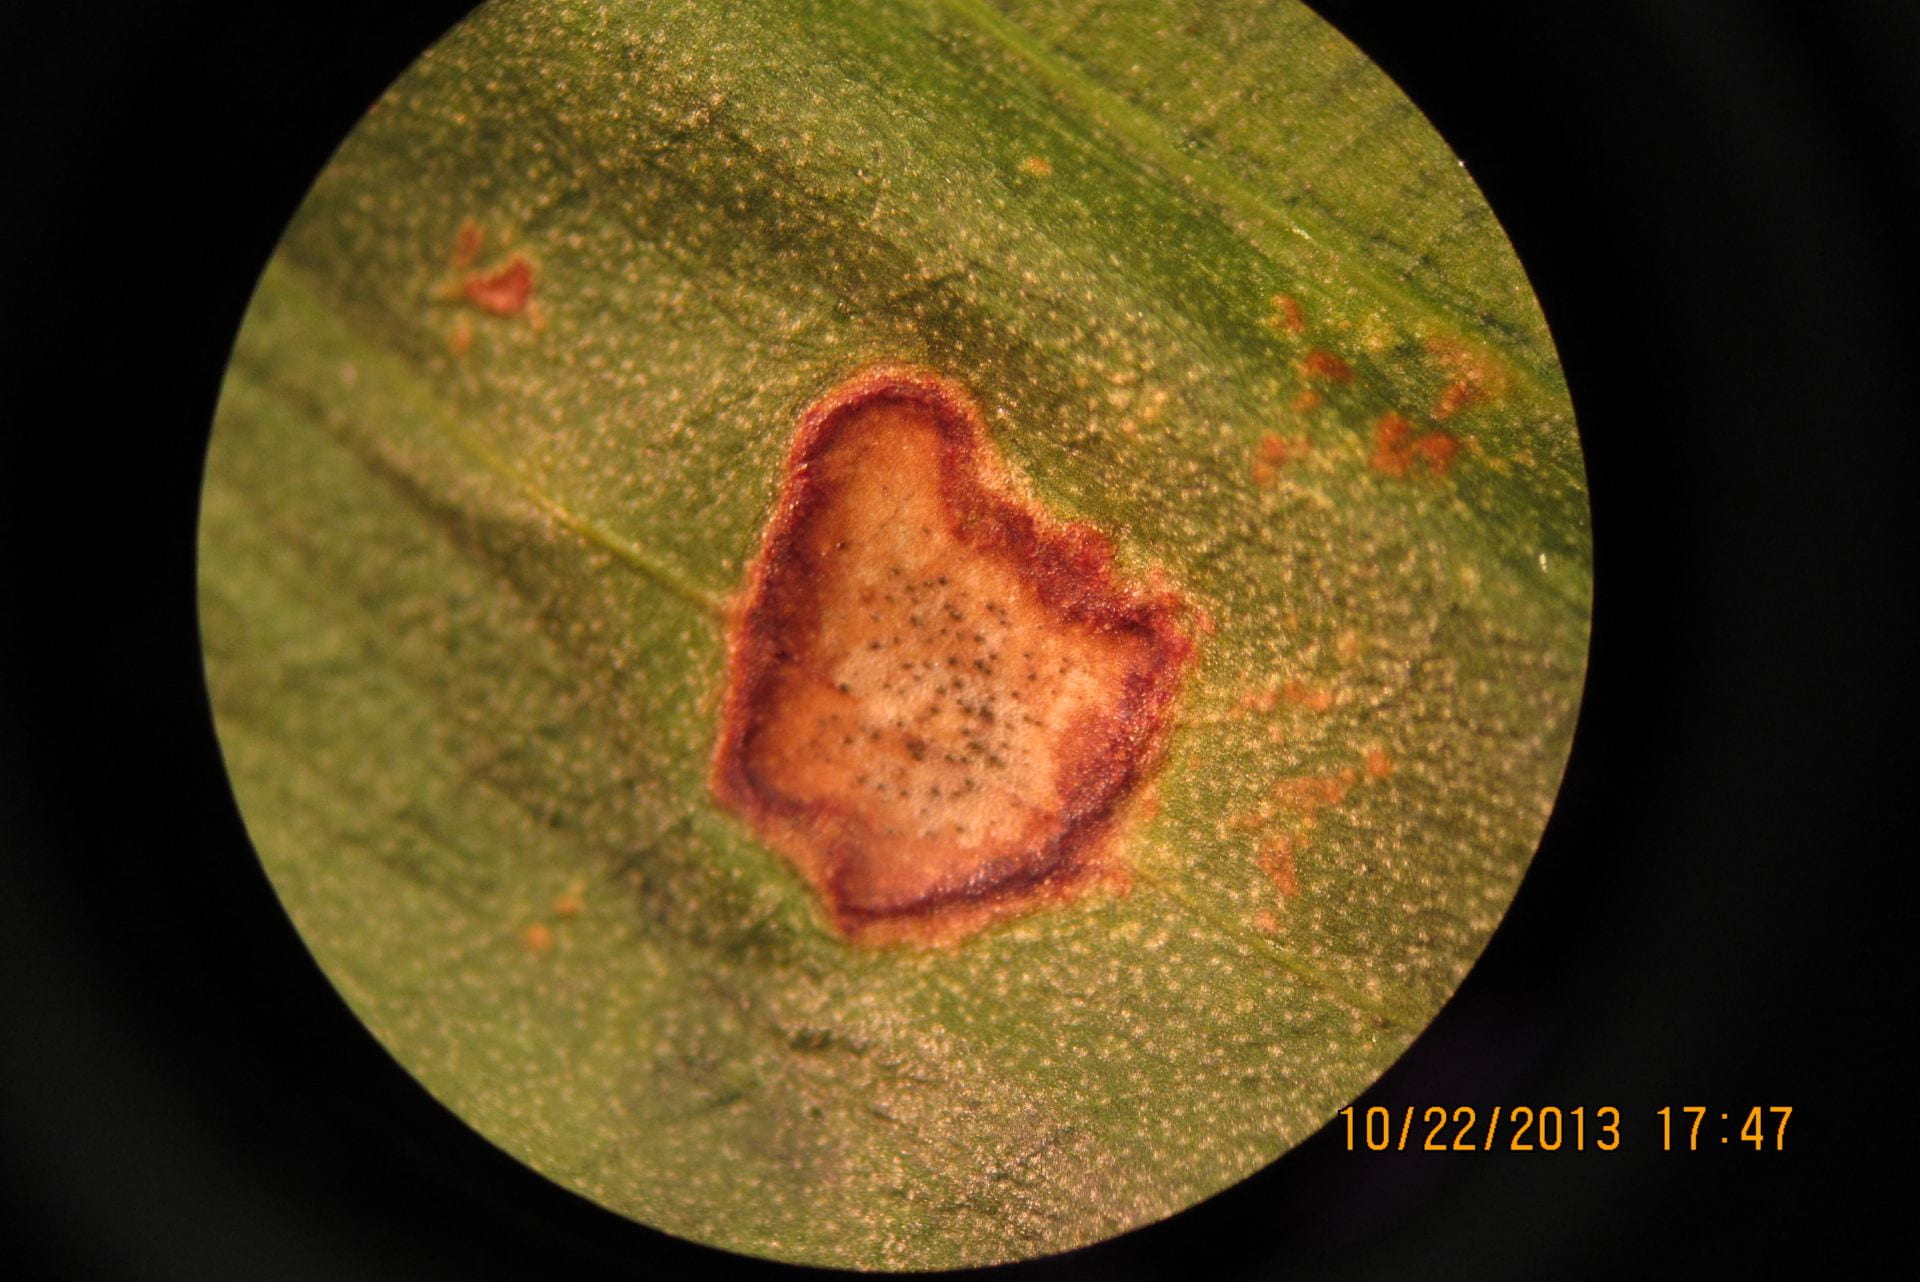
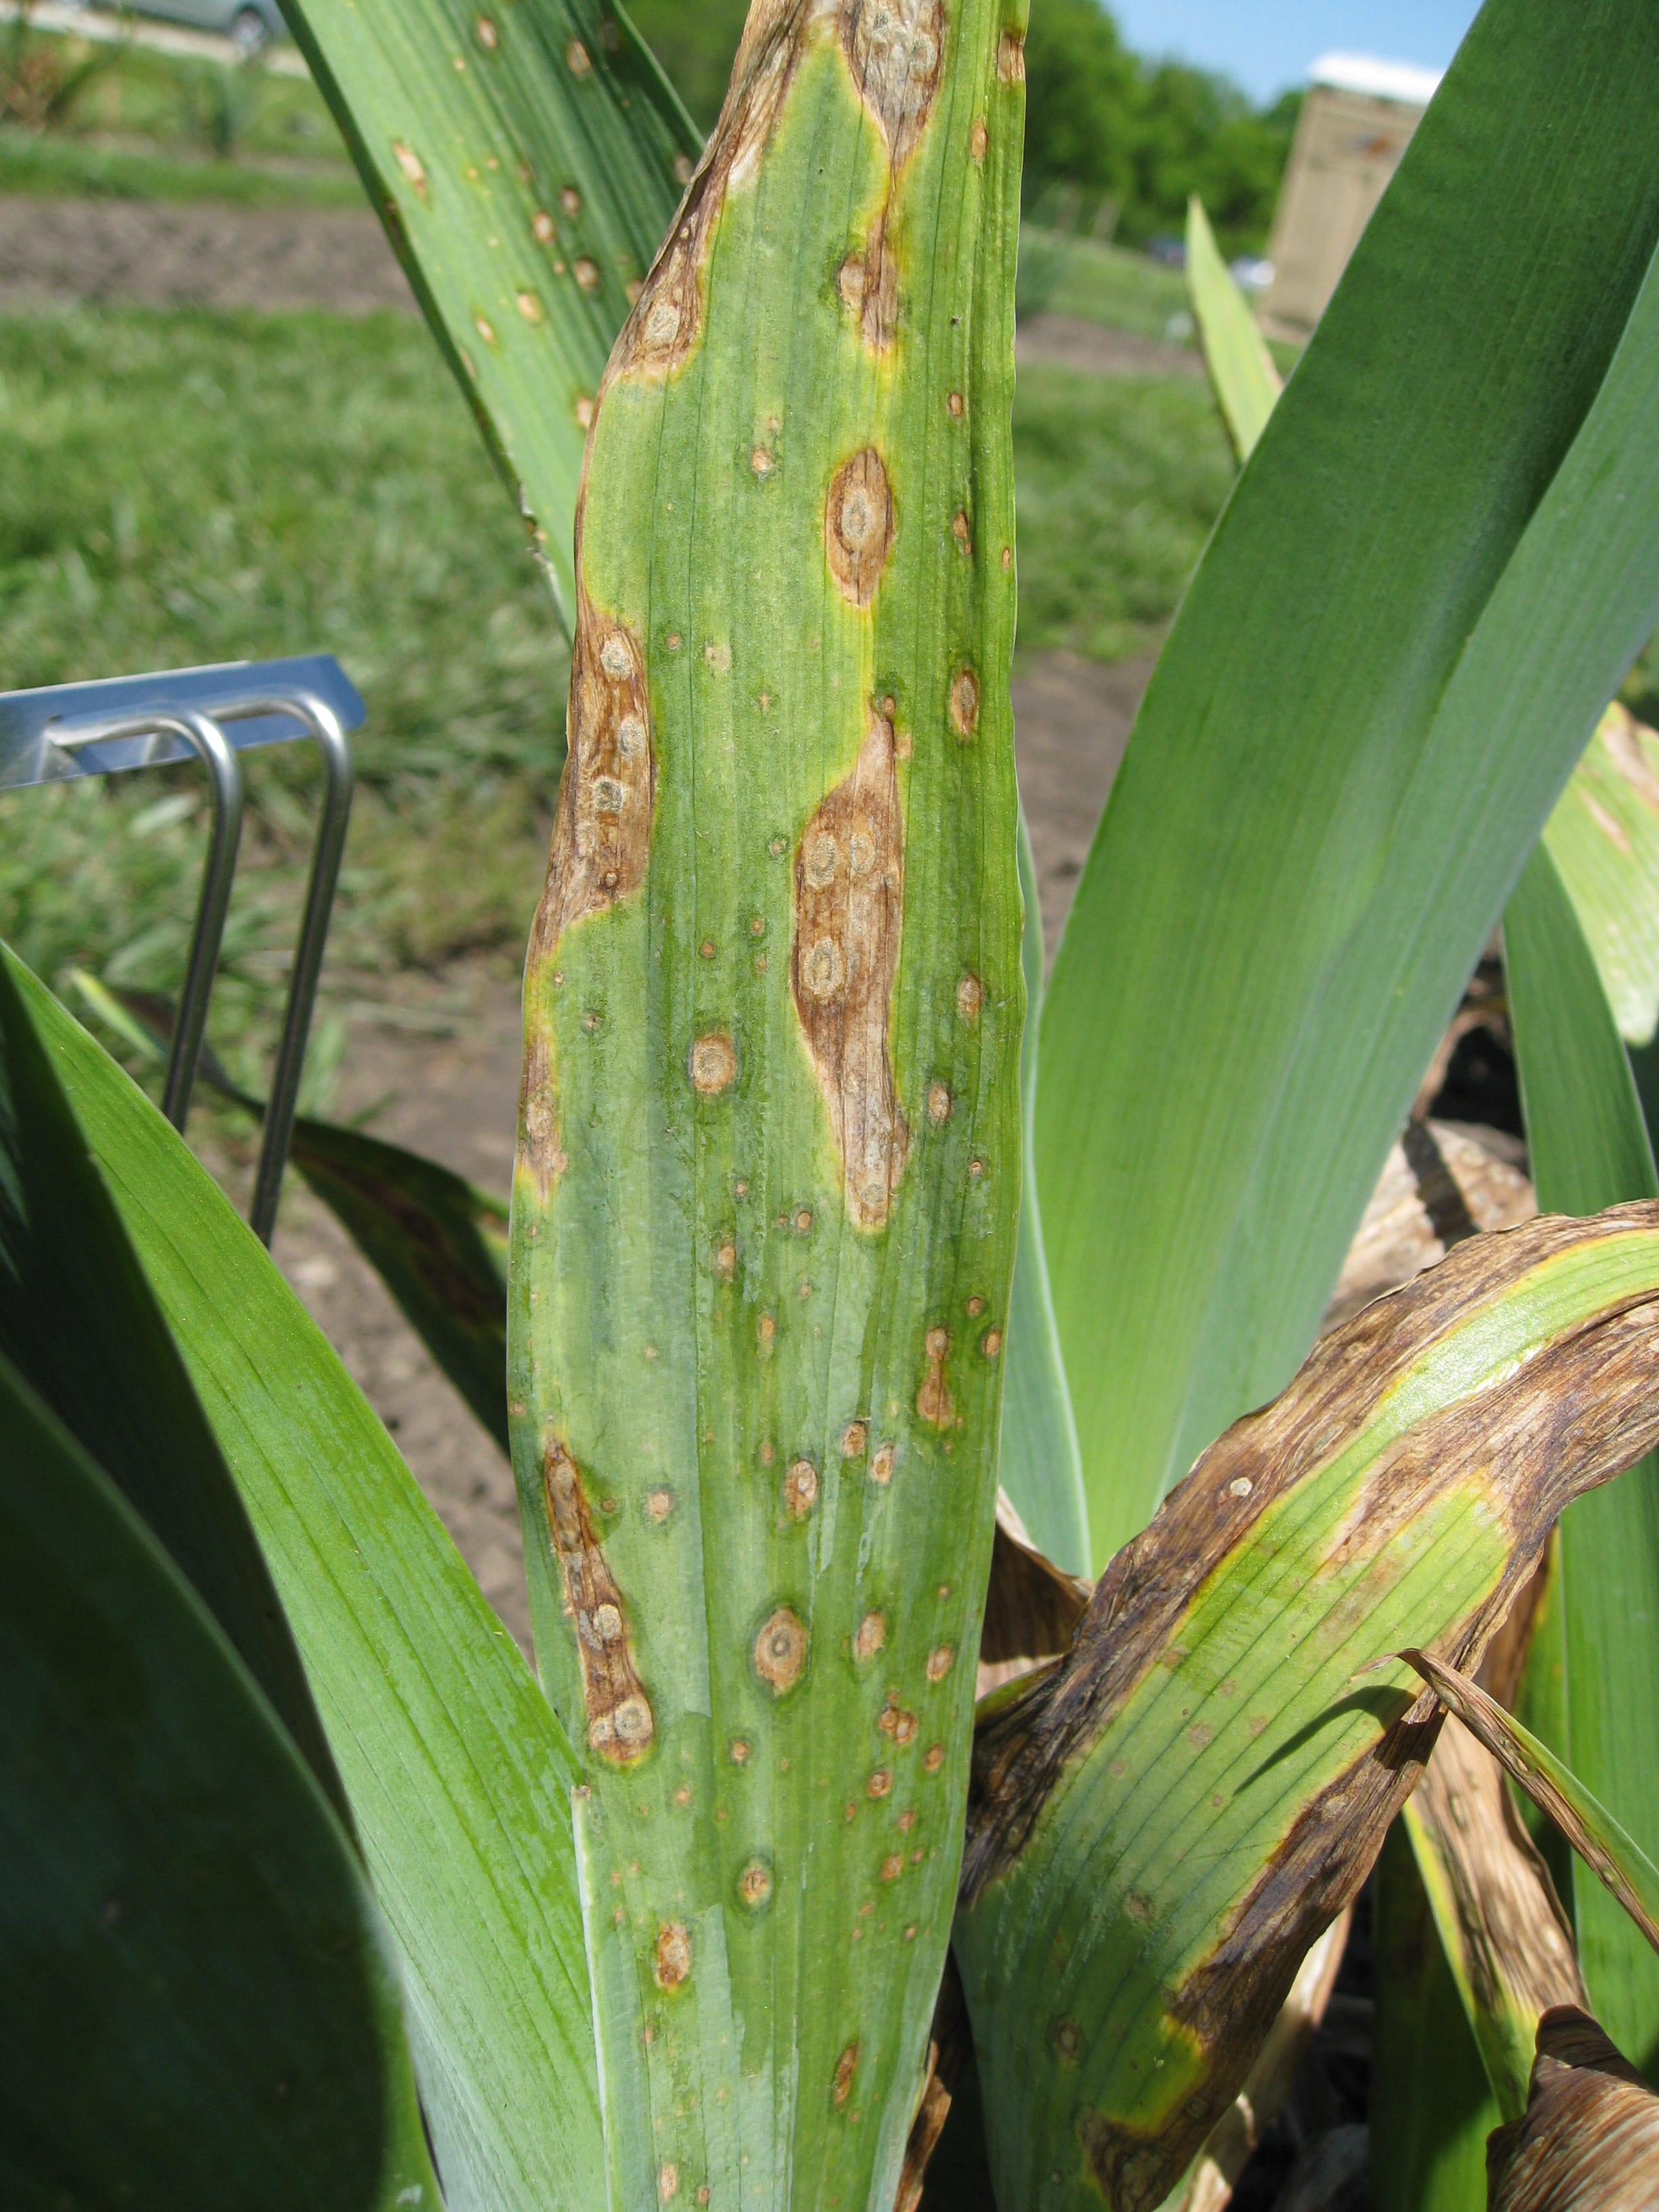
Many plant pathogens like to survive the winter in infected crop debris. One example is iris leaf spot.


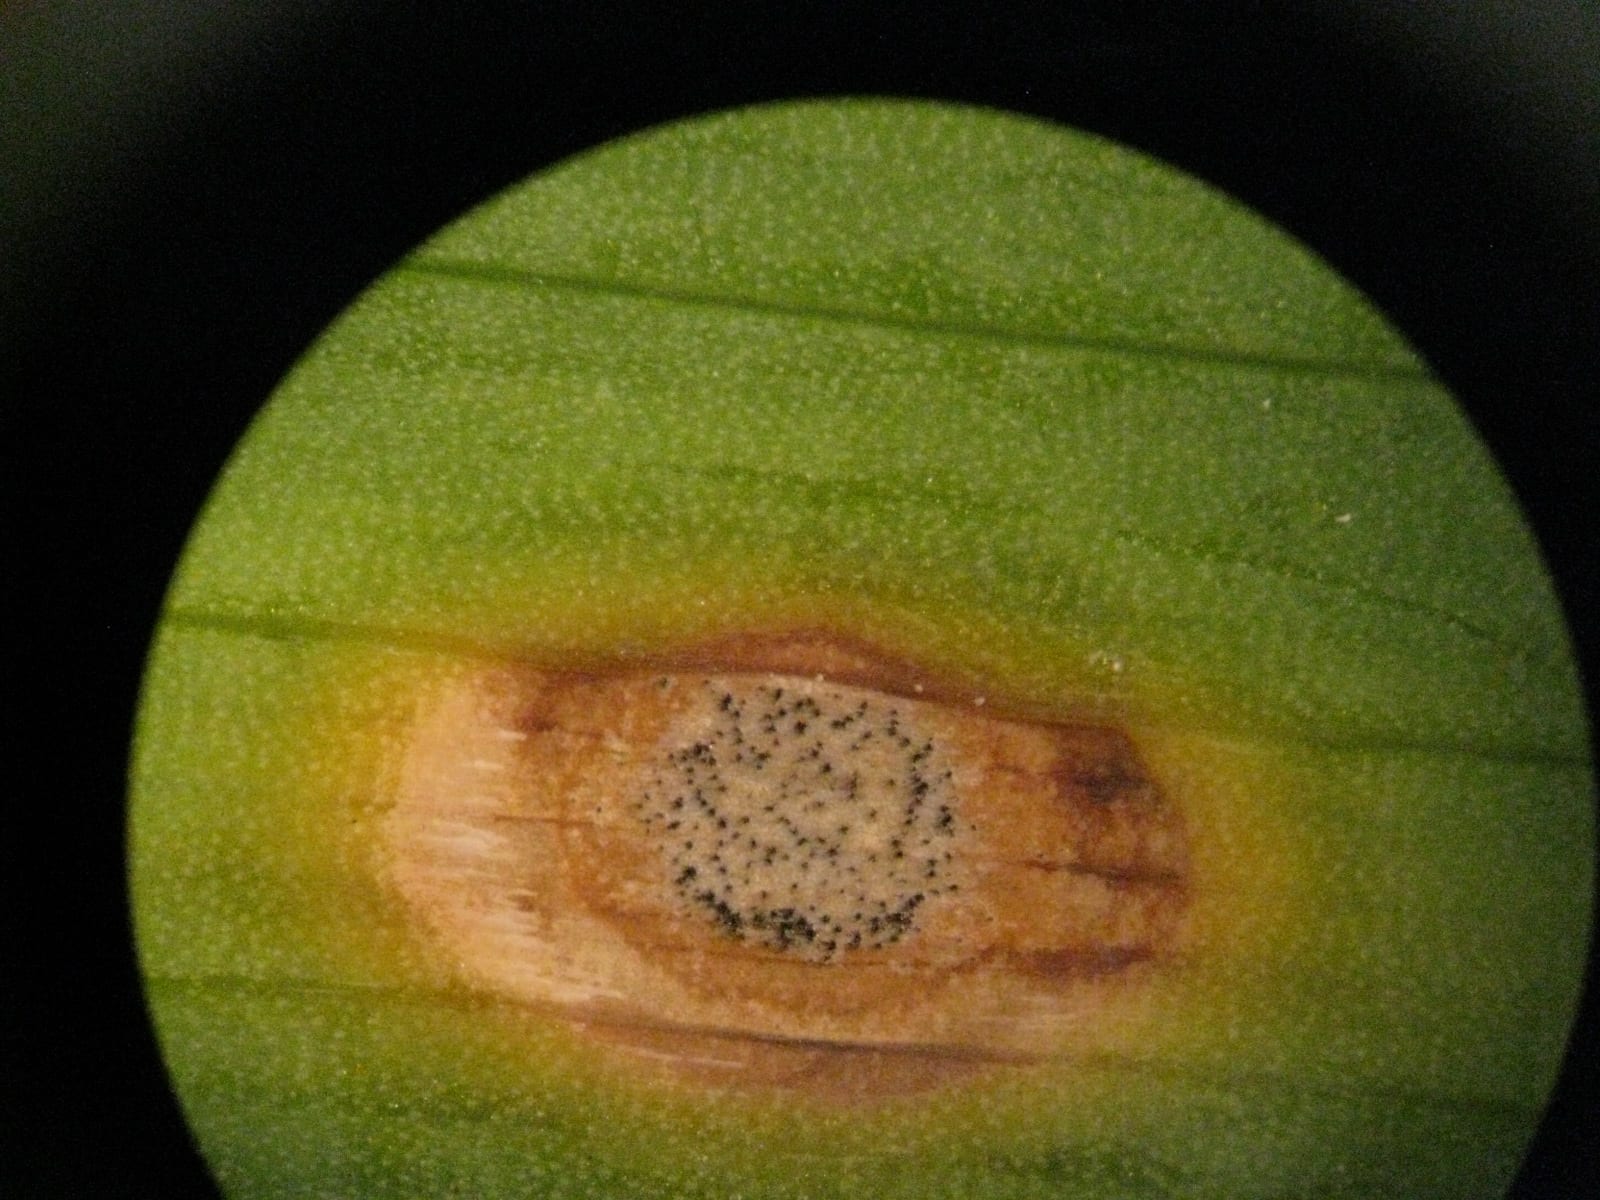
Here is a zoom – the black spots are structures where the fungus produces spores:

Here are some other flower diseases that carry over on debris:

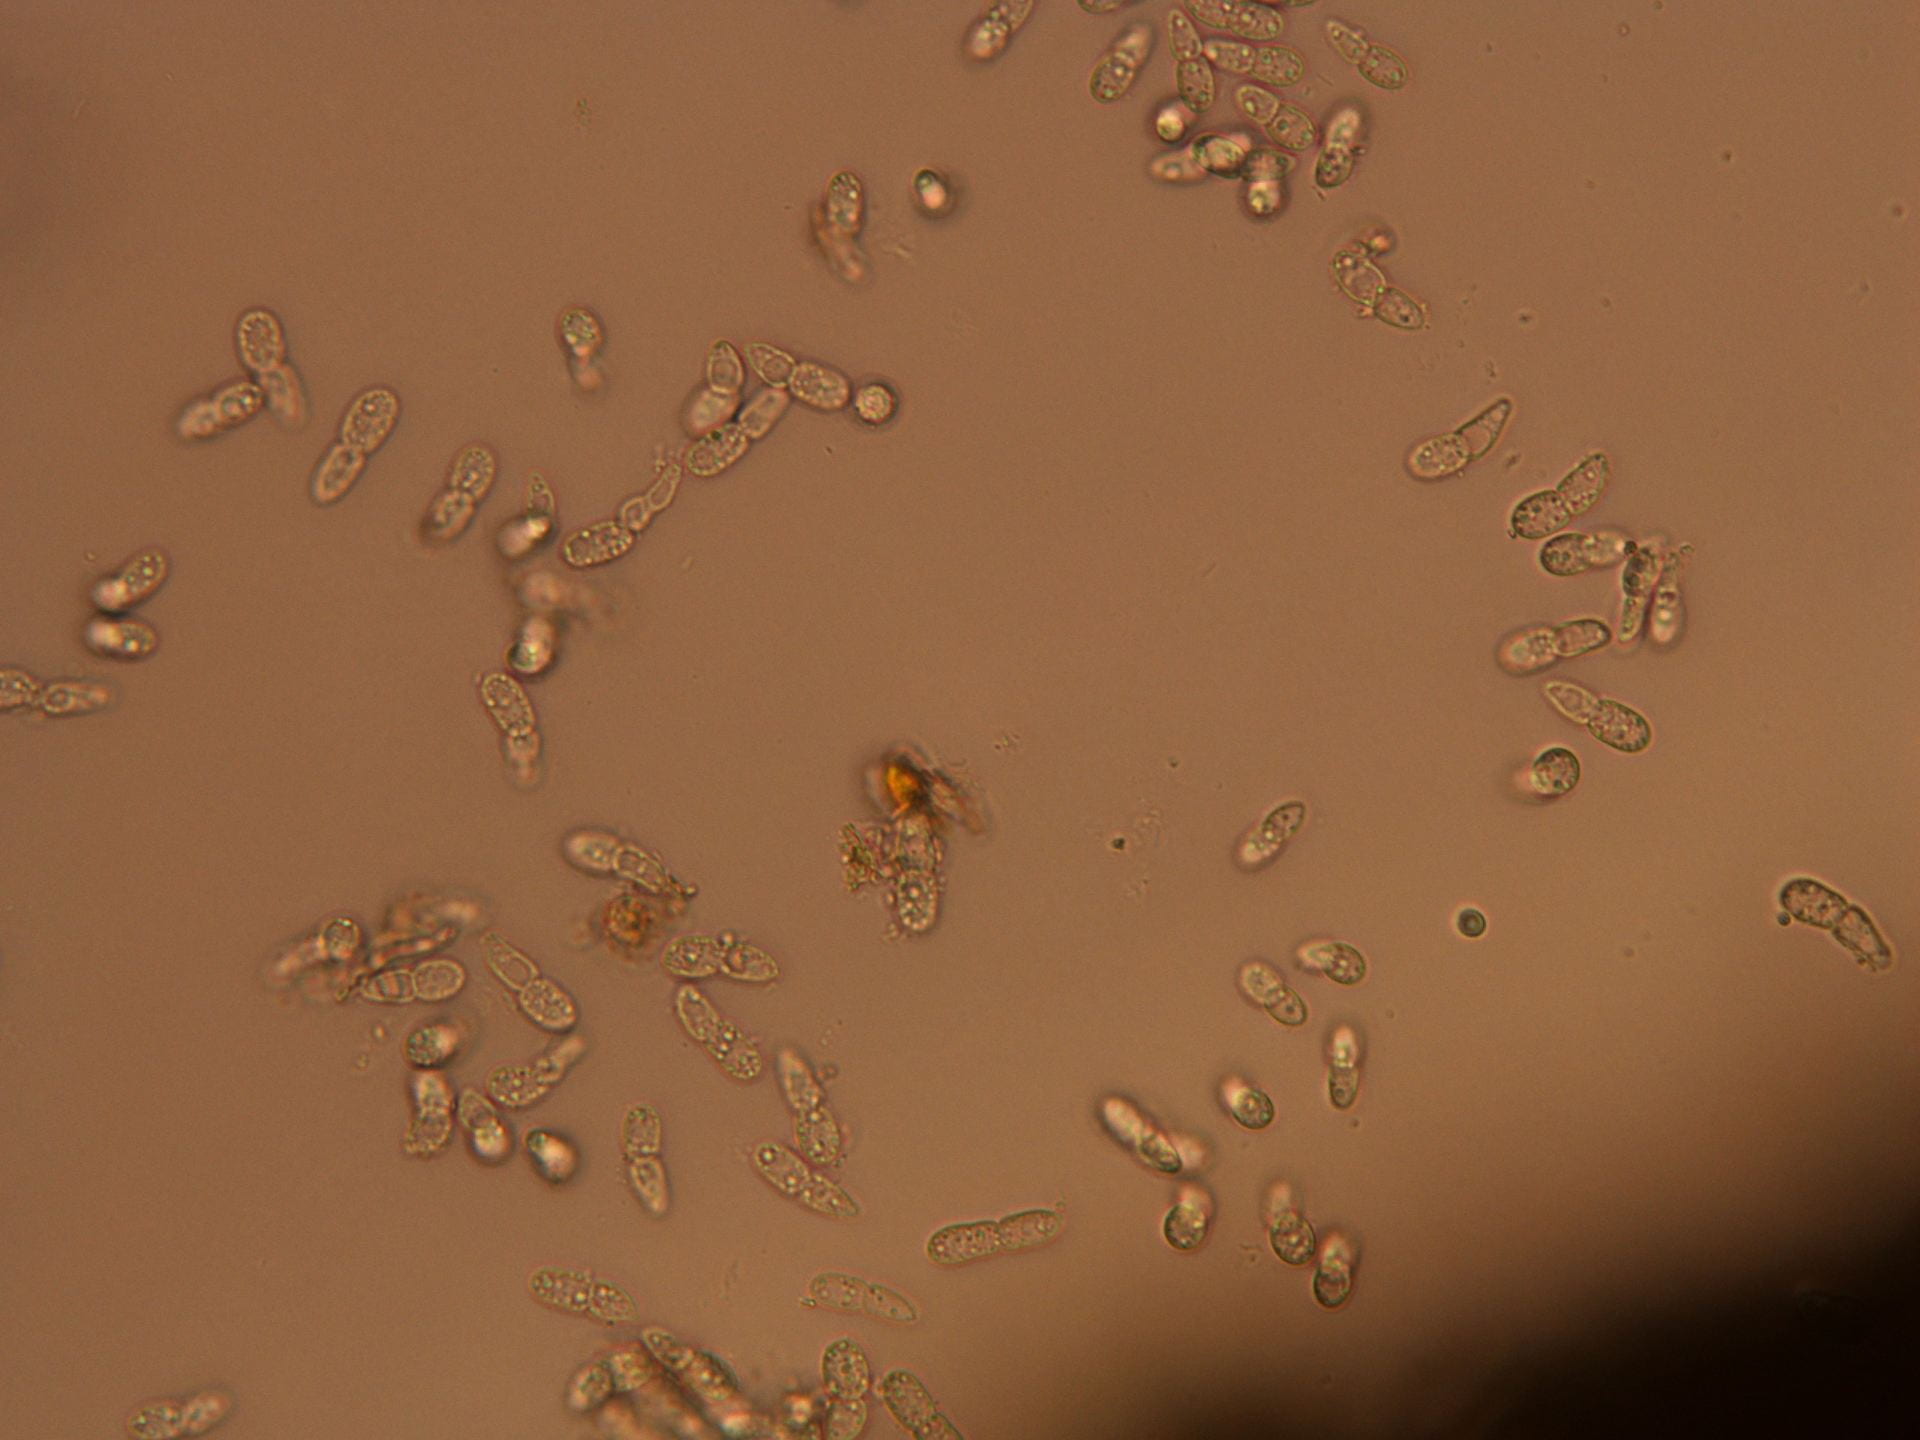
Rose black spot lesions, close-up of lesions, and microscopic view showing abundant spores:

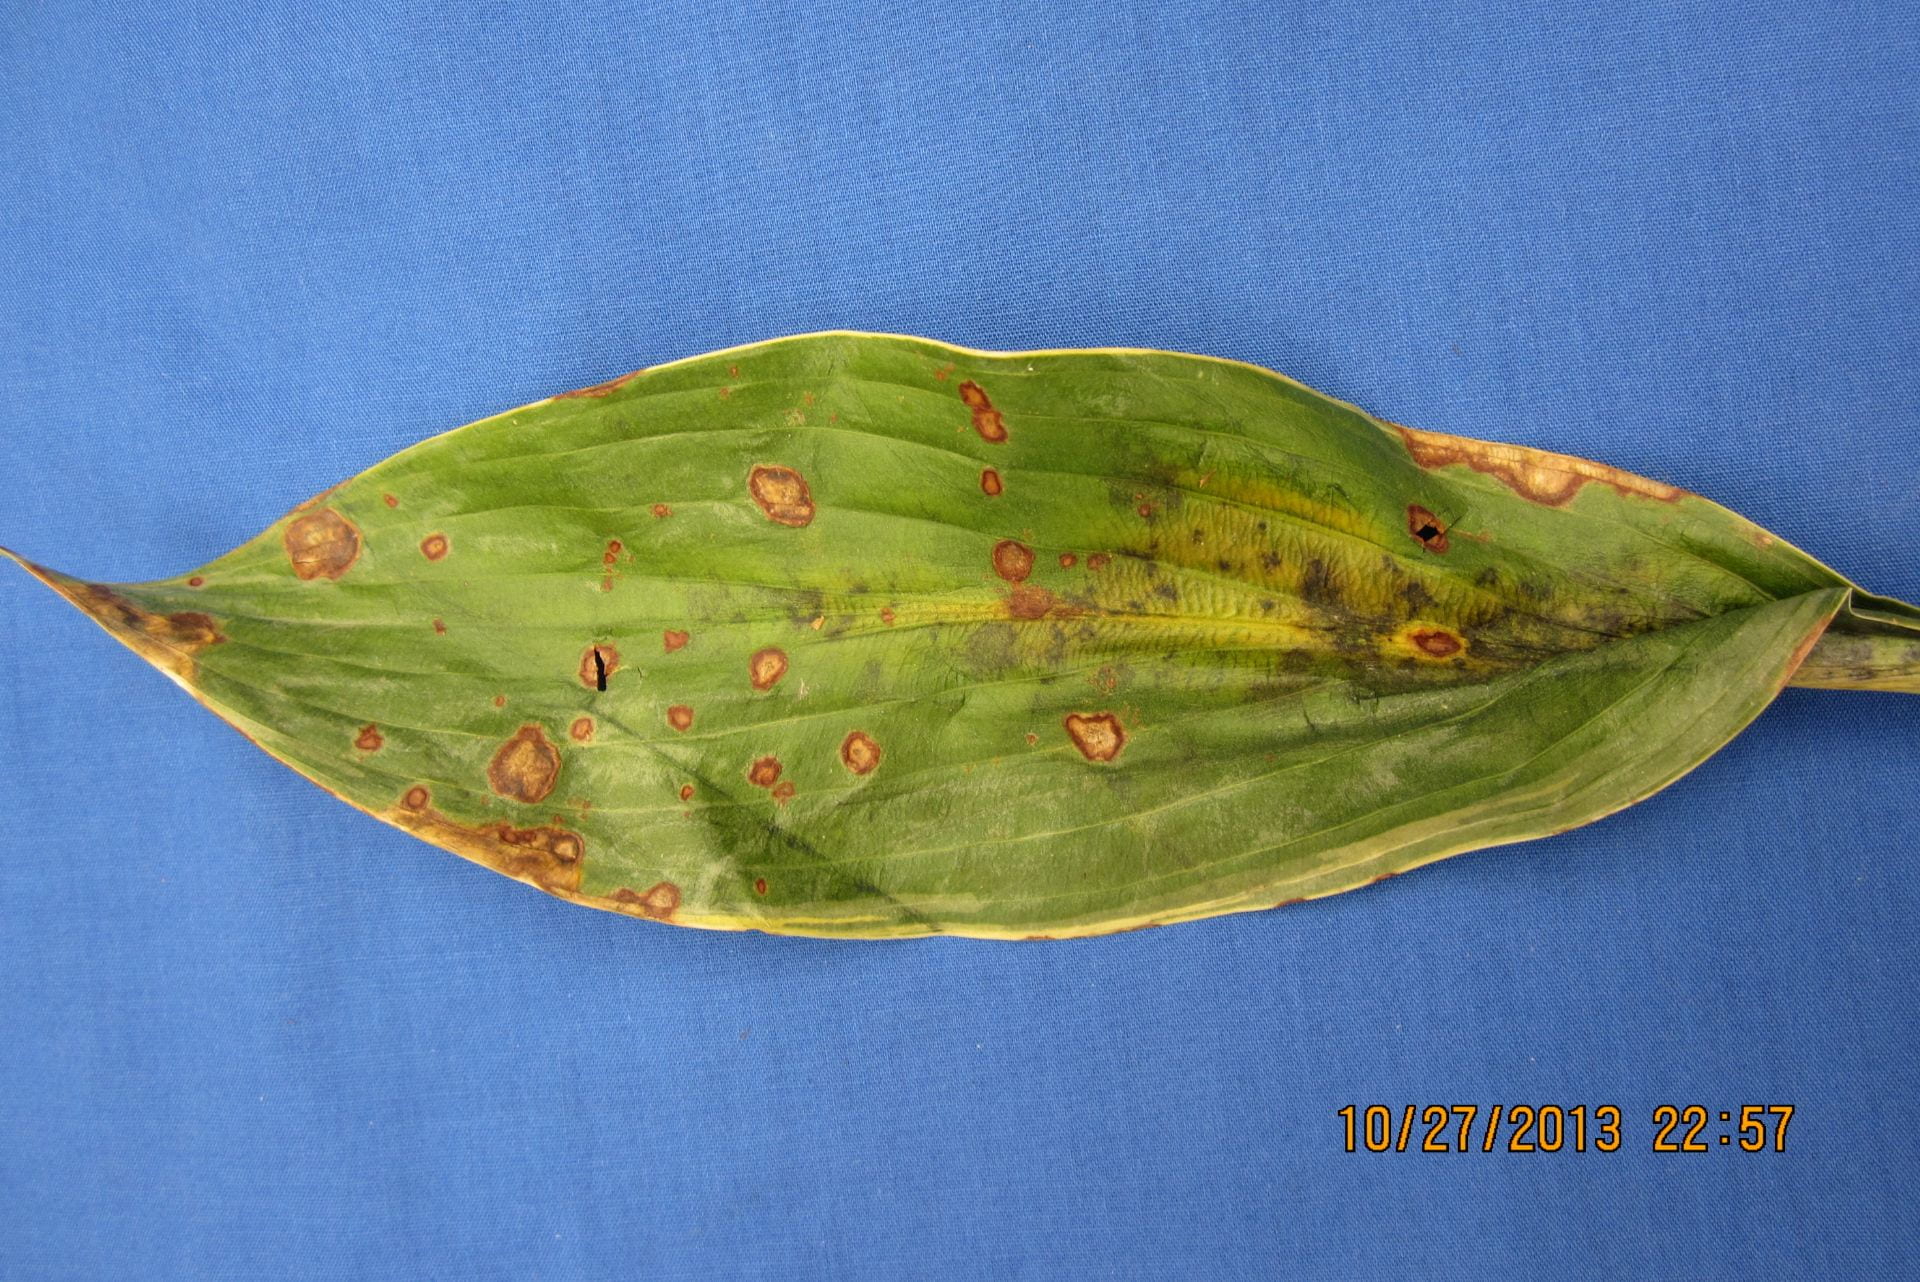
Cercospora leaf spot on hosta:

For many of these common flower-garden leaf spots, removing diseases and dead leaves can help reduce the amount of the fungi lurking over winter to cause disease next year. If composting, don’t put the compost back in the spot where you took the leaves.

Fall Soil Testing

By Jared Hoyle, KSU Turfgrass Research and Extension

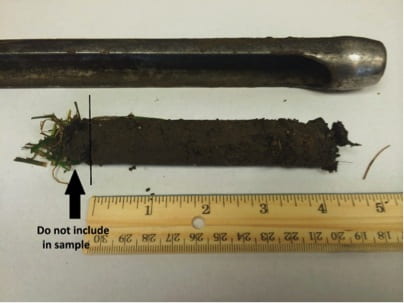
Fall is an important time for cool season turfgrass species because air and soil temperatures are optimal for carbohydrate accumulation and root growth. However, adequate plant nutrition is essential for these processes to operate at maximum efficiency. The importance of using soil test reports to guide fertilization programs cannot be emphasized enough.  The Kansas State Soil Testing Lab (https://www.agronomy.k-state.edu/services/soiltesting/) provides a variety of high quality testing services for turfgrass managers. Testing for pH, phosphorus (P), and potassium (K). A good sampling method is necessary to ensure the soil test results are accurately representing the sampled area. To sample, use a soil probe an extract a 4” to 6” core. The leaf and thatch material should be discarded from the core (see picture). Eight to ten individual cores should be extracted and combined into a single sample for testing. Results are typically sent back within a week of the lab receiving the sample.  Fertilizer recommendations will also be provided by a county agent or K-State horticulturalist.

Of all the possible nutrients, potassium is of particular interest as temperatures continue to decline, because it helps the plant acclimate to cold temperatures. Some soils, especially golf greens, throughout Kansas are low in potassium, leaving turfgrass more susceptible to winter injury. Deficiencies can be addressed by applying K containing fertilizers, such as, potassium chloride (KCl), potassium sulfate (K2SO4), and potassium nitrate (KNO3). Remember, soil tests are a relatively inexpensive tool, but provide a wealth of knowledge.

For more information pertaining to soil testing check out the article below by Dorivar Ruiz Diaz, Nutrient Management Specialist.

Fall Soil Testing: Sample Collection and Submission to the K-State Soil Testing Lab

By: Dorivar Ruiz Diaz

Soil testing provides producers and homeowners important information concerning the fertility status of the soil. This information can help produce better crops and reduce costs by guiding management decisions like the type and amount of fertilizers to apply. If you plan to do your own soil sampling and use the K-State Soil Testing Laboratory, the following outline provides specific information on methods for collecting soil samples and mailing instructions.

  • To take a sample, you will need a probe, auger or spade, and a clean pail. (If you’re also having the soil analyzed for zinc, be sure to use a plastic container to avoid contamination from galvanized buckets or material made of rubber.) You will also need soil sample containers and a soil information sheet from your local Extension office or fertilizer dealer. You can also order soil sample bags online from K-State Research and Extension by clicking here.

  • Draw a map of the sample area on the information sheet and divide your fields into uniform areas. Each area should have the same soil texture, color, slope, and fertilization and cropping history.
  • From each area, take a sample of 20-30 cores or slices for best results. At the very minimum, 12-15 cores should be taken per sample. Mix the cores thoroughly in a clean container and fill your soil sample container. For available nitrogen, chloride, or sulfur tests, a subsoil sample to 24 inches is necessary.
  • Avoid sampling in old fencerows, dead furrows, low spots, feeding areas, or other areas that might give unusual results. If information is desired on these unusual areas, obtain a separate sample from the area.
  • Be sure to label the soil container clearly and record the numbers on the soil container and the information sheet.
  • Air-dry the samples as soon as possible for the available nitrogen test. (Air drying before shipment is recommended, but not essential, for all other tests.) Do not use heat for drying.
  • Fill out the information sheet obtained from your Extension office, or download a sheet.
  • Take the samples to your local Research and Extension office for shipping. Samples may also be sent directly to the lab by placing them in a shipping container. Information sheets should be included with the package. Shipping labels can be printed from the Soil Testing Lab website listed below. Mail the package to:

Soil Testing Laboratory
2308 Throckmorton PSC
1712 Claflin Road
Manhattan, KS 66506-5503

A listing of the types of soil analysis offered, and the costs is available on the Soil Testing Lab web site, http://www.agronomy.k-state.edu/services/soiltesting . You can also contact the lab by email at soiltesting@ksu.edu and by phone at 785-532-7897.

For more information on the proper procedures for the Soil Testing Laboratory, see K-State publication MF-734 at: https://www.bookstore.ksre.k-state.edu/pubs/MF734.pdf. Detailed information on soil sample collection can be found in the accompanying article “The challenge of collecting a representative soil sample” in this eUpdate issue.

Dorivar Ruiz Diaz, Nutrient Management Specialist
ruizdiaz@ksu.edu

New Card Deck teaches IPM Strategies

By: Brooke Garcia

A new resource has been created by the IPM Team at Kansas State University to improve the implementation of IPM strategies in an informative and engaging way. Integrated Pest Management (IPM) is an effective and environmentally friendly approach to pest control. It utilizes a combination of control tactics to prevent or manage pests. This card deck provides a visual representation of cultural, biological, mechanical, and chemical controls used in IPM. The IPM controls are represented through each of the suits, which in turn helps to differentiate and define the IPM principles.

Pictured above, authors Frannie Miller and Brooke Garcia hold the Integrated Pest Management Playing Cards. 

The four control measures are:

  • Biological Control
  • Physical/Mechanical Control
  • Cultural Control
  • Chemical Control 

Biological control is the use of introduced beneficial insects and organisms (natural enemies) to help reduce pest populations. Examples of biological control agents include predators, parasitoids, pathogens and competitors.

Physical and mechanical controls are directly responsible for removing or killing a pest, physically blocking a pest, or making the environment unsuitable for survival. These types of controls are rapid, effective, and have relatively little impact on natural enemies.

Cultural controls focus on altering the environment to make it less suitable for pests. This is used as a prevention strategy to reduce pest establishment, reproduction, dispersal, and the survival of pests. The goal is to maintain healthy plants and animals.

Chemical controls may be considered when other management tactics have not achieved adequate control. Pesticides are used to destroy, repel, or otherwise reduce pest infestations. Examples include herbicides, insecticides, and fungicides. All all readily available and easy to use.

To purchase a card deck, email Brooke Garcia (bmstiffl@ksu.edu) to process your order.

69th Annual Kansas Turfgrass Conference 2019

Save the Date! The 69th Annual Kansas Turfgrass Conference in conjunction with KNLA will be held at the Hilton Garden Inn in Manhattan, Kansas on December 4th, 5th, and 6th, 2019.

This is a 2.5-day conference with an average attendance of over 600, including about 50 exhibitors. Faculty from Kansas State University, invited speakers from other universities and companies, and leaders in the turf industry present informative workshops and seminars.

The 2019 Turfgrass Conference featured speakers:

  • Dr. Matthew Elmore, Rutgers University, is the extension turfgrass
    specialist at Rutgers University. His program at Rutgers focuses on novel strategies to control weeds with fewer pesticide inputs. The program also focuses on significant efforts in developing alternatives to synthetic pesticides and understanding the influence of management.
  • Dr. Josh Friell, Toro Co, joined The Toro Company in 2014 and serves as Senior Principal Research Scientist in the Center for Technology, Research
    & Innovation. As a member of the CTRI team, he is working to address Green Industry challenges through the development and application of innovative technology and solutions.
  • Dr. Roch Gaussoin, University of Nebraska, is a professor in the Agronomy & Horticulture Dept. His research focuses on two areas – investigations in the turfgrass phyto-biome and nutraceutical assessment of amenity grass and specialty crop extracts.
  • Dr. Frank Wong, Cornell University, is a Senior Regulatory Affairs Consultant with Bayer. He works closely with a wide range of industry,
    government, and non-government organizations to help provide solutions to regulatory and legislative challenges for effective disease, insect and weed management.

Download the conference brochure to learn more about the sessions, workshops, and speakers. There are a variety of classes and workshops to help you and your business whether you are new or have been in the turfgrass industry for many years. We can’t wait to see you there.

There are 2 ways to register by November 22nd:

1. Download, print, fill out, and mail the ​​conference brochure with your payment.

2. Go to https://2019turfconference.eventbrite.com to pay with your credit card or scan the barcode in the program on your mobile device.

Wild Violet Control

(By Jared Hoyle, KSU Turfgrass Research and Extension)

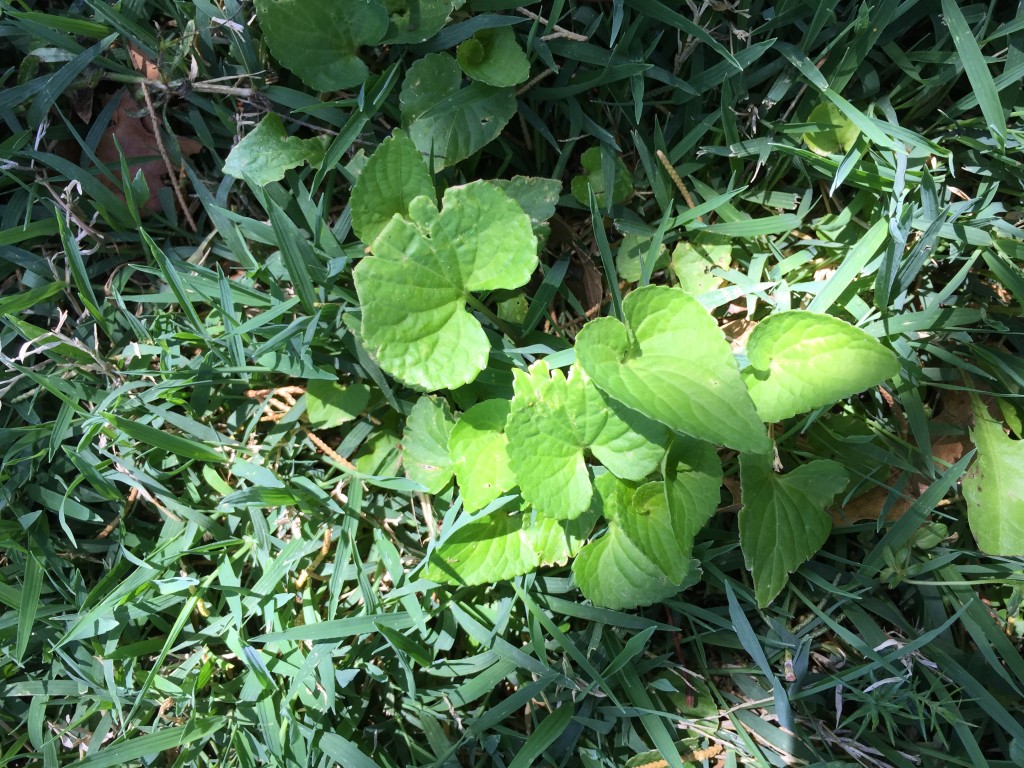
Wild violet or common blue violet is a persistent perennial broadleaf weed commonly found in thin, shaded turfgrass. The plant has heart-shaped, shiny leaves and can spread by rhizomes which makes it a difficult to control weed. The flowers are deep purple or bluish purple. There are many similar species but collectively, turfgrass managers just refer to them as wild violet.

Control has been difficult but can be achieve if you choose the right herbicide and rate. Triclopyr has proven to be effective in cool-season turfgrass and is contained in many different products that are on the market. But the key is to make sure that you apply more than 0.5 lbs ae/A of triclopyr to result in effective control. Not all products that contain triclopyr when applied at the recommended rate will have enough triclopyr for effective control.

At a quick glace through the Turfgrass Weed Control for Professionals manual (Get you copy here – https://www.bookstore.ksre.ksu.edu/Item.aspx?catId=545&pubId=20239) I found a table that shows the rates of triclopyr-delivered by various products at the low and high label rate. From that chart, the following are products that contain ≥ 0.5 lbs ae/A of triclopyr, when applied at the correct rate.

  • Aquasweep
  • Chaser 2 Amine
  • Chaser
  • Crossroad
  • Everett
  • Confront
  • 2-D
  • Tailspin
  • Turflon Ester Ultra
  • Triclopyr 4
  • Trycera

The take home message; To control wild violet in cool-season turfgrass use tricopyr (0.5 lbs ae/A), may different products contain triclopyr, not all products contain enough triclopyr, choose a product that when applied at the correct rate will result in at least 0.5 lbs ae/A of triclopyr.

If you are needing to control wild violet in bermduagrass or zoysiagrass; metsulfuron, sulfentrazon + metsulfuron and flazasulfuron are effective. Repeat applications are often required regardless of the herbicide.

Also, fall applications are best followed by spring applications.

Information from this post if from “Turfgrass Weed Control for Professionals” To get your copy today click here – https://www.bookstore.ksre.ksu.edu/Item.aspx?catId=545&pubId=20239

Always remember to READ THE LABEL for the correct rate, turfgrass tolerance, and specific instructions before application!!!

***Mention of trade names or commercial products in this article is solely for identification purposes and does not imply recommendation or endorsement, nor is criticism implied of similar products not mentioned by Kansas State University.***

Don’t forget to follow me on twitter @KSUTurf.

Also, visit our facebook page www.facebook.com/KSUTurf

White Clover and Yellow Woodsorrel Control

(By Jared Hoyle, KSU Turfgrass Research and Extension)

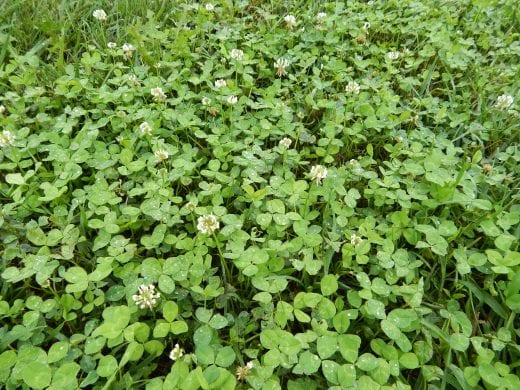
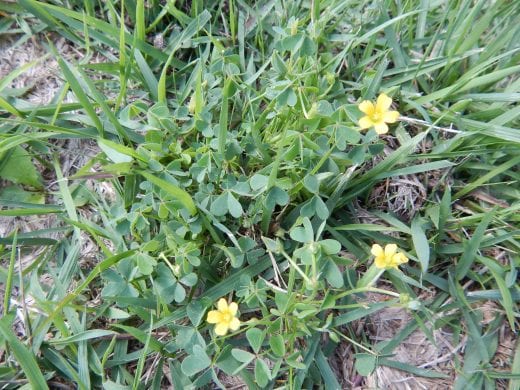
White clover is one of the most common weeds found in cool-season turfgrass.  It can grow in a wide range of environmental conditions and can tolerate many of our cultural practices.   It can also spread by seeds and by stolons. White clover is a perennial broadleaf weed that has trifoliate leaves that may or may not have a wedged-shaped mark. Although it is called white clover the flowers are white but may turn pink as they age.

Because white clover can fix its own nitrogen some see it as an important species to add beneficial soil nitrogen.  There had been some work done to explore using both clover and turfgrass in a mixture in their lawns.  Others may consider it as a weed.

If you consider it a weed, fall is a great time to try and control it.  But did you know 2,4-D, glyphosate and sulfentrazone do not control white clover?

For best control herbicides that contain clopyralid, dicamba, fluroxypyr, florasulam, metsulfruon, and/or quinclorac (also controls crabgrass) provide the best control when applied in the fall.

Yellow woodsorrel (Oxalis stricta) is a perennial or annual broadleaf weed that has clover-like trifoliate heart shaped leaves.  Yellow woodsorrel most commonly spreads by seeds that are contained in a capsule that when it explodes ejects the seeds.  It can be confused with clover but has yellow flowers with five petals.  You can find this weed in a wide range of soil conditions and can commonly be confused with black medic, birdsfoot trefoil and white clover. A similar species is creeping woodsorrel but it is most commonly found in landscape plantings while yellow woodsorrel is most commonly found in turf.

To control oxalis, herbicides that contain triclopyr and fluroxypyr are very effective.

Herbicides that contain fluroxypyr include;

  • Battleship III
  • Escalade 2
  • Momentum FX2
  • Tailspin
  • Vista XRT

Herbicides that contain triclopyr include;

  • 2-D
  • 4-Speed XT
  • Battleship III
  • Chaser
  • Chaser 2 amine
  • Confront
  • Cool Power
  • Eliminate
  • Horsepower
  • Momentum  FX2
  • Tailspin
  • Three-Way Ester II
  • Turflon Ester Ultra
  • Turflon II amine
  • Triclopyr 4
  • TZONE

Always remember a healthy turfgrass stand through proper maintenance is the best weed control and can help minimize clover and yellow woodsorrel in you turfgrass.

Information from this post if from “Turfgrass Weed Control for Professionals” To get your copy today click here – https://www.bookstore.ksre.ksu.edu/Item.aspx?catId=545&pubId=20239

Always remember to READ THE LABEL for the correct rate, turfgrass tolerance, and specific instructions before application!!!

***Mention of trade names or commercial products in this article is solely for identification purposes and does not imply recommendation or endorsement, nor is criticism implied of similar products not mentioned by Kansas State University.***

Don’t forget to follow me on twitter @KSUTurf.

Also, visit our facebook page www.facebook.com/KSUTurf

It is that time of year to start working on your cool-season lawn!


(By Jared Hoyle, KSU Turfgrass Research and Extension)

It is that time of year again to start working on your cool-season lawn.  To try and cover it all, I have listed a couple posts from the past that can help you get that lawn into shape.  I also have added a list of publications. Enjoy!

Time to fertilize cool-season turfgrass

https://blogs.k-state.edu/turf/time-to-fertilize-cool-season-turfgrass/ 

 Monthly calendar for cool-season lawns for the rest of the year

https://blogs.k-state.edu/turf/monthly-calendar-for-cool-season-lawns-for-the-rest-of-2017/

 Power raking or core aeration – That is the question!

https://blogs.k-state.edu/turf/power-raking-or-core-aeration-that-is-the-question/

 The art of knowing your seed label

https://blogs.k-state.edu/turf/the-art-of-knowing-your-seed-label/

 For seeding success, pay attention to other crop on the seed label

https://blogs.k-state.edu/turf/for-seeding-success-pay-attention-to-other-crop-on-the-seed-label/


Publications

Lawn Fertilizing Guide – https://www.bookstore.ksre.ksu.edu/Item.aspx?catId=545&pubId=10639

Recycling your grass clippings  – https://www.bookstore.ksre.ksu.edu/Item.aspx?catId=545&pubId=701

Mowing your lawn – https://www.bookstore.ksre.ksu.edu/Item.aspx?catId=545&pubId=615

 Tall Fescue Lawns – https://www.bookstore.ksre.ksu.edu/Item.aspx?catId=545&pubId=1460

Watering New Lawns – https://www.bookstore.ksre.ksu.edu/Item.aspx?catId=545&pubId=1337

 Planting a Home Lawn – https://www.bookstore.ksre.ksu.edu/Item.aspx?catId=545&pubId=595

 Aerating Your Lawn – https://www.bookstore.ksre.ksu.edu/Item.aspx?catId=545&pubId=713

 Kentucky Bluegrass Lawns – https://www.bookstore.ksre.ksu.edu/Item.aspx?catId=545&pubId=713


Check out the KSRE Bookstore for more publications – https://www.bookstore.ksre.ksu.edu/Category.aspx?id=528&catId=545

Fall Turfgrass Recommendations and Tips

By Ward Upham

Fall Lawn Seeding Tips

The keys to successful lawn seeding are proper rates, even dispersal, good seed to soil contact, and proper watering. Evenness is best achieved by carefully calibrating the seeder or by adjusting the seeder to a low setting and making several passes to ensure even distribution. Seeding a little on the heavy side with close overlapping is better than missing areas altogether, especially for the bunch-type tall fescue, which does not spread.   Multiple seeder passes in opposite directions should help avoid this problem.

A more serious error in seeding is using the improper rate. For tall fescue, aim for 6 to 8 pounds of seed per 1,000 square feet for new areas and about half as much for overseeding or seeding areas in the shade.

Kentucky bluegrass is much smaller seed so less is needed for establishment.  Use 2 to 3 pounds of seed per 1,000 square feet for a new lawn and half that for overseeding or shady areas.

Using too much seed results in a lawn more prone to disease and damage from stress. The best way to avoid such a mistake is to determine the square footage of the yard first, and then calculate the amount of seed. Using too little seed can also be detrimental and result in clumpy turf that is not as visually pleasing.

Establishing good seed to soil contact is essential for good germination rates. Slit seeders achieve good contact at the time of seeding by dropping seed directly behind the blade that slices a furrow into the soil. Packing wheels then follow to close the furrow. The same result can be accomplished by using a verticut before broadcasting the seed, and then verticutting a second time.

Core aerators can also be used to seed grass. Go over an area at least three times in different directions, and then broadcast the seed. Germination will occur in the aeration holes. Because those holes stay moister than a traditional seedbed, this method requires less watering.

If the soil that has been worked by a rototiller, firm the soil with a roller or lawn tractor and  use light hand raking to mix the seed into the soil. A leaf rake often works better than a garden rake because it mixes seed more shallowly.

Water newly planted areas lightly, but often. Keep soil constantly moist but not waterlogged.  During hot days, a new lawn may need to be watered three times a day. If watered less, germination will be slowed. Cool, calm days may require watering only every couple of days. As the grass plants come up, gradually decrease watering to once a week if there is no rain. Let the plants tell you when to water. If you can push the blades down and they don’t spring back up quickly, the lawn needs water. Once seed sprouts, try to minimize traffic (foot, mower, dog, etc.) seeded areas receive until the seedlings are a little more robust and ready to be mowed. Begin mowing once seedlings reach 3 to 4 inches tall.

Overseeding a Lawn

Tall fescue lawns that have become thin over the summer can be thickened up by overseeding during September. Start by mowing the grass short (1 to 1.5 inches) and removing the clippings. This will make it easier to achieve good seed-soil contact and increase the amount of light that will reach the young seedlings.

Good seed-soil contact is vital if the overseeding is to be successful. Excess thatch can prevent seed from reaching the soil and germinating. Normally we want 1/4 inch of thatch or less when overseeding. If the thatch layer is 3/4 inch or more, it is usually easiest to use a sod cutter to remove it and start over with a new lawn. A power rake can be used to reduce a thatch layer that is less than 3/4 inch but more than a quarter inch.

Once thatch is under control, the soil should be prepared for the seed. This can be done in various ways.   For small spots, a hand rake can be used to roughen up the soil before the seed is applied,

A verticut machine has solid vertical blades that can be set to cut furrows in the soil. It is best to go two different directions with the machine. A slit seeder is a verticut machine with a seed hopper added so the soil prep and seeding operation are combined. Another option is to use a core aerator.

The core aerator will punch holes in the soil and deposit the soil cores on the surface of the ground. Each hole produces an excellent environment for seed germination and growth. Make three to four passes with the core aerator to ensure enough holes for the seed. Using a core aerator has the additional benefit of reducing the amount of watering needed to get the seed germinated and growing. Aeration also increases the water infiltration rate, decreases compaction, and increases the amount of oxygen in the soil.

Of the three methods, I prefer the slit seeder for obtaining good seed/soil contact.  However, if watering is difficult, core aeration may be a better option.  Regardless of method used, fertilizer should  be applied at the rate suggested by a soil test, or a starter fertilizer should be used at the rate suggested on the bag.

Give Cool-Season Grasses a Boost

September is almost here and that means it is prime time to fertilize your tall fescue or Kentucky bluegrass lawns. If you could only fertilize your cool-season grasses once per year, this would be the best time to do it.

These grasses are entering their fall growth cycle as days shorten and temperatures moderate (especially at night). Cool-season grasses naturally thicken up in the fall by tillering (forming new shoots at the base of existing plants) and, for bluegrass, spreading by underground stems called rhizomes. Consequently, September is the most important time to fertilize these grasses.

Apply 1 to 1.5 pounds of actual nitrogen per 1,000 square feet. The settings recommended on lawn fertilizer bags usually result in about 1 pound of nitrogen per 1,000 square feet. We recommend a quick-release source of nitrogen at this time. Most fertilizers sold in garden centers and department stores contain either quick-release nitrogen or a mixture of quick- and slow-release. Usually only lawn fertilizers recommended for summer use contain slow-release nitrogen. Any of the others should be quick-release.

The second most important fertilization of cool-season grasses also occurs during the fall. A November fertilizer application will help the grass green up earlier next spring and provide the nutrients needed until summer. It also should be quick-release applied at the rate of 1-pound actual nitrogen per 1,000 square feet.

Power Raking and Core-Aeration

September is the optimum time to power rake or core-aerate tall fescue and Kentucky bluegrass lawns. These grasses should be coming out of their summer doldrums and beginning to grow more vigorously. This is a good time to consider what we are trying to accomplish with these practices.

Power raking is primarily a thatch control operation. It can be excessively damaging to the turf if not done carefully. For lawns with one-half inch of thatch or less, I don’t recommend power raking but rather core aeration. For those who are unsure what thatch is, it is a springy layer of light-brown organic matter that resembles peat moss and is located above the soil but below the grass foliage. Power raking pulls up an incredible amount of material that then must be dealt with by composting or discarding.

Core-aeration is a much better practice for most lawns. By removing cores of soil, core-aeration relieves compaction, hastens thatch decomposition, and improves water, nutrient, and oxygen movement into the soil profile. This operation should be performed when the soil is just moist enough so that it crumbles easily when worked between the fingers. Enough passes should be made so that the holes are spaced about 2 to 3 inches apart. Ideally, the holes should penetrate 2.5 to 3 inches deep. The cores can be left on the lawn to fall apart naturally (a process that usually takes two or three weeks, depending on soil-type), or they can be broken up with a power rake set just low enough to nick the cores, and then dragged with a section of chain-link fence or a steel doormat. The intermingling of soil and thatch is beneficial to the lawn.

To view these posts in the Horticulture e-Newsletter, visit: http://www.ksuhortnewsletter.org/
Keep an eye out for powdery mildew in your landscape…

By Christian Webb

As summer starts winding down, you may begin to notice some of your bedding plants developing a white powdery coat on the upper surface of their leaves. No, this is not your plants putting on a winter coat for the cool autumn nights. It’s actually caused by the infection of a fungus on the surface of your plants leaves called powdery mildew.

Powdery mildew can be commonly found developing on many types of landscape plants during the late summer. On most plants, this disease will develop on the lower leaves and move up through the canopy. The typically symptoms of the infection will appear as a white to grey dusty growth on the upper surface of the leaves. In severe cases, leave may appear distorted and the cause defoliation.

Pictured to the left: Powdery mildew on Ox-eye Daisy (Heliopsis helianthoides)

To develop, the fungus requires high relative humidity and temperatures around 70⁰F. Many woody and herbaceous ornamentals may be affected by powdery mildew. As a general rule, the powdery mildew on one host will only affect hosts in that genus. For example, the fungi that you will find on oaks trees will only affect oaks and the powdery mildew on grapes will only affect grapes.

If you are looking to control powdery mildew in your landscape, there are a few ways to protect your plants. For annuals, increasing the spacing between plants will increase airflow through the canopy create more unfavorable conditions for powdery mildew develop. Along with altering the plant canopy, consider planting resistant hosts. Replanting the same susceptible hosts will likely result in a reinfection.

Pictured above on left: Powdery mildew on Zinnia (Zinnia elegans). Right: A microscopic image of the powdery mildew spores on the surface of a Zinnia leaf.

There are labeled fungicides for the control of powdery mildew. But you consider apply any product, be sure that your infection is caused by powdery mildew. Downy mildews looks similar to powdery mildew, but are caused by a different type of organism and may not be controlled by products labeled for powdery mildew. Powdery mildew is typically found on the upper surface of the leaf, while downy mildew is associated with the underside of the leaf. For recommended products for the control of powdery mildew, please consult the following factsheet: Link.

For further assistant in identifying powdery mildew, contact your local extension office.

To find your local extension office, the list of Kansas extension offices can be found here.

Further discussion of powdery mildew on woody ornamentals can be found at this Link on pgs. 48-50

Reference:

https://www.fs.fed.us/rm/pubs/rmrs_gtr335.pdf

https://hnr.k-state.edu/extension/info-center/common-pest-problems/common-pest-problem-new/Peony%20Powdery%20Mildew.pdf

Powdery Mildew Resistant Peony Varieties

By Kenneth Dodson

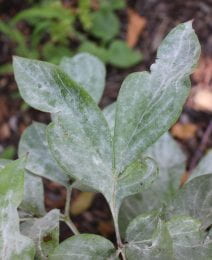
Powdery Mildew is a common fungal disease that can appear on a wide range of plants. This year has seen a high level of powdery mildew on peonies, leaving bushes looking snow-covered or dusty. The best way to avoid dusty looking peony bushes is to use resistant plants. A look through the peony demonstration planting at the K-State Gardens showed a wide range of disease susceptibility to powdery mildew.

Pictured above: Powdery mildew on Peony (Paeonia spp.) 

Here are a few peony varieties that showed good resistance to powdery mildew. In terms of Herbaceous Peonies: Red Charm, Lillian Wild, and Pink Luau were the best options, followed by Madame de Verneville, and Pink Hawaiian Coral. If you’re looking for Tree Peony varieties, there are several that show strong resistance to powdery mildew: Rockii, Joseph Rock, Kamata Nishiki, Shima Daijin, Hakuo Jishi, Kinkaku, and Kokamon all looked good. Lastly, the Itoh or intersectional peonies Pea Green, Yellow Charm, and Morning Lilac exhibited good disease control against powdery mildew.

Just fyi, the major distinction between the three growing types is the in the way they overwinter. Tree peonies will have a woody stem that stays above ground, while herbaceous peony stems will die back to

the ground every year. Itoh varieties have herbaceous stems as well, and will die above ground, but Itoh peonies typically have the same flowering types as tree peonies.

Ash Leaf Spot on Green Ash Trees in Kansas

By: Christian Webb

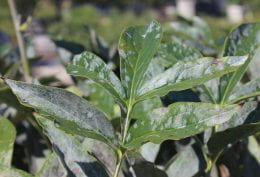
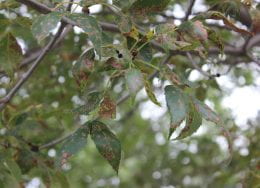
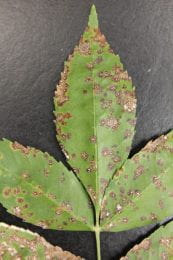
You may notice brown spots beginning to develop on the lower foliage of green ash trees. Symptoms of Ash leaf spot include irregularly shaped brown spots on the leaf that merge to form large patches of brown spots. In severe cases, the tree may defoliate four to six weeks earlier than normal causing the tree to appear bare long before other trees lose their leaves.

Pictured above on the left: A branch of lower leaves on an Ash tree affected by leaf spot. Right: Brown leaf spots with white speckling on the surface of the upper leaf caused by Ash leaf spot

The fungi that cause Ash leaf spot (Mycosphaerella spp.) survive in the leaf litter underneath the ash tree. In the early summer, the fungi in the leaf litter will begin producing spores capable of infecting leaves. Initial infections will appear on the lower leaves, and then quickly spread throughout the tree. By late fall, the fungus will produce structures able to survive the harsh conditions of winter and be ready to infect new leaves during the following summer.

The severity of the disease will depend on the conditions present during the period of leaf infection. Typically, the disease will become apparent in the late summer and early fall, which may not cause significant cosmetic damage. But in summers with abnormally wet conditions, the disease may develop earlier than normal and cause premature defoliation. Multiple years of these conditions may lead to weak trees with reduced vigor prone to branch dieback.

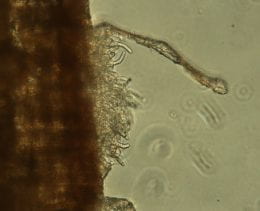
Pictured above: A microscopic image of fungal structure emerging from the surface of the leaf.

There are few recommended methods to protect ash plantings from Ash leaf spot. Since the disease will survive in the residue around the trees, raking up fallen leaves will reduce the amount of disease carried over to the next growing season. No ash trees resistant to leaf spot have been reported although they may vary in susceptibility.

Reference:

More information on Ash leaf spot may be found at the following Link on page 46-47. https://www.fs.fed.us/rm/pubs/rmrs_gtr335.pdf