Kansas State University

search

K-State Turf and Landscape Blog

Rethinking Zoysiagrass for Home Lawns

Kansas State University teamed with Texas A&M to develop a new cultivar of zoysiagrass called Innovation, that’s suitable for lawns and golf courses. Pictured is Ted Wilbur (left), owner of Sod Shop in Wichita, Kansas and Jack Fry, horticulture professor at Kansas State University. Wilbur was the first to grow Innovation commercially in Kansas.

K-State, Texas A&M develop new cold-hardy variety for home landscapes and golf courses

OLATHE, Kan. – Who doesn’t love the look and feel of a soft, green carpet of grass underfoot? Even better if it’s resistant to pests and requires less fertilizer than other grasses. A Kansas State University professor believes that zoysiagrass can fit the bill for home landscapes – even in Kansas and surrounding states.

Zoysiagrass is well known as a warm-season grass commonly grown across southern tier states for its dense, weed-resistant and slow-growing nature (think less mowing), plus it requires about half the water needed for cool-season grasses typically grown in the nation’s midsection.

Those who choose to grow zoysia should be aware, however, that as a warm-season grass, it goes dormant and turns brown in mid-October and may not green up again until late April.

“The determining factor for whether any warm-season grass that can be used here is winter survival,” said Kansas State University horticulture professor Jack Fry.

Kansas and other states across the middle of the country are in what’s called a transition zone, where both warm- and cool-season grasses can grow but weather extremes can prove challenging and sometimes injure or kill the grass. In order to improve on a longtime favorite zoysia called Meyer, Fry and his K-State colleagues teamed with Texas A&M Agrilife researchers to develop a new zoysia cultivar.

Their aim was to develop a cultivar that is as cold-tolerant as Meyer for areas in the transition zone, but also to offer improved characteristics, such as finer leaf blades and even better density which blocks out weeds.

The K-State team worked with Ambika Chandra, associate professor at Texas A&M, to develop a new hybrid that was ultimately named Innovation. The new hybrid can withstand the cold that can sometimes blanket the central U.S. as well as Meyer does, but also exhibits better quality, meaning it has a darker green color, finer leaf blades, better density and good uniformity.

Zoysiagrass is already widely used on golf course tees and fairways in Kansas and across the transition zone, but less so on home lawns, Fry said. When drought water restrictions come about, however, it’s a good choice for home lawns.

Zoysia, and especially newer cultivars like Innovation, also require less fertilizer or pest treatments to stay healthy than typical cool-season grasses such as tall fescue or Kentucky bluegrass.

To develop the new cultivar, the researchers used traditional plant breeding, crossing cold-hardy types with other southern-adapted types that offered high density and finer-textured leaf blades.

That density results in almost no herbicides being needed during the growing season, Fry said.

To get from initial crosses – about 1,500 in all – to the final product took about 13 years, Fry said. Along the way from those initial crosses, 35 looked promising, so were planted in 5-foot by 5-foot plots in Kansas and Texas and evaluated by the researchers, who then narrowed the list to seven.

Those top seven hybrids were tested at additional sites across the transition zone in Missouri, Oklahoma, North Carolina, Tennessee and Virginia. The result is Innovation, which was released for commercial growth and sales in 2015. It is currently available via licensed distributors through a company called Sod Solutions, which has sub-licensed production to 15 sod producers in eight states.

What’s next? A new phase of the K-State-Texas A&M research is under way which aims to identify grasses that have superior resistance to a disease called Large Patch, and there may even be types that are promising for use on golf greens, too, Fry said.

Post featured by: https://www.ksre.k-state.edu/news/stories/2019/05/zoysia-for-home-lawns.html

——-

More information about zoysiagrass is available at

https://www.bookstore.ksre.ksu.edu/pubs/mf683.pdf

or in a Clemson University fact sheet, https://hgic.clemson.edu/factsheet/zoysiagrass/
A Day for Daylilies

Dividing Daylilies

By: Brooke Garcia

My backyard is currently a construction zone, and I have spent the last month dividing iris and daylily plants in efforts to save them from being ran over by the Bobcat (and no I’m not talking about the animal). With our future garage being built, we have had to move hundreds of iris and daylily plants into a new garden bed. Being a horticulturist by trade, I couldn’t see these plants go to waste.
I know it isn’t the ideal time to be moving these plants around, as several of them have recently bloomed. Generally, I’d suggest to wait to divide these plants until they have completed their bloom cycle (late summer/early fall). You can also divide them in the early spring prior to blooming, but this could impact their blooms later in the season. The steps to this process are relatively simple, but you should expect your hands to get a little dirty. It can also be a little time-consuming.

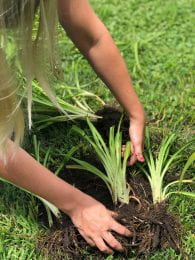
Step 1: Dig up a clump of daylilies with a shovel or hand trowel. I have found the process moves more quickly when you grab a shovel and do larger sections. In our case, we had hundreds to move…. so the bigger the clumps, the better!


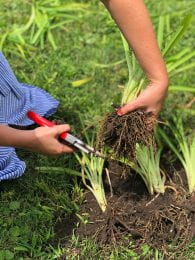
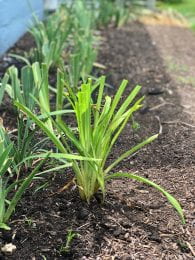
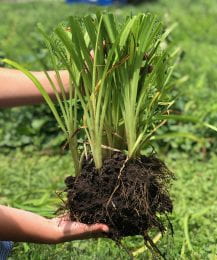
Step 2: Trim the daylily leaves and flowers to a height of 8-12 inches. Pictured above on the right, you will notice the final clump cut back to approximately 12 inches.

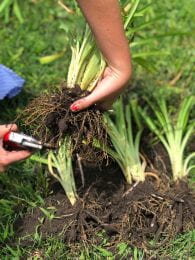
Step 3: Separate the clump of daylilies into smaller clumps. My preference is to keep the clumps in groups of 2-3 plantings to keep the transplant looking full. Looking at the pictures below, the bottom left shows a single plant divided from the clump of daylilies. Pictured on the bottom right, I kept two plants clumped together for one single planting.


Step 4: Loosen the soil away from the roots of the recently divided plants. Next, trim the roots of your plants to stimulate new root growth. Only trim a small amount of the roots, as this will be enough to stimulate new healthy growth. (See pictures below)

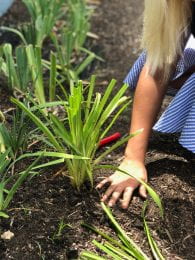
Step 5: You’re ready to plant your newly divided daylilies! Be sure that you choose a sunny location in your garden with well-drained soil. Generally, I dig a hole 2-3x the size of the root ball of my plant. Once you place your newly divided plant into its newly dug home, add additional compost or garden soil into the hole. Gently pack the soil around the new planting. Be mindful to keep the crown of the plant above the soil line.

Step 6: Don’t forget to water your freshly divided daylily plants. If you plan to transplant more, space the plantings 12-18 inches apart to give them room to grow. Daylilies can begin to get crowded after 4-5 years.

Daylily Leaf Streak

By: Judy O’Mara

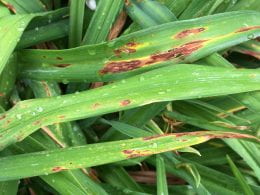
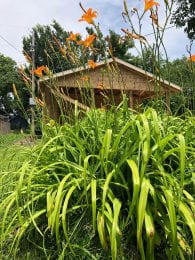
Daylilies are a great fit for Kansas. There are many varieties that grow well here. I particularly like browsing the photo gallery at the Flint Hills Daylily Society chapter (https://www.flinthillsdaylily.org/gallery) for my favorite ones. They are mostly problem free but I did recently see some daylily streak (Aureobasidium microstictum) on a recent walk. It isn’t that common in Kansas, but wet conditions this spring likely the triggered the disease.

Daylily leaf streak starts as long yellow streaks that turn a reddish brown. Heavily infected leaves scorch back and die early.

The disease is favored by moderate temperatures and wet conditions. Daylily streak can spread by splashing water droplets. Although you can’t manage the rain, you can time irrigation so that your plants are watered in the morning. This allows leaves to dry out quickly and reduce conditions that favor disease development. A mature daylily planting can be crowded leading to poor air circulation and prolonged periods of leaf wetness. Good plant spacing will improve air flow and help to dry out plants quickly. The disease can also be moved on tools, so avoid working around wet plants

Inspect plants when purchasing them and always start with healthy, disease-free plants (ie no spots on the leaves). If just one plant in the landscape is showing symptoms, you might be able to stay ahead of the disease by picking off and dispose infected leaves. Daylily leaf streak will overwinter in the leaf litter, so cleaning up the flower bed will help to reduce the amount of disease that is carried over to the next growing season. If daylily leaf streak shows up annually, it might be worth isolating the problem daylily from the rest of the planting.

The best strategy for managing day lily leaf streak…is through the use of resistant cultivars. Disease susceptibility varies and lists of resistant varieties are not easily available. A few varieties reported by Clemson University are: Betty Bennet, Edna Spalding, Ella Pettigrew, Globe Trotter, Nancy Hicks, Pink Superior, Ron Rousseau, Sudie, Tropical Tones, Upper Room, and Winsome Lady. (https://hgic.clemson.edu/factsheet/daylily-diseases-insect-pests/)

Turf disease update

Megan Kennelly, KSU Plant Pathology

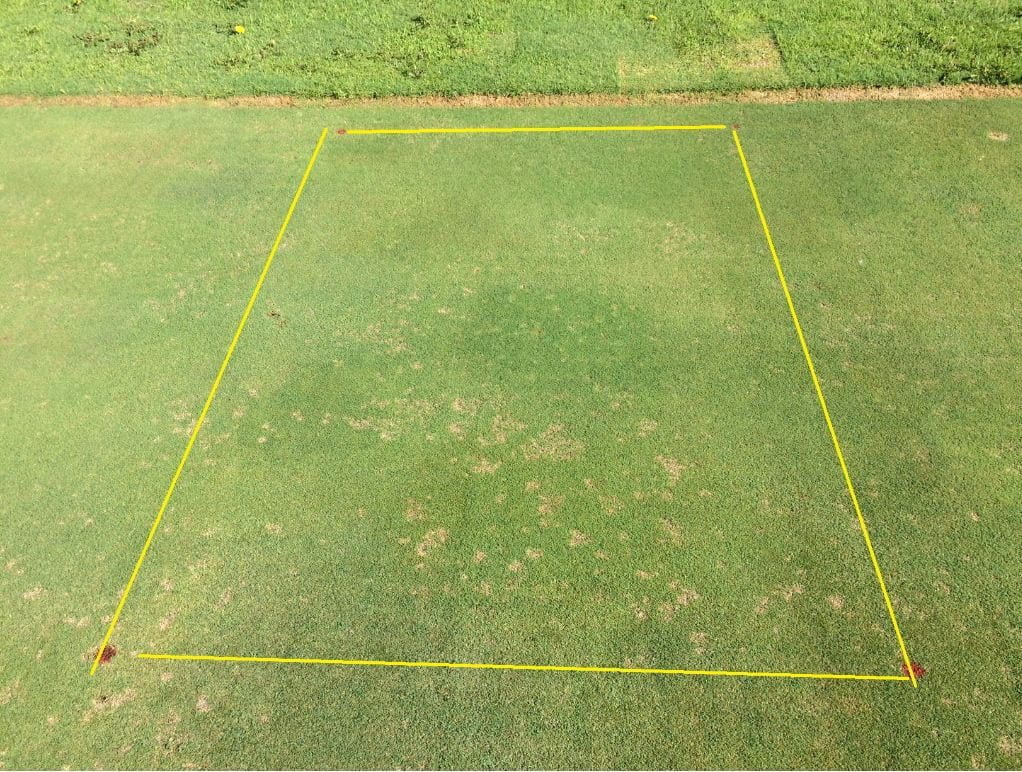
Moisture and humidity are causing continued disease activity in both ornamentals and turf.

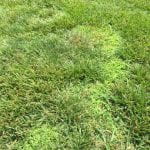
Below is some dollar spot activity in untreated controls in a fungicide study. As you can sort of tell from the photo, the disease has gotten to the point where the infection centers are not just off color but are also sunken/pitted.

If you are struggling with dollar spot control, consider your fertility regime. Low N can make the turf more susceptible, but high N comes with its own issues. Check your nozzles and spray equipment to ensure good coverage. Be sure to rotate among different modes of action. For more details check the dollar spot section starting on page 14 of THIS DOCUMENT.


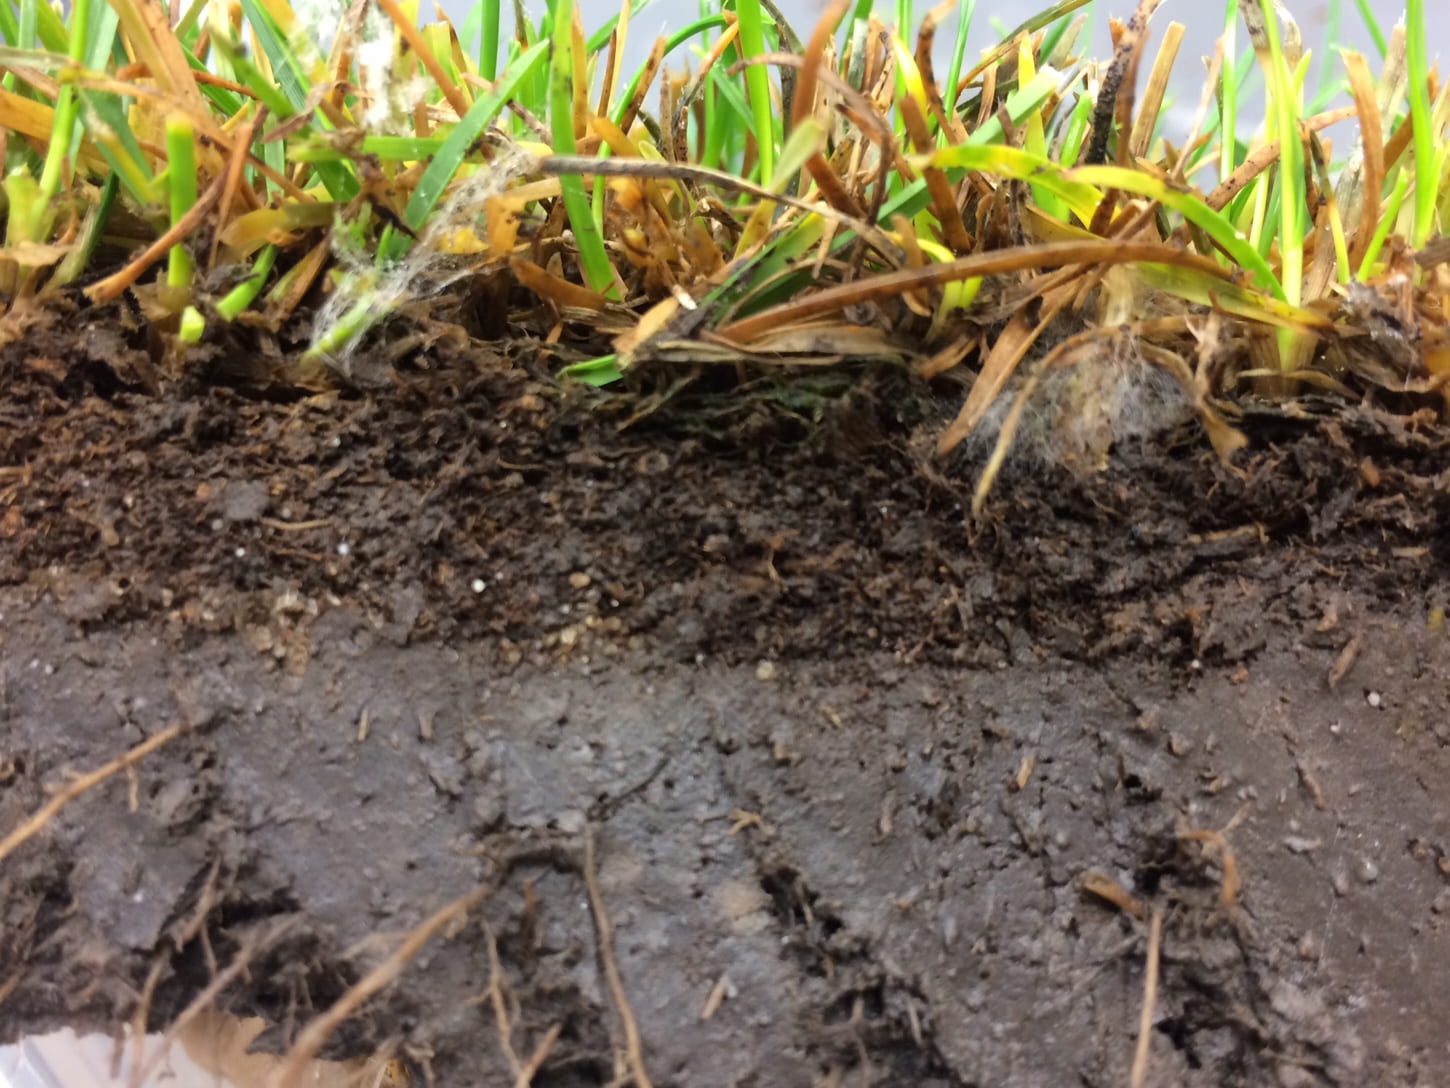
We are getting some heat and humidity, and brown patch is becoming more active. Typically we think about brown patch as affecting tall fescue, perennial ryegrass, and our putting greens. However, this disease can affect bluegrass, too. This photo shows a sample from a Kentucky bluegrass fairway. You can see the fungal mycelium. With all the moisture, foliar Pythium also came to mind as a possibility, but in the microscope it was clearly the brown patch pathogen.

In the photo below, you can also discern that this is a heavy clay soil – see how shiny and glossy it looks. And, there is a thatch layer starting to build up, which can lead to its own set of problems. This site already has an aerification plan in place for fall.


The final disease I want to mention is Pythium root rot in putting greens.

Saturated soils alone can cause major decline in root systems. Unfortunately those same conditions can trigger Pythium root rot. The photos below illustrate typical symptoms I’ve seen recently, including several already this week:

When you pull up a turf core, the root system does not cling together well, and the whole core kind of lacks structure. If you wash them off, they are brown and mushy.

Canopy is thinned out and yellowing:

In the microscope the roots are dark, sloughing outer tissues, lacking root hairs, and have Pythium oospores present. (The physiological decline from wet soils alone can also cause browning, lack of root hairs, etc)

Here are a couple of resources about this disease:

https://turfpath.missouri.edu/profile/pythium_root_rot/index.cfm

and:

https://www.turffiles.ncsu.edu/diseases-in-turf/pythium-root-rot-in-turf/

National Pollinator Week!

Did you know it was National Pollinator Week?
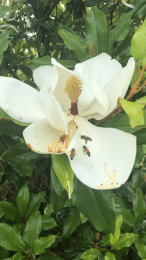
In honor of National Pollinator Week, I wanted to share a video of bees pollinating on a Southern Magnolia tree that was located at the John C. Pair Horticultural Center in Haysville, KS. They caught my eye, as they were very “busy bees.”

Click on the link below to watch the video:

Video of Pollinating Bees

In addition to my short video, there is a wonderful video called “The Beauty of Pollination – Moving Art”. It is worthwhile to watch. Truly incredible!

For more information about National Pollinator Week, you can visit the official website. It’s not too late to celebrate. You can always plant a pollinator plant or take time for a garden walk to appreciate the pollinators in your garden.

Publication: Annual White Grubs in Turf

Dead spots in an otherwise healthy lawn may be a sign of white grubs. Grub damage varies from year to year and may be severe. The annual white grub is the most common grub pest of turf- grass in Kansas. It is the larval stage of the masked chafer beetle, Cyclocephala spp., which completes its life cycle in a single year. Six masked chafer species have been recorded in Kansas, all with similar developmental cycles: Cyclocephala lurida (southern masked chafer), C. borealis (northern masked chafer), C. pasadenae(southwestern masked chafer), C. hirta (western masked chafer), and Cyclocephala longula and C. melanocephala, which do not have common names.

To read this publication, visit this link to read it through the K-State Research and Extension bookstore.

Hosta…one of my favorite plants.

By: Judy O’Mara

Hosta is a standard go to plant for every shade garden. They are very hardy and have few problems and you can plunk them in the ground and come back 20 years later and they will still be going strong. They really do have few problems…and yet, they aren’t problem free. Here are two things that I’ve seen on hosta this spring.

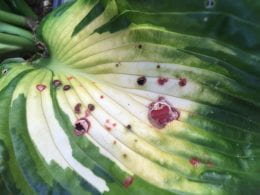
Anthracnose on hosta will show up as brown scattered spots. The centers sometimes drop out creating a shot hole appearance. Like all fungal diseases, it has been favored by the wet conditions this spring.

The impact of anthracnose on the plant is cosmetic. The disease is fairly easily cleaned up by picking off the infected leaves.

Aside from rainy weather, prolonged leaf wetness from watering late in the day can also promote conditions that favor the disease. Switching to morning irrigation will allow the leaves to dry out quickly, which in turn reduces disease activity.

A bit more serious is Hosta virus X (aka HVX). This disease is sap transmitted. If you divide an infected plant and then use the same tools to divide a healthy plant, the virus can be spread to the new plant. Virus diseases tend to weaken the plant, so infected plants may end up smaller and less vigorous than healthy plants nearby. The best way to avoid the problem is to inspect hosta plants when purchasing them. If you discover a plant with Hosta virus X in your yard dig it up and discard it.

Hosta virus X is tricky to identify based on symptoms because it can look similar to normal hosta variegation. Confirmation of the disease is done in a lab with a serological test (ELISA). However… one symptom that I have seen consistently associated with Hosta virus X is called ‘ink vein bleeding’. This is where the veins of the leaf have the opposite color and appear to be bleeding like an ink blot.

                   Healthy Hosta                                       Hosta with HVX

Iowa State University has a great publication on Hosta Diseases and Pests.


I sprayed but I didn’t kill the weed!

(By Jared Hoyle, KSU Turfgrass Research and Extension)

“I sprayed but I didn’t kill the weed!” I get this comment many times throughout the year and there could be may possible reasons why, other than saying that herbicide doesn’t work. What I have found is that the most common reason is human error. So, here are a couple questions you should ask yourself to help determine what went wrong.

  1. Did you correctly identify the weed?
  2. Was the weed listed on the label?
  3. Did you use the correct rate?
  4. Did you have uniform spray coverage?
  5. Did you apply it at the appropriate growth stage?
  6. What was the temperature when you applied? Was it within the label recommendation?
  7. Was there adequate soil moisture for weed growth?
  8. Did you tank-mix?  Could have an antagonistic effect!
  9. Where you suppose to make two applications (according to the label)?
  10. Did it rain or did the irrigation run soon after application?
  11. Did you add an adjuvant or surfactant that was recommended on the label?
  12. If you applied a PRE, did you water it in, within the next few days? or has the weed already germinated or emerged?

These are just a couple questions used to help figured out what happened if you sprayed and didn’t kill the weed.

Always remember to READ THE LABEL for the correct rate, turfgrass tolerance, and specific instructions before application!!!

***Mention of trade names or commercial products in this article is solely for identification purposes and does not imply recommendation or endorsement, nor is criticism implied of similar products not mentioned by Kansas State University.***

Don’t forget to follow me on twitter @KSUTurf.

Also, visit our facebook page www.facebook.com/KSUTurf

Postemergent Crabgrass Control

(By Jared Hoyle, KSU Turfgrass Research and Extension)

Today I was walking around the Rocky Ford Turfgrass Research Center in Manhattan, KS looking for an area to put out a postemergent crabgrass study and notice that the crabgrass on the research farm is all different stages.  It is important to know what stage the crabgrass is in to help with control.  That could determine your success in controlling it with postemergent herbicides

There are postemergent herbicide options out there for crabgrass control.  But depending on how big or how many tillers the crabgrass has will help you determine what product to use.  First, determine the size or stage of crabgrass you have present.

Here is a picture to show the tillering stages of crabgrass.

The smaller the crabgrass the easier it is to kill it.  The tillered crabgrass may take more than one application and higher rates so make sure you check the label for correct application rates and intervals.

  • dithopyr – Can provide control to crabgrass up to one tiller stage.  This product also has preemergence activity.
  • quinclorac – Can be applied on most cool- and warm-season turfgrass species.  This product controls crabgrass when it is one tiller or smaller or when it has four or more tillers.
  • mesotrione – Can be effective for crabgrass control but in most cases will take two applications at two week intervals. The label also states that applications must be made before the four tiller crabgrass stage.
  • topramazone – Similar to mesotrione, this product will require two applications at three week intervals. Use at higher rates on crabgrass that have greater than one tiller.
  • fenoxaprop – Are very effective in controlling crabgrass.  Label states that this product can be applied to annual grasses up to the five tiller stage. Remember not to tank mix with products that contain 2,4-D, antagonism can occur.

As one last reminder, do not apply post emergent herbicides outside the recommended temperature on the label.  This will increase the risk of turfgrass injury.

Always remember to READ THE LABEL for the correct rate, turfgrass tolerance, and specific instructions before application!!!

***Mention of trade names or commercial products in this article is solely for identification purposes and does not imply recommendation or endorsement, nor is criticism implied of similar products not mentioned by Kansas State University.***

Don’t forget to follow me on twitter @KSUTurf.

Also, visit our facebook page www.facebook.com/KSUTurf

Research UPDATE – Influence of Herbicide Combinations and Sequential Applications on Windmillgrass (Chloris verticillata) Control

(By Nic Mitchell and Jared Hoyle, KSU Turfgrass Research and Extension)

Windmillgrass (Chloris verticillata Nutt.) populations commonly infest turfgrass systems in the mid-west, which result in aesthetically unacceptable turfgrass stands. Windmillgrass is a perennial monocot bunch-type grass. It often spreads by stolons and by its panicle shape seed which acts much like tumble weed.

Prior research found that Pylex (topramezone) and Acclaim Extra (fenoxaprop) result in fair to minimal control of windmillgrass with a single application. Tenacity (mesotrione) which, labeled for two applications for best control of windmillgrass, recommends the second application should be three weeks after initial application. Additionally, studies have shown the addition of triclopyr to HPPD inhibitor herbicides increases windmillgrass control in a controlled environment.

The goal of this research was to determine the effect of a sequential postemergent herbicide applications and the addition of triclopyr to HPPD inhibitors herbicides on windmillgrass control.

Research trials were initiated in 2018 at Rocky Ford Turfgrass Research Center in Manhattan, Kansas. Windmillgrass was infested in a low maintenance tall fescue (Schedonorus arundinaceus) system. Seven herbicide combinations were applied as a single application or with a sequential application and non-treated control was included for comparison for a total of 15 individual treatments. All herbicide treatments were applied on August 16, 2018 and treatments that received a sequential application were applied on September 9, 2018. Herbicide treatments consisted of Pylex (topramezone) at 2 fl oz/a, Tenacity (mesotrione) at 8 fl oz/a, Acclaim (fenoxaprop) at 39 fl oz/a, Alligare Triclopyr 4 (triclopyr) at 32 fl oz/a, Pylex (topramezone) at 2 fl oz/a + Alligare Triclopyr 4 (triclopyr) at 32 fl oz/a, Tenacity (mesotrione) at 8 fl oz/a + Alligare Triclopyr 4 (triclopyr) at 32 fl oz/a, Acclaim (fenoxaprop) at 39 fl oz/a + Alligare Triclopyr 4 (triclopyr) at 32 fl oz/a, and a nontreated control. Data collection consisted of visual percent windmillgrass cover (0-100%) and were transformed to percent windmillgrass control for presentation purposes. Analysis of variance (ANOVA) was performed in SAS 9.4 (SAS Institute Inc., Cary, NC) and means were separated according to Fisher’s protected least significant difference (LSD) level at 0.05.

We found that Pylex (topramezone) applied at 2 fl oz/a resulted in 87% windmillgrass control at 8 weeks after treatment. A single application of Pylex (topramezone) at 2 fl oz/a + Alligare Triclopyr 4 (triclopyr) at 32 fl oz/a and Tenacity (mesotrione) at 8 fl oz/a + Alligare Triclopyr 4 (triclopyr) at 32 fl oz/a resulted in 96% and 97% windmillgrass control 8 weeks after initial treatment, respectively. All treatments that received a sequential application on September 9, 2018 excluding the non-treated control and Acclaim (fenoxaprop) at 39 fl oz/a provided 100% windmillgrass control at 8 WAT. Acclaim (fenoxaprop) at 39 fl oz/a applied on August 16, 2018 followed by an application at 39 fl oz/a on September 9, 2018 resulted in 88% windmillgrass control.

Table 1. Windmillgrass (Chloris verticillata Nutt.) control 8 weeks after initial application from single and sequential applications at Rocky Ford Turfgrass Research Center in Manhattan, KS; 2018.

Treatment Herbicide Rate Application Date Controla
___%___
1 non-treatedb 4 Cc
2 Pylex + MSOd 2 fl oz/a + 1% v/v Aug. 16, 2018 87 A
3 Tenacity + NISd 8 fl oz/a + 0.25% v/v Aug. 16, 2018 9 C
4 Acclaim Extra + NIS 39 fl oz/a + 32 fl oz/100 gal Aug. 16, 2018 16 C
5 Triclopyr 32 fl oz/a Aug. 16, 2018 64 B
6 Pylex + Triclopyr + MSO 2 fl oz/a + 32 fl oz/a + 1% v/v Aug. 16, 2018 96 A
7 Tenacity + Triclopyr +NIS 8 fl oz/a + 32 fl oz/a + 0.25% v/v Aug. 16, 2018 97 A
8 Acclaim Extra + Triclopyr +NIS 39 fl oz/a + 32 fl oz/a + 32 fl oz/100 gal Aug. 16, 2018 63 B
9 Pylex + MSO 2 fl oz/a + 1% v/v Aug. 16, 2018 fbe Sept. 9, 2018 100 A
10 Tenacity + NIS 8 fl oz/a + 0.25% v/v Aug. 16, 2018 fb Sept. 9, 2018 100 A
11 Acclaim Extra + NIS 39 fl oz/a + 32 fl oz/100 gal Aug. 16, 2018 fb Sept. 9, 2018 88 A
12 Triclopyr 32 fl oz/a Aug. 16, 2018 fb Sept. 9, 2018 100 A
13 Pylex + Triclopyr + MSO 2 fl oz/a + 32 fl oz/a + 1% v/v Aug. 16, 2018 fb Sept. 9, 2018 100 A
14 Tenacity + Triclopyr +NIS 8 fl oz/a + 32 fl oz/a + 0.25% v/v Aug. 16, 2018 fb Sept. 9, 2018 100 A
15 Acclaim Extra + Triclopyr +NIS 39 fl oz/a + 32 fl oz/a + 32 fl oz/100 gal Aug. 16, 2018 fb Sept. 9, 2018 100 A

a Ratings were conducted 8 weeks after initial application; October 11, 2018.

b Non-treated control contained approximately 65% windmillgrass cover throughout the research trial. 4% control was observed due natural declining of windmillgrass populations to environmental considerations on October 11, 2018.

c Treatment means followed by a common capital letter are not significantly different according to Fisher’s protected LSD (α= 0.05).

d MSO, methylated seed oil and NIS, non-ionic surfactant were added to treatments according to herbicide manufacture recommendations.

e fb, followed by.


Always remember to READ THE LABEL for the correct rate, turfgrass tolerance, and specific instructions before application!!!

***Mention of trade names or commercial products in this article is solely for identification purposes and does not imply recommendation or endorsement, nor is criticism implied of similar products not mentioned by Kansas State University.***

Don’t forget to follow me on twitter @KSUTurf.

Also, visit our facebook page www.facebook.com/KSUTurf

Time to ‘Get Ready’ for Bagworms

By: Dr. Raymond Cloyd

For those of you that have been waiting patiently or for some… impatiently; it is time to ‘get ready’ to spray for bagworms. In due time, bagworms will be present throughout Kansas feeding on broadleaf and evergreen trees and shrubs. Therefore, now is the time to initiate action against bagworms once they are observed on plants. Bagworms are primarily a pest of conifers; however, they have expanded their host range to include a number of broadleaf plants, such as; rose, honeylocust, and flowering plum. It is important to apply insecticides when bagworms are small to maximize effectiveness and subsequently reduce plant damage.

To read additional information about this topic, continue reading this post that was featured in the KSU Extension Entomology Newsletter.