Kansas State University

search

K-State Turf and Landscape Blog

Removing Mosquito Habitats: Tips and Tricks

By: Brooke Garcia

You know it is spring or summer when the mosquitos are out for blood. However, they seem especially terrible this season, following a tremendous amount of rainfall in the NE Kansas area. It is difficult to enjoy our favorite activities outdoors when we are constantly being bitten. As an avid gardener, I have found it hard to withstand being outdoors for long periods of time. I’ve recognized the importance of implementing methods to suppress and eliminate mosquito habitats after a series of bites leaves me itching for revenge.

To overcome this 2019 mosquito battle, I wanted to provide you with some tips and tricks to reduce the mosquito populations surrounding your favorite places and spaces. For starters, eliminate pools of water in your garden. These can be found in planters, saucers, gutters, tires, tree holes, plastic covers, low spots, and/or any additional areas where water can be contained. As much as we enjoy our bird baths and water features, it is important to provide weekly maintenance to them. This includes emptying and changing out the water to remove potential mosquito habitats. If you happen to have a swimming pool, circulation of water and appropriate treatments are needed to eliminate mosquito habitats. In addition, avoid over-watering. As I was driving in Manhattan today, following a night of rain showers, I noticed someones sprinklers going off. The runoff and wet ground is only adding to this mosquito problem.

As far as chemical and/or organic methods of removal go, using appropriate barriers of protection against bites is highly advised. If you prefer not to use DEET, this is my go-to Insect Repellent recipe:

  • 1/2 cup water
  • 1/4 cup witch hazel
  • 45 drops of eucalyptus oil
  • 30 drops of lemon oil
  • 10 drops of peppermint oil
  • 6 ounce spray bottle

Be sure to shake well before applying often. Store this out of direct sunlight, and it should keep for 6-9 months.

Adding lemongrass and/or citronella into your planters or landscape are also advised as ways to reduce the mosquito population around your home.

Remember the structural barriers in which mosquitos can enter a building, home, or screened-in area. It is important to cover any holes or crack that may be found around windows and doors. If your screen door has a small hole in it, covering it with a piece of tape is a temporary fix until the screen can be replaced.

The overall goal is to avoid being bitten. It is our hope that these methods can easily be implemented into your life, or those surrounding you.
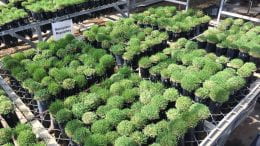
USGA: Improving The Cold Tolerance, Pest Resistance And Overall Quality Of Zoysiagrass

Post provided by USGA By Cole Thompson, assistant director, Green Section Research

Genetics ultimately determine how well grasses tolerate the stresses of golf as well as the most suitable playing surfaces and geographic regions for use. At times, management strategies may compensate for genetic shortcomings. For example, many cool-season grasses have excellent quality at very low cutting heights but require frequent irrigation and pesticide applications to mitigate damage from heat, drought or pests. Alternatively, some warm-season grasses tolerate drought and potential pests better than cool-season grasses, but may not provide the desired aesthetics or have the cold tolerance necessary to excel in colder regions. These compromises can make turfgrass selection challenging, especially in regions with diverse environmental conditions.

Because reliable turfgrass performance and resource efficiency are becoming more important to golf facilities, many are opting to use warm-season grasses and risking potential injury during harsh winters. In the case of ultradwarf bermudagrass putting greens, covering during low temperatures accounts for insufficient cold tolerance in the transition-zone region of the U.S.A. This is effective, but another strategy is to improve the genetics of warm-season grasses to diminish tradeoffs and reduce the resources required to deliver high-quality turf in a challenging environment.

Zoysiagrass is a warm-season grass that has already helped golf courses in the transition zone to use resources more efficiently. There are several species of zoysiagrass with different morphologies and cold tolerances. In general, zoysiagrass cultivars provide a high-quality playing surface with lower water, fertilizer and pesticide requirements than cool-season – and even some warm-season – grasses. The cold tolerance of Zoysia japonica cultivars – e.g., ‘Meyer’ – has made them ideal for fairways in the transition zone. To improve quality and further improve cold, shade and pest tolerances, the USGA has supported zoysiagrass development at Texas A&M University since 1983. The cultivars ‘Diamond’, ‘Cavalier’, ‘Crowne’ and ‘Palisades’ were developed and released from this support.

Since 2004, scientists at Texas A&M have partnered with colleagues at Kansas State University and Purdue University (since 2012). Initial success has come from crossing Zoysia japonica types with Zoysia matrella types, which have finer and denser leaves but less cold tolerance. ‘Innovation’ is a new cultivar released from these efforts, which has better quality and similar cold tolerance than ‘Meyer’ – the current standard-bearer for zoysiagrass in the transition zone. Since 2012, this group of scientists has worked to incorporate large patch disease resistance into their higher-quality, cold-tolerant zoysiagrass hybrids. They developed more than 2,800 new zoysiagrass hybrids and evaluated them in Dallas, Texas; Manhattan, Kansas; and West Lafayette, Indiana, from 2012 through 2014. The hunting billbug emerged as a problematic pest during this cycle of evaluation and hunting billbug resistance has since been a trait of interest. Researchers then selected the best 60 hybrid lines and evaluated them in 10 transition-zone locations from 2015 to 2018.

The 10 best hybrid lines have been advanced from the most recent evaluations for further testing. Large patch and hunting billbug resistance are improved in these lines when compared to ‘Meyer’, and some have better cold tolerance than ‘Meyer’. In 2018, the researchers began crossing these hybrid lines with lesser used zoysiagrass species such as Zoysia pacifica, Zoysia minima and Zoysia pauciflora, which have an even finer texture than Zoysia matrella types. Their ultimate goal is to produce zoysiagrass cultivars with all the aforementioned traits for fairways, tees and even putting greens.

Warm-season Turfgrass Lawn Care Reminders

(By Jared Hoyle, KSU Turfgrass Research and Extension)

Now that the summer weather is finally here it is time to start thinking about maintenance on warm-season turfgrass.  Below are some monthly reminders for everyone that has warm-season turf.


Bermudagrass and Zoysiagrass

May – August 15
Fertilize with 1 lb. of nitrogen per 1,000 square feet per application. Follow the recommendations on the bag. More applications will give a deeper green color, but will increase mowing and may lead to thatch buildup with zoysiagrass. Bermudagrass can also have problems with thatch buildup but thatch is less likely with Bermuda than zoysia. Bermudagrass – Use two to four applications. Zoysiagrass – Use one to two applications. Too much nitrogen leads to thatch buildup.

One Application: Apply in June.
Two Applications: Apply May and July.
Three Applications: Apply May, June, and early August.
Four Applications: Apply May, June, July, and early August.

Remember to look and see if you are using a quick release nitrogen source or a slow release nitrogen source.  If you use a quick release source then it is immediately available but only lasts a couple weeks.  Thats why you would have to make a couple of applications like it is listed above.  If you are going to use a slow release source it will tell you on the bag how long the product will last.  Therefore, you might not have to make as many applications.

So generally you want to use a total of 2 to 4lb. of nitrogen per 1,000 square feet per year for bermudagrass and 1 to 2 lb. of nitrogen per 1,000 square feet per year for zoysiagrass.

June
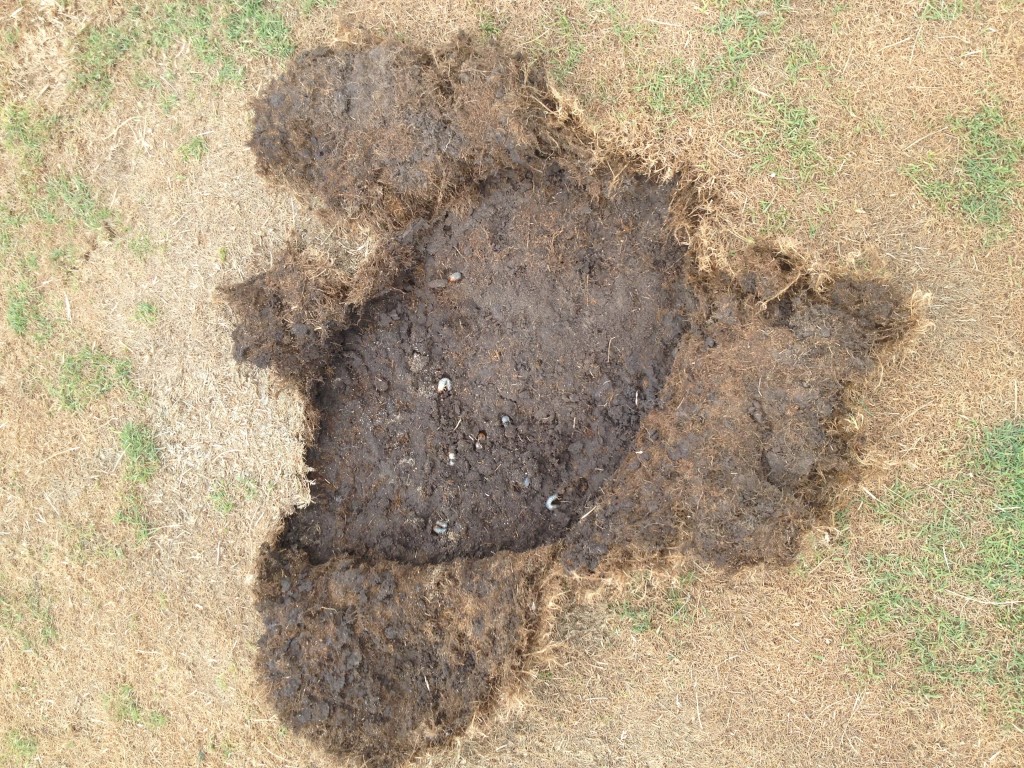
If grubs have been a problem in the past, apply a product containing imidacloprid by mid July. Imidacloprid can be applied as early as mid May if there are problems with billbugs or May beetle grubs. These products kill the grubs before they cause damage. They are effective and safe but must be watered in before they become active. June is a good time to core aerate a warm-season lawn. Core aeration will help alleviate compaction, increase the rate of water infiltration, improve soil air exchange and help control thatch.

Late-July through August
If you see grub damage, apply a grub killer. If Imidacloprid has been applied, this should not be necessary. Grub killers must be watered in immediately.

For more information check out the Zoyisagrass Lawns Publication at the KSRE Bookstore – https://www.bookstore.ksre.ksu.edu/Item.aspx?catId=545&pubId=1451

For more information check out the Bermudagrass Lawns Publication at the KSRE Bookstore – https://www.bookstore.ksre.ksu.edu/Item.aspx?catId=545&pubId=586


Buffalograss

June

Fertilize with 1 lb. of nitrogen per 1,000 square feet during June. More applications will give a deeper green color, but can encourage weeds. If it is felt that a second application is needed, apply in July.

If grubs have been a problem in the past, apply a product containing imidacloprid by mid July. Imidacloprid can be applied as early as mid May if there are problems with billbugs or May beetle grubs. These products kill the grubs before they cause damage. They are effective and safe but must be watered in before they become active. Again, I would only treat if grubs have been a problem in the past. Note that the whole area may not need to be treated. The beetles that lay the eggs for the grubs are attracted to lights and moist soil and those areas are most likely to be infested.

Late-July through August

If you see grub damage, apply a grub killer. If imidacloprid has been applied or if grubs have not been a problem in the past, this should not be necessary. Grub killers must be watered in immediately.

For more information check out the Buffalograss Lawns Publication at the KSRE Bookstore – https://www.bookstore.ksre.ksu.edu/Item.aspx?catId=545&pubId=1447


Always remember to READ THE LABEL for the correct rate, turfgrass tolerance, and specific instructions before application!!!

***Mention of trade names or commercial products in this article is solely for identification purposes and does not imply recommendation or endorsement, nor is criticism implied of similar products not mentioned by Kansas State University.***

Don’t forget to follow me on twitter @KSUTurf.

Also, visit our facebook page www.facebook.com/KSUTurf

*SPECIAL ALERT* Sudden oak death pathogen reported in Kansas

Megan Kennelly, KSU Plant Pathology

The Kansas Department of Agriculture confirmed the presence of Sudden Oak Death (SOD) in Kansas. The KDA press release from today can be found here:

https://agriculture.ks.gov/news-events/news-releases/2019/06/07/plant-disease-identified-in-rhododendrons-in-kansas

SOD is a plant disease that has killed large tracts of oaks and other native species in California and Oregon. It also occurs on nursery plants including  rhododendron, azalea, camellia, viburnum, lilac, and periwinkle. Infected rhododendrons have been identified in 10 states in the Midwest, including Kansas. The infected plants that have been found in the Midwest have all been traced back to a common source.

This is a serious situation, and we ask that if you have purchased, planted, or maintained rhododendrons or other known host plants this spring please read the  information on the provided links and documents below and take action as needed.

Many details and photos are provided on the KDA website:

https://www.agriculture.ks.gov/SOD

We have provided some additional details in a pdf that you can access by clicking the link below:

KS SOD FAQs_2019

KDA, K-State, and the Kansas Forest Service are all working collaboratively to address this situation.

K-State’s press release from today is here:

https://www.ksre.k-state.edu/news/stories/2019/06/Sudden-Oak-Death-Reported-in-Kansas.html

If you have questions, you can email me at kennelly@ksu.edu (or call 785-532-1387) or Cheryl Boyer (KSU nursery crops specialist) at crboyer@ksu.edu (785-532-3504).


Spring Brings a Little Bit of Everything

By Judy O’Mara

Take Closer Look at the Roses

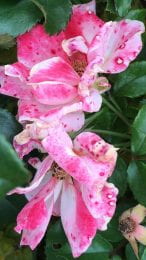
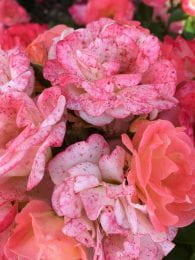
The cool, wet spring weather is amazing for rose shrubs. They are blooming like crazy. However…if you take a closer look, you might notice that the blooms don’t last that long. They seem to fall apart and drop their petals very quickly. This is one of those instances where there actually is a disease involved. A fungal disease called Botrytis blight can cause tiny spots on the flower petals. If conditions are favorable (cool, high humidity, wet), then the blooms can look like they have the measles. Infected blooms quickly fell apart. The problem self corrects itself when the temperature increases and the weather dries out.

Fungi just Love Mulch

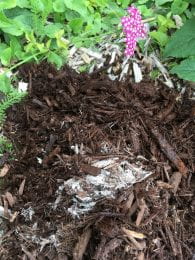
I planted some flowers and mulched the flower bed this weekend. When I opened the bag about twenty percent of the mulch had a white fungal mold. Questions about this issue turn up every spring. Basically mulch molds are wood decomposers. They occur as part of the natural ecosystem that breaks down organic matter. This is probably why we have to replace the mulch in our flower beds every year.
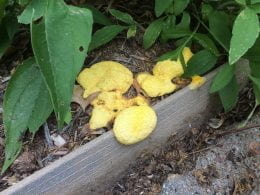
What triggers the prolific growth is a combination of wet conditions and large amounts of organic matter. Very likely the bag had a hole in it and water got inside.

Heavy amounts of mold can create a hydrophobic zone which can prevent water from getting to the plant roots. This can be avoided by breaking up the fungal mass.

It is not necessary to use fungicides to get rid of them. They are pretty much present whether we see them or not.
Another interesting mulch problem is Dog Vomit aka Slime mold. 

Slime molds start out as a colorful, slimy mass that dries down to a powdery material. They are common in mulch or turf. They can even crawl up on lawn furniture. They are favored by cool, wet conditions and are easily knocked back with a stream of water from a hose or even a rake.

For more information on this interesting phenomenon check out this web site at the Utah State University Herbarium. https://herbarium.usu.edu/fun-with-fungi/slime-molds

Diplodia tip blight

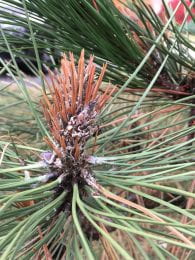
Across the state of Kansas, the most common pine disease is Diplodia tip blight (aka Sphaeropsis tip blight). The disease attacks the new shoot growth as it emerges in the spring. About the end of May, new shoots visibly die back on the ends of the branches. Over time, the disease can develop as a canker further back and result in a die back of the entire branch.

This fungal disease is primarily a problem on mature pine plantings (ie crowded, with poor air flow). Over a period of many years (10-15), the disease slowly chews up the tree resulting in a tree that appears half dead. The black pepper speck, fungal fruiting bodies (pycnidia) on the back of the pine cone scales are a key diagnostic feature for Diplodia tip blight.
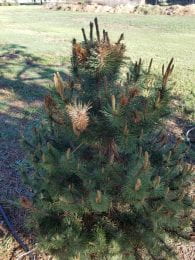
Those are the facts, so…I was taken back by two separate pine samples that came through the K-State Plant Disease Diagnostic lab last week. Both pines had Diplodia tip blight, causing a shoot blight of the new growth, but…they were from young trees (3-5yrs old)!
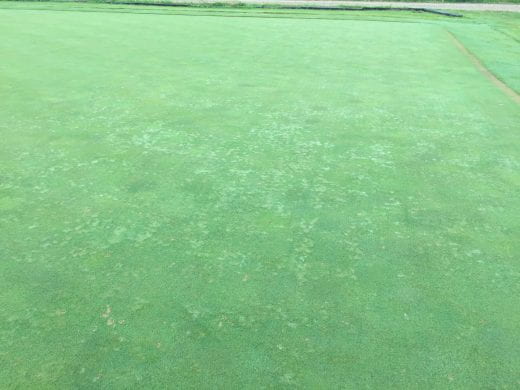
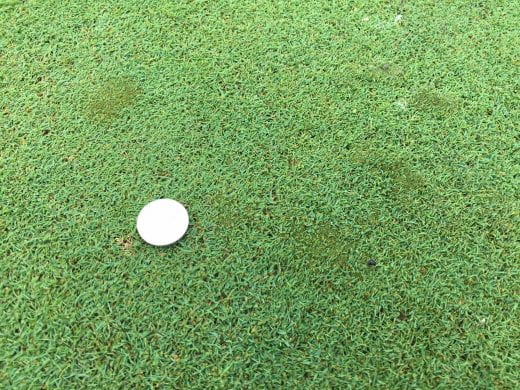
However…on one sample the new trees were planted next to a line of older pine trees, which was probably the source of the disease inoculum.

Bentgrass Putting Green Fertility – Helping or hurting silvery-thread moss?

(By Jared Hoyle, KSU Turfgrass Research and Extension)

At Rocky Ford Turfgrass Research Center in Manhattan, KS we have two bentgrass putting greens.  On one of them we “try” to maintain as a common putting green with typical disease, weed and fertility programs.  On the other one we don’t apply any fungicides at all to see what disease we can grow.  On that same putting green we are growing a nice crop of silvery-thread moss as we aren’t doing anything to help suppress or control it.

When I came on board here at KSU in 2013, the KSU Turfgrass Faculty and graduate students were really diving into figuring out programs to help control or suppress silvery-thread moss in bentgrass putting greens.  Quick to find out, controlling moss is not just an application but a program and part of that program is fertility.

I quickly went through some of the past research reports on the KSU Turfgrass Website (https://www.k-state.edu/turf/research/index.html) and came across a short report on the influence of nitrogen source and spray volume on the establishment of silvery-thread moss.  Establishment! Establishment!  Why are we studying the establishment?  Well, knowing what helps establishment also tells you what is going to promote growth of silvery-thread moss.

As Drs. Raudenbush and Keeley explain in the research report, “the practice of spraying small quantities of soluble nitrogen at a relatively high frequency my promote silvery-thread moss growth because the moss lacks a vascular system of removing water and nutrients from the soil.”  Apply small quantities of soluble nitrogen at relative high frequencies is a common practice for managing bentgrass putting greens, so we maybe making the problem worse.

To summarize the project that was conducted in the greenhouse, spraying soluble nitrogen increased moss cover compared with the untreated control and ammonium sulfate has the highest moss cover at all the ratings dates.  Comparing ammonium sulfate to urea, ammonium sulfate caused more than a threefold increase in moss dry weight (At 7 weeks after the initial treatment the moss was harvested, dried and weighed.) and there was no difference between urea and the water only control.

There are many other factors to consider when looking at suppressing or controlling silvery-thread moss including but not limited to; watering, herbicide applications, topdressing and promoting healthy bentgrass. But remember fertility, as it does play a roll in silvery-thread moss management.

For the full report check out Page 12 of the 2014 Kansas State University Turfgrass Research Report – https://krex.k-state.edu/dspace/bitstream/handle/2097/20427/Turfgrass2014.pdf?sequence=1&isAllowed=y

Should we be hitting the panic button on goosegrass control?

(By Jared Hoyle, KSU Turfgrass Research and Extension)

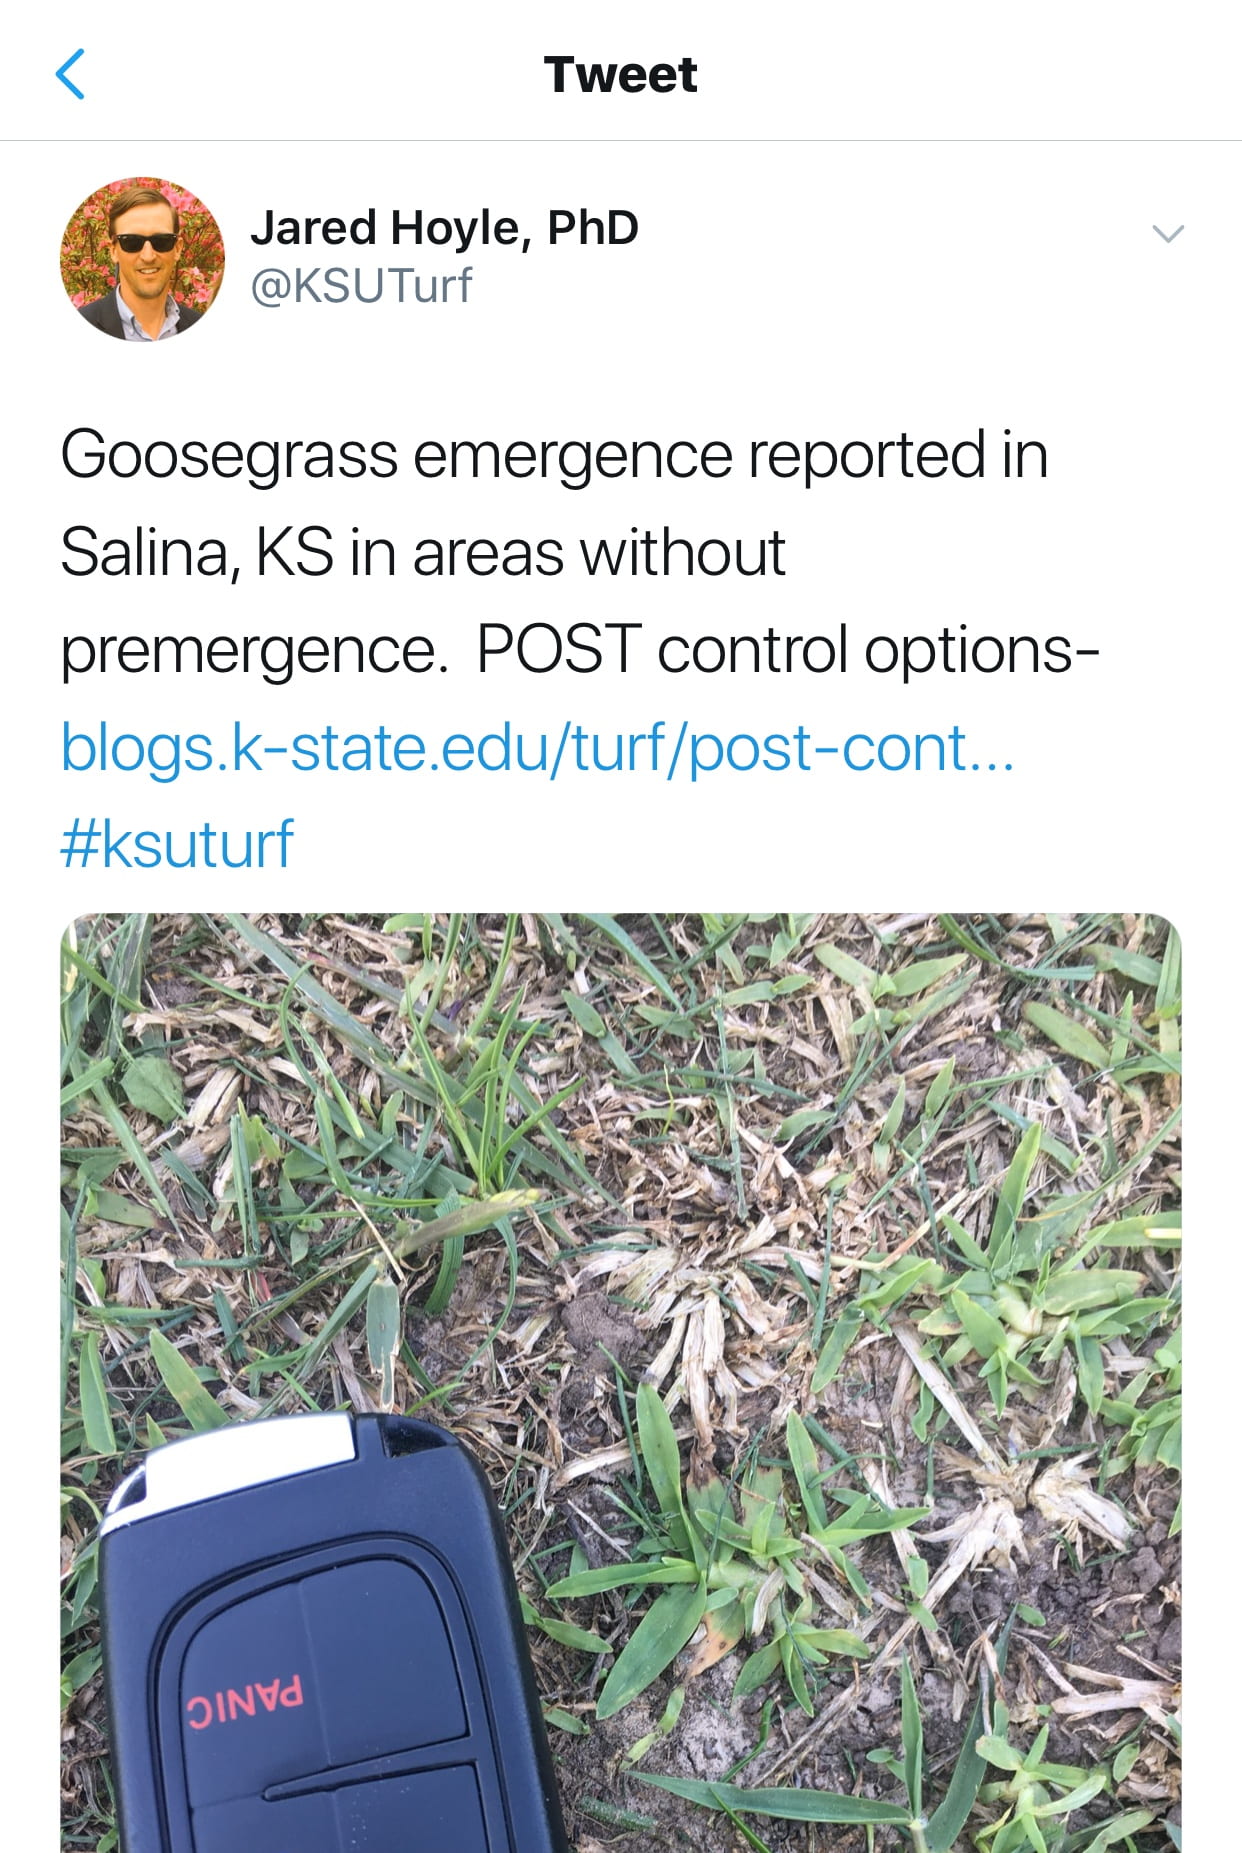
Not too long ago I received a text from a friend of mine with a picture of goosegrass and the caption, “goosegrass emergence reported in Salina, KS in areas w/o PRE.”  With the mild temperatures and just now seeing crabgrass germinate in some thin areas where no preemergence has been applied, I thought to my self, “Oh no.”  I then posted the picture on Twitter to let everyone know what was going on in the area.

One of my good friends, Scott, down in Georgia commented “Should we hit the panic button?”

To answer that question honestly… I’m not sure.  Then I went back and looked at the picture.  There was a set of keys in the picture to help show the relative size of the goosegrass and on the key was a “panic” button that is commonly on keyless entry vehicles. Ironic?

So should we hit the panic button?  I am not sure but I do think that means we need to keep an eye out and know that goosegrass is on its way if not already germinated and especially in areas that haven’t been applied with a preemergent herbicde.

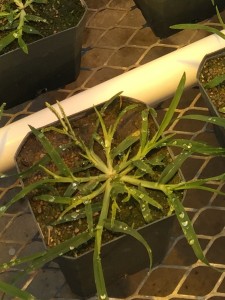
Goosegrass (Eleusine indica) is a summer annual weed that typically germinates after crabgrass in the spring.  That is about when the soil temperatures consistently reach approximately 60° F.  Like crabgrass, goosegrass is best controlled with a preemergence herbicide.   Herbicides that contain the active ingredient oxadiazon work very well.  Other preemergence herbicide efficacy can vary.

But as it seems like everyone has already put down preemergence herbicide so, you have nothing to worry about.  Well what if you didn’t, or there is break through?  There are some POST application control options.

First, Know you turfgrass species.  Your herbicide selection is going to vary greatly depending on species.

If you have cool-season turfgrass then you can use fenoxaprop (Acclaim Extra), fluazifop (Fusilade II), topramezone (Pylex), or MSMA (golf courses and sod farms only!).  You will probably have to do more than one application if the goosegrass is tillered out.  Sulfentrazone (Dismiss) is also effective on goosegrass if it has not tillered out yet.

Bleaching of goosegrass from topramazone application

Creeping Bentgrass

For all you golf courses out there that have creeping bentgrass fairways it is going to be a little bit more difficult because the herbicides that work best tend to injure  the turf.  1-Tiller or smaller can be controlled with fenoxaprop (Acclaim Extra) at 3.5 fl oz/A but you will need to re-apply every two weeks to make sure you are applying to small plants.

As crazy as it sounds a herbicide that has commonly been used for broadleaf weeds has shown control on goosegrass.  SpeedZone (2,4-D +dicamba + MCPP) has shown control but a follow up[ application is going to be needed 30 days after initial application.

Topramezone (Pylex) can be used on bentgrass at lower rates (0.25 fl oz/A) but definitely might need a repeat application at 21 days

Bermudagrass and Zoysiagrass

Now if you have bermudagrass or zoysiagrass then you can use Tribute TOTAL (thiencarbazone + foramsulfuron + halosulfuron).  Fusilade II and Acclaim Extra that works in cool-season grass can also be used on zoysiagrass.  If you mix these products with triclopyr (Turflon Ester Ultra or Triclopyr 4) then you will get better results.

Always remember to READ THE LABEL for the correct rate, turfgrass tolerance, and specific instructions before application!!!

***Mention of trade names or commercial products in this article is solely for identification purposes and does not imply recommendation or endorsement, nor is criticism implied of similar products not mentioned by Kansas State University.***

Don’t forget to follow me on twitter @KSUTurf.

Also, visit our facebook page www.facebook.com/KSUTurf

Save the Date: Kansas Turf & Ornamentals Field Day – August 1st, 2019

The Kansas Turf & Ornamentals Field Day will be held on Thursday, August
1st at the K-State Research & Extension Center in Olathe (35230 W. 135th St.).

The field day program is designed for all segments of the turf & ornamentals industry – lawn care, athletic fields, golf courses, nursery, landscape & grounds maintenance. Included in the field day program: research presentations, problem diagnosis, commercial exhibitors, and equipment displays.
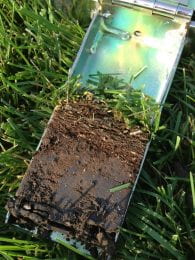
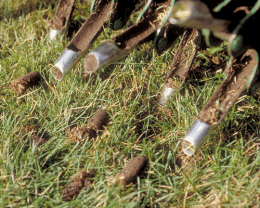
 

There will be time to see current research, talk to the experts and get answers to our questions.

One hour of pesticide recertification credit in both 3A & 3B is available, as well as GCSAA education points.

For more information, go to: https://www.k-state.edu/turf/events/index.html

Got Thatch?

By: Ward Upham

Thatch Control in Warm-Season Lawns

Thatch control for cool-season lawn grasses such as bluegrass and tall fescue is usually done in the fall but now is the time we should perform this operation for warm-season turfgrasses such as bermudagrass and zoysiagrass. Because these operations thin the lawn, they should be performed when the lawn is in the best position to recover. For warm-season grasses that time is June through July. Buffalograss, our other common warm-season grass, normally does not need to be dethatched.

When thatch is less than one-half inch thick, there is little cause for concern; on the contrary, it may provide some protection to the crown (growing point) of the turfgrass. However, when thatch exceeds one-half inch in thickness, the lawn may start to deteriorate. Thatch is best kept in check by power-raking and/or core-aerating. If thatch is more than 3/4 inch thick, the lawn should be power-raked. Set the blades just deep enough to pull out the thatch. The lawn can be severely damaged by power-raking too deeply. In some cases, it may be easier to use a sod cutter to remove the existing sod and start over with seed, sprigs or plugs.

If thatch is between one-half and a 3/4- inch, thick, core-aeration is a better choice. The soil-moisture level is important to do a good job of core-aerating. It should be neither too wet nor too dry, and the soil should crumble fairly easily when worked between your fingers. Go over the lawn enough times so that the aeration holes are about 2 inches apart.
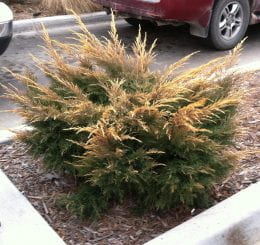
Excessive thatch accumulation can be prevented by not over-fertilizing with nitrogen. Frequent, light watering also encourages thatch. Water only when needed, and attempt to wet the entire root zone of the turf with each irrigation.

Finally, where thatch is excessive, control should be viewed as a long-term, integrated process (i.e., to include proper mowing, watering, and fertilizing) rather than a one-shot cure. One power-raking or core-aeration will seldom solve the problem.

What’s What on Juniper Shrubs?

By: Judy O’Mara

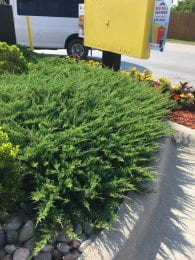
You can drive to any grocery store, fast food restaurant or mall in Kansas and see a spreading juniper shrub planting. They are pretty well adapted to Kansas but a few problems show up.

Winter damage is common following cold temperatures and desiccating winter winds. Die back tends to show up on the ends of the branches during December through February. If the damage isn’t too bad, it can be pruned out and with some added care, the shrubs may recover.

Snowy and Salty

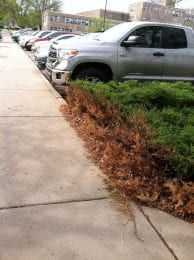
In addition to cold temps last winter, there was lots of snow. According to Assistant State Climatologist, Mary Knapp, Manhattan Kansas received 27.8” of snow during the recent winter, which is 11.1” over the normal 16.7” snowfall. So what does this have to do with junipers? Well, with snow comes slippery sidewalks and driveways, which in turn can lead to the use of salt or de-icing products. They work pretty well to keep people safe slipping and breaking a hip, but sometimes the products can damage nearby shrubs.

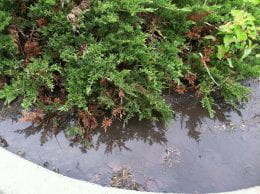
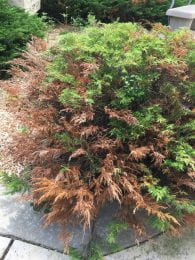
It is not uncommon to see salt damage or browning on the side of juniper shrubs closest to the sidewalk in the spring. In this case, salt leached from the sidewalk and burned the roots closest to the edge. There is a nice article on which ice melts are appropriate to use at the K-State Johnson County Extension web site. Something to keep in mind for next winter.

Pictured above on the left, the juniper shrubs are experiencing salt burn from the sidewalk. Pictured above on the right is a heavy concentration of salt crystals.

Wet and More Wet

I got caught in a down pour on a recent trip to Hiawatha, KS.  The area creeks were flooded and topped the roads in a few places. It was an awesome sight, plus a little bit scary. It’s been a fairly common phenomenon this spring and there are a number of articles out there on the impact of flooding on landscape plants. I thought I would throw in my two cents, as well.

One of the more serious challenges for junipers plantings is damage due to ‘wet feet’. It is not uncommon during heavy spring storms to see shrubs floating in a pool of water. Aggravating factors may be locations with heavy clay soils that drain poorly or even locations that have a compaction layer not far from the soil surface. In either case, prolonged expose to wet soils will damage the roots and cause a collapse of the planting. I tend to think of this as center decline. Sometimes the entire plant will die, and sometimes just a portion (frequently the center). So, if a large section of the planting is going out, it may be a root health issue. Juniper shrubs never recover from this type of damage. It is really important to select a well-drained site for juniper plantings.

Branch Tip Die Back

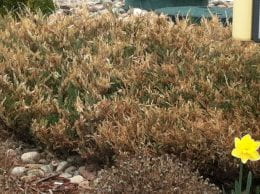
I know this juniper shrub looks bad but, it’s actually okay. The damage here is caused by a fungal disease called Kabatina tip blight. It causes a die back of the branch tips, usually 2-8” with symptoms showing up between February and mid-June. It can cause a scattered branch die back or it can hit every single tip, making the shrub look like it is going to die. But no, like magic the planting recovers. By late June, the dead tips dry up and fall, slowly improving the appearance of the shrub. Some creeping junipers are particularly susceptible.

As always, there is the question ‘What can I spray?’. There are two reasons why that is not a practical option. One, the infection period is in the fall, so by the time you see the symptoms it  is too late to spray. Two, the disease is basically a cosmetic issue. In most years, it shows up as scattered dead tips (barely noticeable). In years with a prolonged cool, wet spring Kabatina tip blight symptoms can be dramatic. But…summer eventually arrives and with warmer temps and drier conditions disease activity halts. At that point, the dead tips start dropping off and the planting starts to look better. So best management option? Do nothing, or maybe rip it out and plant something less susceptible.

Pictured above, you can see daffodils, so you know it is early spring and conditions are favorable for Kabatina tip blight. Pictured on the right is the same planting later in the season. As you can see, all of the dead tips have dropped off of the plant.